restoration

All posts tagged restoration

With the lower play field given an initial clean and service, it is time to go over the middle area. The main feature of the middle play field area is a central “spinner” (or spinning disk) which rotates constantly during gameplay. It’s covered with a rubber pad used to grip the ball and fling it off (….like a fireball). I won’t be servicing this for now, but will return to it at a later date. The spinner works fine, but really could do with a service.

I will be removing the rest of the mylar up to the pop bumpers, along with servicing the rest of the play field components in that area.

The mylar in the middle section was not as bad as in the lower. But just as with the lower section, someone has attempted to remove parts of it, while leaving the goo and not really doing the best job.

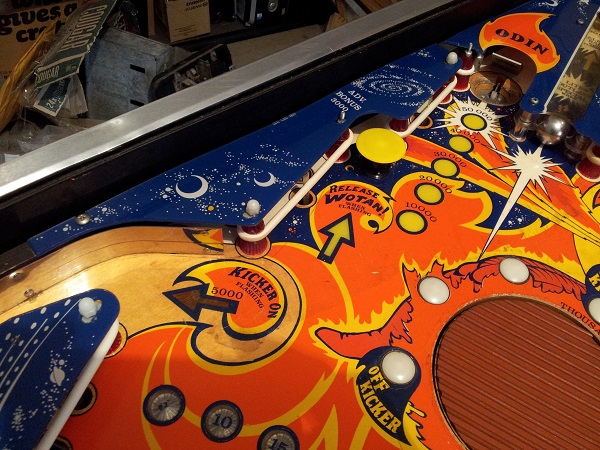
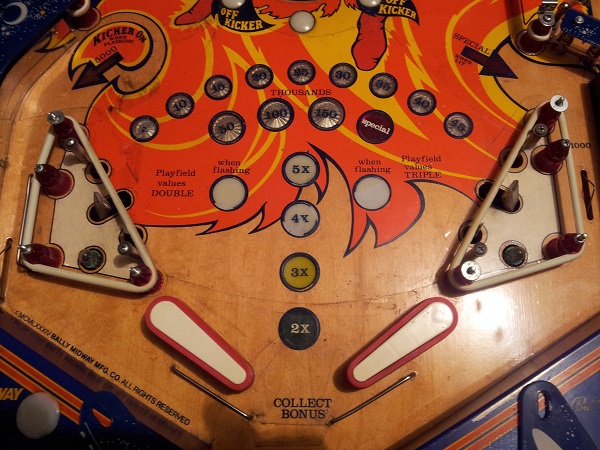
Both sides contain one plastic each, along with some switches, mini mushroom bumpers and a saucer to trap a ball in. The right side also contains a gate which can allow the ball to either return to the shooter lane, or back into play.

(note I had removed the small mushroom bumper on the right side before the starting photo was taken).

Fireball mid play field left
Continue Reading

Time for another installment on the progress so far.

This time, I’ll be focusing on the lower play field. I’m working my way up the play field – from the apron (which I covered in previous posts, all the way up tp tje top). This allows me to focus on specific areas and assemblies and then test them once they have been serviced. It also helps stop feeling overwhelmed with everything still to do.

The lower play field is quite dirty. Mylar covers some sections, while others either have chunks taken out of it (or it was removed by a previous owner). When it was removed you can see some damage that was done to multiplier and bonus inserts 🙁

I needed to service the slingshots, so figured that while I was doing that, I could also remove the remaining mylar and give the play field a much needed clean. Before I’m done with the machine I plan to give the play field a solid wax too. Doing the play field in stages will mean more work in the future as I’ll have to remove everything to clean and wax it, but I’ll live with that.

Fireball lower playfield
Continue Reading

I enjoyed working on my Nugent so much that I had to get another machine to work on.

I knocked back a few machines in the process of searching which I’d love to own (and had the funds for) – but they required no work.

I wanted a machine that was in need of some love. After a few false starts in the hunt for a project machine, I ended up getting a Fireball Classic by Bally (1985).

As a game, it ticks many of the boxes I was looking for. Pop bumpers? Check. Multiball? Check. Messenger ball? Check. Ball save? Check. Early Bally/Stern SS? Check.

As I’ll show shortly, the machine does need some cosmetic love, along with some fixing up to the game play. I will be able to apply much of what I learnt while working on my Nugent here, and also extend myself into areas not yet explored. Perfect 🙂

I expect my work on this project to take a few months at least as time and funds permit. Given I now have two other machines, getting this finely tuned is less critical as I can always turn to my Nugent or Space Orbit for some awesome fun.

To start with, the machine boots up and does allow you to start a game. This wasn’t a requirement in my search, but is a bonus.

Fireball classic - Powered up
Continue Reading

First up for this update is the lock down bar. The condition of the bar itself is OK. It’s a little worn and has a few scratches, but is solid and doesn’t need replacing. The issue it does has however is it’s loose on the left side and does not lock down properly. I can lift the left side up with my hand.

Loose nugent lockdown bar
Continue Reading

Today, I finally completed the project. After having the machine split in 2 (thus unplayable) for so many months, I put the finishing touches on the front half today and joined it all back up for a game.

The first step was to remove the existing decals from both the left and right front panels. As it was, some of the decals had already come off. In some places there were chips missing from the side panels and even what look like burn marks (assuming cigarette).

Left panel start
Continue Reading