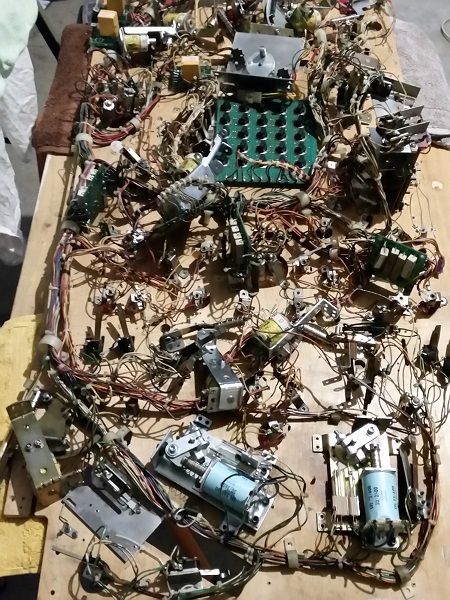
The Pinbot playfield swap continues to move forward, with bits and pieces done each day. Following on from my previous update, the first task to report on is getting everything on the old playfield ready to dump/move/slide/transfer across to the new one. This involves removing all screws, so anything attached to the underside of the playfield is free to be moved. It also means the removal of all staples holding the GI sockets to the playfield and the ground braid that runs between them. There are a few instances where wires had been soldered to lamp socket screws, which means they will need to be desoldered first so I can remove the screw. I started at the base of the playfield and slowly worked my way up to the top. Eventually I had worked my way up the entire playfield, leaving nothing attached to the surface. It just looks like a big mess.
Pinbot
All posts tagged Pinbot
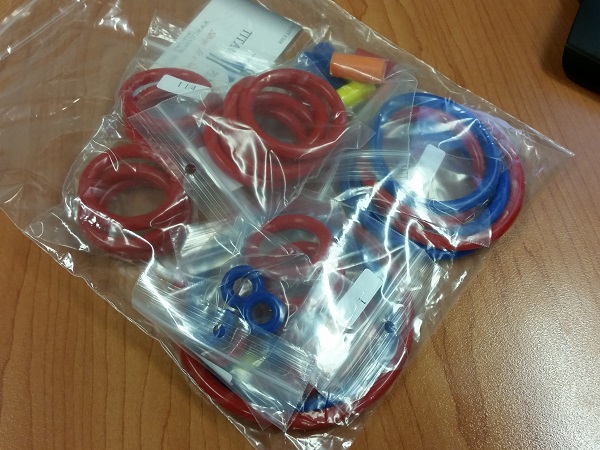
This update kicks off with the safe arrival of a package from Titan Pinball in the USA. Inside, red and blue silicon “rubber” rings which will replace the white rubber and add some extra cool factor to the playfield. Also included are post sleeves, mini post rings and new shooter rod tip. I was really impressed with the customer service from Titan and will order from them again. I’m really looking forward to seeing the rings installed and how they respond during play.
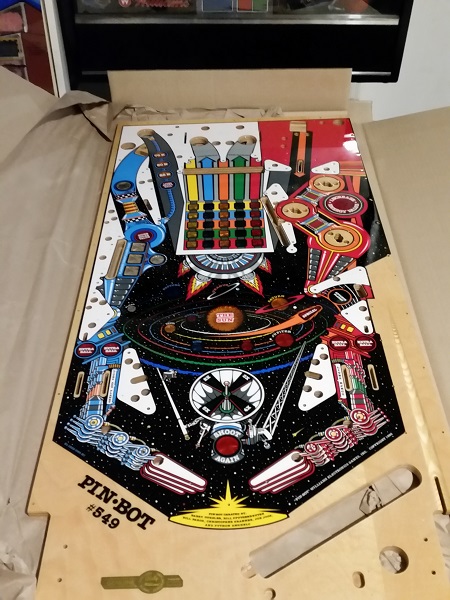
It’s been quite awhile since I last did any work on my Pinbot. Not really intentional, but other pinball projects / tasks came up (Counterforce, Mariner, Last Action Hero) which were more pressing. A lot of hard work went into the machine in earlier posts and it’s been a lot of fun to play. One thing has remained outstanding though – the playfield swap. Almost 2 years ago now (July 29th, 2014) a CPR gold playfield arrived, which I wanted to install into my machine. Time sure has flown and I didn’t realise how long I had put it off. Doing a playfield swap is no easy task and certainly not something to perform quickly – so it’s been easy to push the task off until later. But it will be put off no longer. I feel ready to take the task on and essentially complete my work on Pinbot. I have a new CPR reproduction plastic set waiting to go on too, along with LEDs and some coloured Titan silicon “rubbers”. This machine is going to look f*cking awesome once done. The CPR playfield looks amazing.
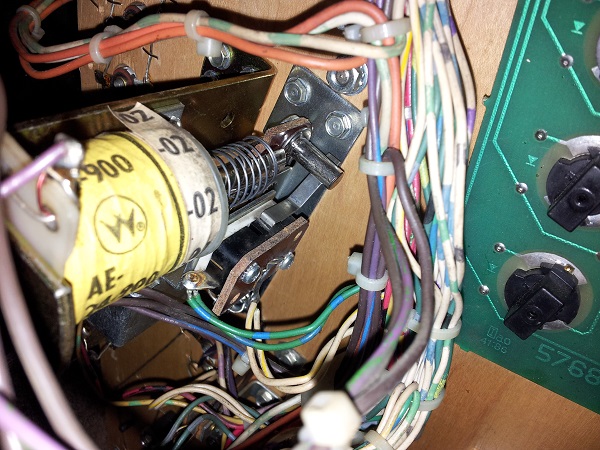
Two switch issue have crept into Pinbot over the last few months and I wanted to take a look at them. The first relates to the ramp switch, which lets the game know if the ramp is up or down. When the ramp is down, the switch should be activated. There are two coils which control the state of the ramp and if the switch is in the wrong state, the game will continually try and activate a coil. This was the behavior I was seeing. The ramp would be down, but the coil would continue to fire.
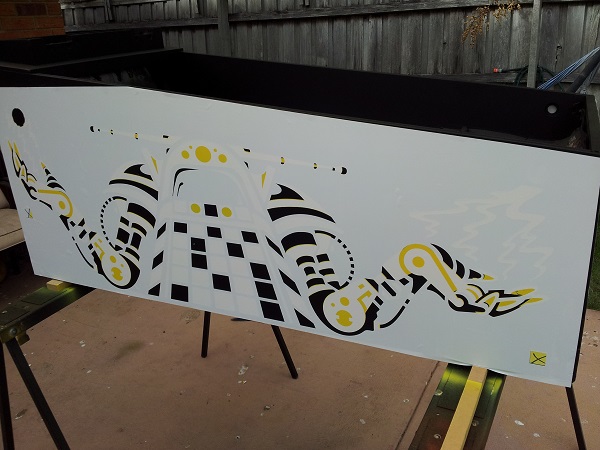
After the Twisted Pins drama, it’s good to be bringing the cabinet work on Pinbot to completion. I’m tempted to do a write up comparison between the two different sets of stencils to highlight the pros and cons. But i’ll save that for another day. For now, it’s time to finish off the cabinet and get the machine back together. At the end of the previous post, I had sanded off the paint from the Twisted Pins stencils and repainted the black. The yellow layer was done first. This stencil layer has two registration marks which it leaves on the cabinet when pealed off. This is an incredibly easy system to use and get right. I like that Pinball Pimp has included these as it makes lining up the second layer easy. The stencils also have the correct bleed and traps, which means the final result will look accurate. Here the second stencil has been lined up and is ready for the red paint.