apron

All posts tagged apron

I’ve put the top right plastic issues to the side once again as I haven’t managed to get anywhere with it.

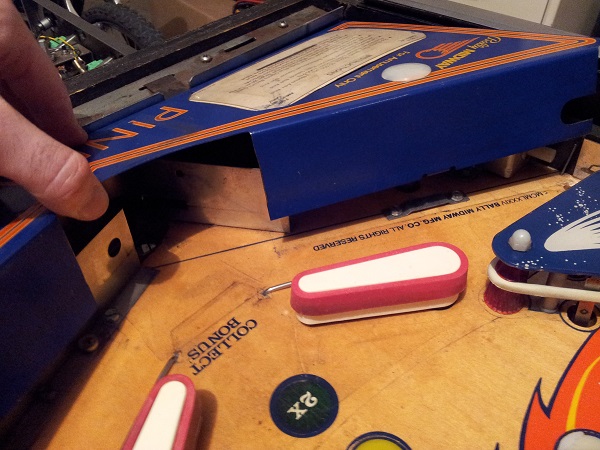
I decided instead to install the clear plastic in the top right and fire the game up to actually play it! I haven’t had the machine in a playable state since the first few nights it came home. Once I started to clean parts, I didn’t want to play it and spread all the dirt, dust and goo around the cleaned areas – so have held off playing.

It was great to actually -finally- play it. The small play session doubled as a good shakedown on the machine to see what sort of issues still remained and what required some fine tuning.

A few things turned up.

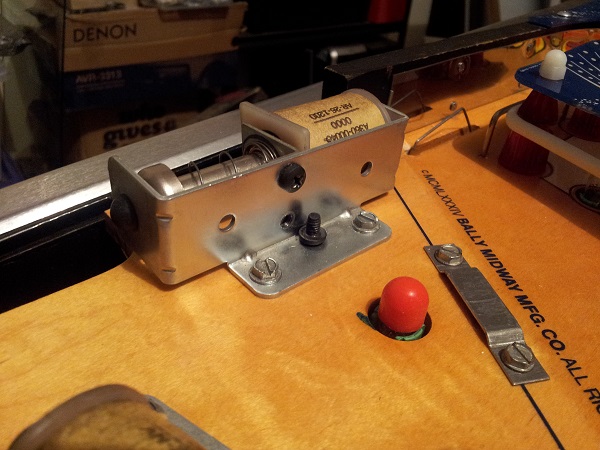
Firstly the ball save kicker was unreliable. Sometimes it would save the ball, other times it would kick out, but not make good contact with the ball. My first thought was the switch – perhaps not being sensitive enough. So I tested the switch, but that came up fine and was very sensitive. I removed the apron to have a look at the assembly. I found the coil was actually loose. The reason for this is there are two small screws which to the coil bracket and lock it in place. I had made the mistake of putting these on the outside when I reinstalled it after servicing it. The screws should sit inside. There is no thread on small metal bracket – only on the large assembly frame, so they have to be screwed in from the inside. Thankfully this was a nice easy fix.

Fireball Classic ball save screws wrong
Continue Reading

Time for another installment on the progress so far.

This time, I’ll be focusing on the lower play field. I’m working my way up the play field – from the apron (which I covered in previous posts, all the way up tp tje top). This allows me to focus on specific areas and assemblies and then test them once they have been serviced. It also helps stop feeling overwhelmed with everything still to do.

The lower play field is quite dirty. Mylar covers some sections, while others either have chunks taken out of it (or it was removed by a previous owner). When it was removed you can see some damage that was done to multiplier and bonus inserts 🙁

I needed to service the slingshots, so figured that while I was doing that, I could also remove the remaining mylar and give the play field a much needed clean. Before I’m done with the machine I plan to give the play field a solid wax too. Doing the play field in stages will mean more work in the future as I’ll have to remove everything to clean and wax it, but I’ll live with that.

Fireball lower playfield
Continue Reading

Still working my way through the assemblies located under the apron. This time I’ll be focusing on the ball trough and ball eject assemblies. I also need to sort out an issue with the ball trough where the ball bounces back down into the drain hole.

First up though, time to pull the ball trough apart and give it a really good clean. Even at a first glance, you can see how much dirt has built up.

Fireball ball trough

Continue Reading

With the sound issue issue covered, and the ball serve issue to look at, I wanted a bit of a break from problem solving to exploring the different assemblies on the machine and giving them a clean. The problem was – where do I begin? I want to cover the entire machine. In the end I figured I start from the bottom of the play field and work my way up.

So to begin with, I’d remove the apron and see what lurks below.

The apron on these early Bally machines are secured by two small metal brackets at the front and two screws at the back. The last person to work on the machine didn’t secure the apron to the brackets at the front and as a result it was lose (which isn’t good when you go to lift the play field by it…)

I have to say the two screws at the back don’t feel like the most sturdy attachment for the apron. I may be that due to age, it has just seen better days – but I don’t trust lifting the play field via the apron like I do on my Nugent and Space Orbit machines..

Fireball classic apron
Continue Reading

First up for this update is the lock down bar. The condition of the bar itself is OK. It’s a little worn and has a few scratches, but is solid and doesn’t need replacing. The issue it does has however is it’s loose on the left side and does not lock down properly. I can lift the left side up with my hand.

Loose nugent lockdown bar
Continue Reading