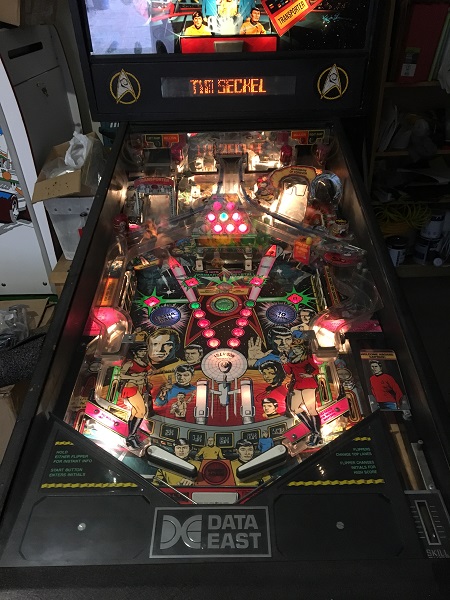
The newest game to arrive in my line up (and next on my to do list) is a Star Trek: 25th Anniversary. The game was released by Data East in late 1991, with 4400 machines made. Being one of the early DMD games, it features the smaller 128×16 pixel DMD. I love the artwork on this game as it contains so many references to the 3 seasons of the original Star Trek series. It’s a shame that some of it is covered by various playfield parts. The game arrived working well, with just a few small things needing to be looked at. It needs a good clean and a rebuild though, which is what I’ll be focusing on.
playfield
All posts tagged playfield
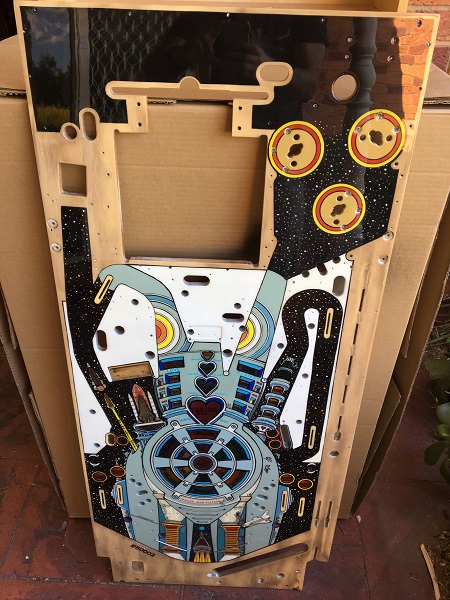
I have a Bride of Pinbot playfield for sale.
This is a used playfield, which came out of the machine I worked on. Mylar across the central playfield and pop bumper areas has protected most of the art over the years. Often these areas get thrashed and leave the playfield looking like someone attacked it with sand paper 🙁
There are a lot of photos below to show the condition and I’ll be as critical as I can, running through the things that stand out to me as marks against the playfield. Some of you won’t care as the playfield condition will be way better than what you have and much cheaper than buying a repro. For others they are deal breakers. I’d rather have it all mentioned now though and you can decide if the playfield is for you 🙂
If my machine had not come with the extra playfield, I would have been more than happy to keep using this one.
There are some small wear patches, most notably:
– Close to the scoop entry.
– Left / right loops.
– Start of shuttle and heart beat ramp entries.
– Top of left return lane, just below the extra ball insert (this has been touched up by someone in the past).
– Right return lane, at the rear of the shuttle (also looks to have been touched up by someone in the past with a small mylar patch applied over the top).
– Red ring on lower and left pop bumper (the rest of the area is covered in mylar).
– The edges of the 500K insert on the right loop (the mylar stops just below it).
– Base of the green insert on the left loop (mylar stops just before this one too).
There is some mylar lift:
– Towards the entry of the heart beat ramp, but doesn’t look to have lifted much (if any) art.
– Some of the large and small wheel inserts have some mylar lift, but does not look to have damaged the insert and the insert is not risen.
– A couple of the 100K/50K/25K inserts – again does not look to have damaged the insert and the insert itself has not risen.
There is also some wood damage on the rear of the playfield around the pop bumper area. Doesn’t seem to affect the playfield or assemblies though.
The two pop bumper body screw holes on the lower pop bumper are larger than normal – so these should probably be filled (match sticks / skewers + glue – or similar to fill before screwing).
Sounds like a lot of negatives, but I’m being super critical. It is 28 years old after all and has held up well. I’ve included some photos to show how it looked in my machine to show how good it looks as a straight drop in. The playfield would be a good upgrade to a machine with a trashed playfield, or some touch up work and clear coat to have it looking like new again.
Price is $280AU + shipping.
[Best_Wordpress_Gallery id=”5″ gal_title=”Bride of Pinbot playfield”]
Who likes self punishment? I do, it seems. My BoP 2.0 machine came with a touched up and clear coated playfield when I purchased it 14 months ago and it’s a task I knew I would get to at some point. But when you’re having fun playing a game, it’s hard to take it offline for some major changes. Playfield swaps are a time consuming process, so it’s not something I’ve been looking forward to. I gained some excellent experience when I did my Pinbot CPR playfield a couple of years ago and I’ll be rolling that knowledge in to how I approach this one. The up side here is the replacement playfield is an existing playfield, so all screw holes (both sides) are already there. New playfields have (most) screw holes dimpled, but can be up to 1mm out in any direction (according to CPR – not sure if that also applies to other playfield makers). On my Pinbot playfield, I found many dimples missing on the underside. This can be a pain for assemblies under the playfield that are made up of 2 or 3 components, consisting of up to 12 screws, which all need to line up in order for it to operate smoothly. The current playfield in my game isn’t bad by any stretch as mylar across the central playfield and pop bumper areas has protected most of it. I actually think it would make a great drop in replacement for someone who has a trashed playfield or someone who wants to touch up and clear coat one for themselves. Time to begin the process.
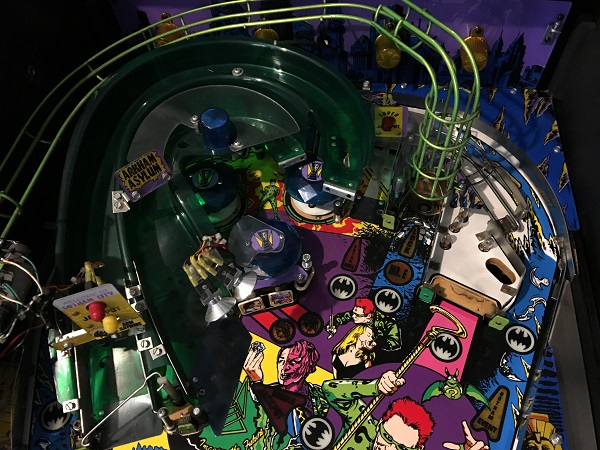
Batman Forever has been cleaning up really nicely. The game is in excellent condition, which makes my task easier. In this update, i’m now going to work through the last of the playfield assemblies so I can begin getting everything back together for a proper test. That means for this progress report, I’ll be covering the top playfield section. This includes the VUK, ramp diverter and three pop bumper assemblies. I already covered the orbit rail, saucer assembly and upper left and right playfield / plastics in a previous update, so won’t need to worry about those now. There’s a large ramp and rail that will need to be removed first, but from there it should be smooth sailing.
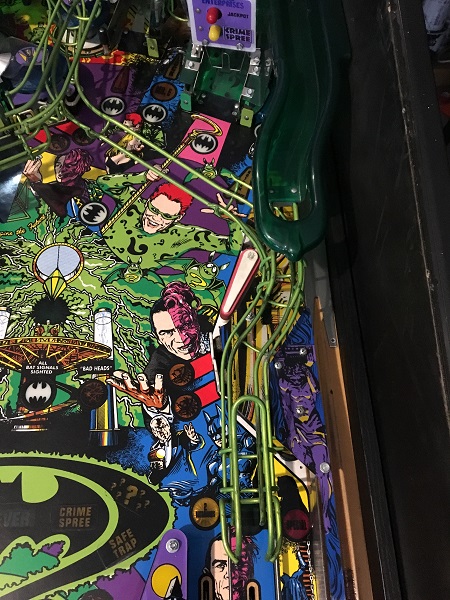
It’s time for the third installment on the Batman Forever rebuild. I’ve been a little slower than I’d like getting this update posted, but it’s been a busy time of year (and getting busier as we race towards Christmas). Having worked through the lower playfield areas in previous updates, I’m now going to focus on the middle playfield sections. This area is home to an upper flipper, some stand up targets and also a 4 bank of drop targets. There is an orbit shot which I want to remove the parts from and clean too as the rails are attached under some of the middle playfield plastics – so it’s easier to deal with that now than have to remove plastics again to remove the orbit rails at a later time. To start with though, I’ll need to remove various rails and ramps to get access to the playfield parts below. I’ll start with the right side.