service

All posts tagged service

With the lower play field given an initial clean and service, it is time to go over the middle area. The main feature of the middle play field area is a central “spinner” (or spinning disk) which rotates constantly during gameplay. It’s covered with a rubber pad used to grip the ball and fling it off (….like a fireball). I won’t be servicing this for now, but will return to it at a later date. The spinner works fine, but really could do with a service.

I will be removing the rest of the mylar up to the pop bumpers, along with servicing the rest of the play field components in that area.

The mylar in the middle section was not as bad as in the lower. But just as with the lower section, someone has attempted to remove parts of it, while leaving the goo and not really doing the best job.

Both sides contain one plastic each, along with some switches, mini mushroom bumpers and a saucer to trap a ball in. The right side also contains a gate which can allow the ball to either return to the shooter lane, or back into play.

(note I had removed the small mushroom bumper on the right side before the starting photo was taken).

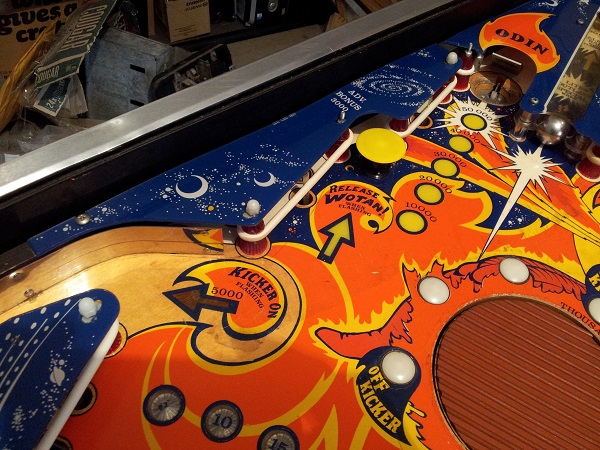
Fireball mid play field left
Continue Reading

Time for another installment on the progress so far.

This time, I’ll be focusing on the lower play field. I’m working my way up the play field – from the apron (which I covered in previous posts, all the way up tp tje top). This allows me to focus on specific areas and assemblies and then test them once they have been serviced. It also helps stop feeling overwhelmed with everything still to do.

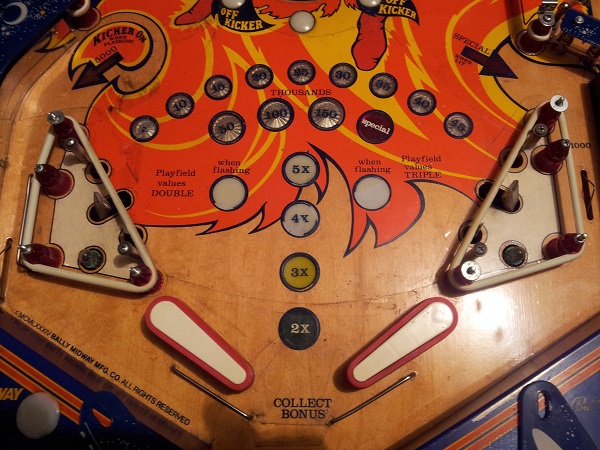
The lower play field is quite dirty. Mylar covers some sections, while others either have chunks taken out of it (or it was removed by a previous owner). When it was removed you can see some damage that was done to multiplier and bonus inserts 🙁

I needed to service the slingshots, so figured that while I was doing that, I could also remove the remaining mylar and give the play field a much needed clean. Before I’m done with the machine I plan to give the play field a solid wax too. Doing the play field in stages will mean more work in the future as I’ll have to remove everything to clean and wax it, but I’ll live with that.

Fireball lower playfield
Continue Reading

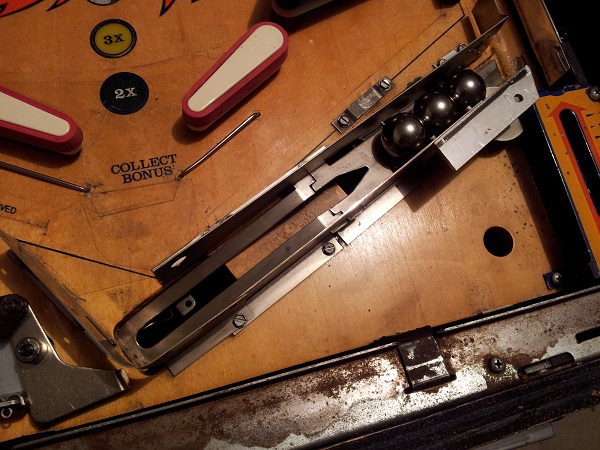
Still working my way through the assemblies located under the apron. This time I’ll be focusing on the ball trough and ball eject assemblies. I also need to sort out an issue with the ball trough where the ball bounces back down into the drain hole.

First up though, time to pull the ball trough apart and give it a really good clean. Even at a first glance, you can see how much dirt has built up.

Fireball ball trough

Continue Reading

I’m beginning to run out of things to do on the Nugent now. I’ve gotten into most corners of the machine and sorted out many issues as I’ve gone along. There are two main things left to look at – the drop targets and 3 pop bumpers. I’m going to focus on the pop bumpers and get them serviced.

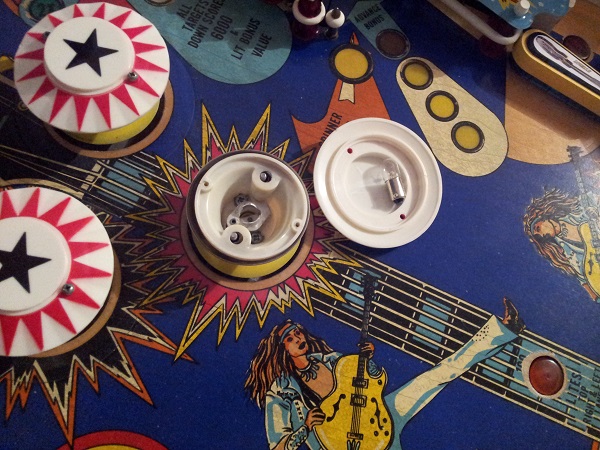
Awhile ago I replaced the 3 caps on the pop bumpers (seen in an earlier post). Now it’s time to actually remove all three pop bumper assemblies to clean and service them. At this point the only real complaint I could make about the pop bumpers is sometimes they don’t activate when they should. Most likely solved by cleaning and/or adjusting the switch.

There is a bit of work to actually get them out as I found, but once I had managed to do one, the others were much easier. I decided to do one at a time. That way I had two working pop bumpers to use as reference in case I mucked up.

To begin with, I need to remove the cap and also undo two screws that sit inside pop bumper. The two screws attached the pop bumper body to the playfield. But I can’t simply lift it up as the bulb socket is soldered under the playfield and the metal ring is attached to the plunger.

Nugent pop bumper
Continue Reading

One of the first things I decided to tackle was giving the shifter a service. The shifter is a basic high / low – 2 position shifter. It works (at least 95% of the time), but could certainly do with a clean and re lubricating. There are a few cases where it doesn’t shift into high gear correctly, but I suspect this will be corrected with the service. To make sure, I’ll replace any mircoswitches too.

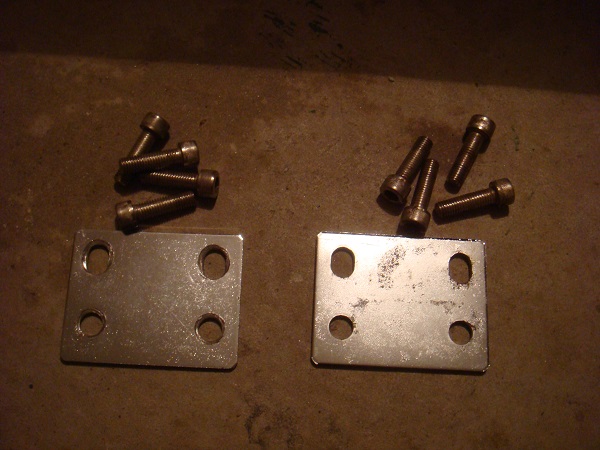
The first thing to do was split the cockpit into two parts. The base is held together with two metal plates (one on either side) and 4 bolts. The tread on the bolts has just about worn thin from age, so using an Allen key will be required. For those that are interested, you can use an 8mm or 5/16″. The plates are in decent condition, but do require a bit of a clean. I will make some time to do that before putting it back together.

cockpit plates
Continue Reading