The Counterforce project is now on the home straight. Not much more to do and i’ll consider it a another project completed. I’m looking forward to actually playing it. First (and biggest) task to look at for this update is rebuilding the lower set of flippers. The flipper bats are dirty and will need a good clean. The others came up nicely, so I expect these will too. The rubber is long gone but easy enough to replace. The playfield area around here also needs a good clean, which I’ll do once the bats are removed.
Flippers
All posts tagged Flippers
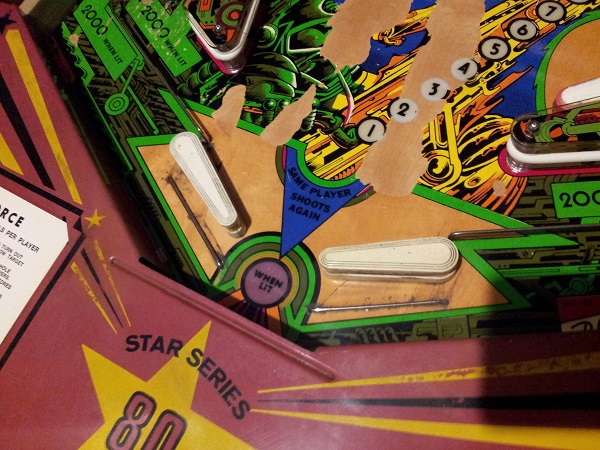
On my to do list for awhile has been rebuilding the flippers. I only have one flipper kit at the moment, but that’s a start. I’ve decided to rebuild to upper set of flippers as these areas are the dirtiest of the two sets and also have plastics and posts that can be cleaned up and installed again. On the right hand side of the playfield we have a single outlane and a single in lane that sit behind the upper flipper. The flipper position is where normally you would expect to have a slingshot. The artwork damage isn’t as bad on this side as it was on the left (when looking at the sling shot). The condition of the plastic is unbroken and just dirty. There is another post cap missing, but I have plenty of spares to cover it.
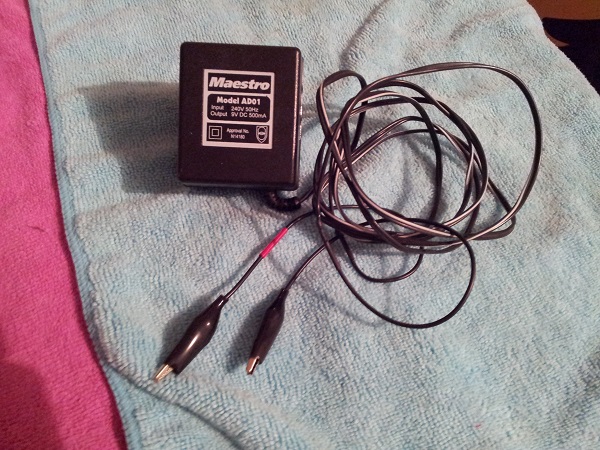
Continuing on from my previous update, the non working display is first on my hit list for this post. I’ve checked the cables and swapped the displays around to verify that the issue is indeed with the display itself. Last time, I tested the two UDN6118 chips on the display and they were OK. I did this on the chip pins however and not the solder joins on the rear of the board. This time, I flipped the display over and tested the chips using the joins. Both tested OK again. After some further research I decided to modify an old power pack that can refresh the displays by burning off the crap that becomes attached to the filaments. I was hopeful that the issue was simply a very faded display. For this, I found an old powerpack for a 28.8K modem I purchased back in 1995 or something. I’m amazed I still have it. It’s rated at 9V and 500ma. I replaced the connector with two alligator clips. I put some red tape around the positive lead.
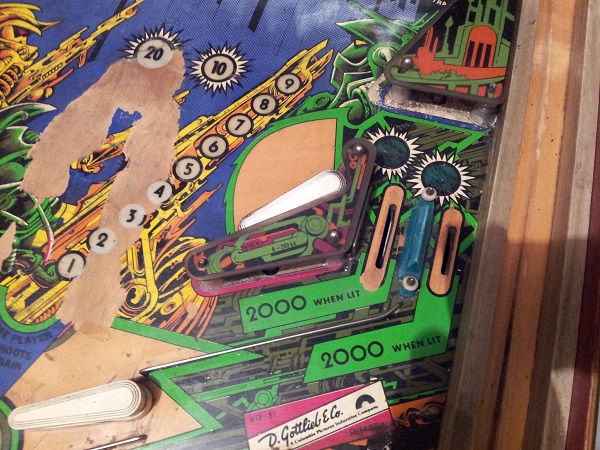
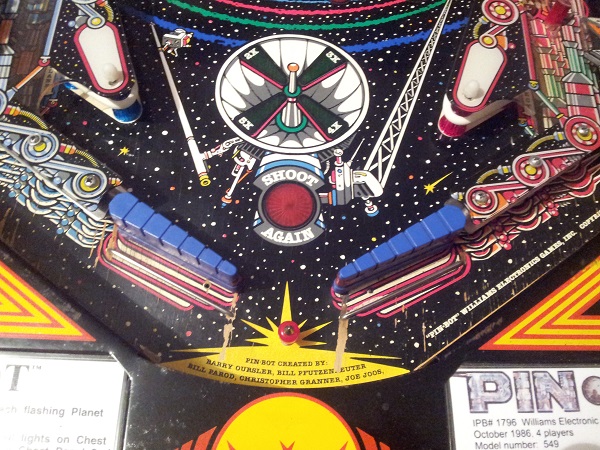
It feels like forever since I was last working on Pinbot (in truth it’s been about 4 weeks). A project I started last year and then set aside for 10 months while Pinball took over my life needed to be completed in November. That was successfully done and now it’s time to turn my attention back to my beloved Pinbot machine and continue its rise to awesomeness. The last part of the playfield to do is the flippers. To be more specific, rebuilding both and sorting out the right flipper (which does not work).
So the starting point. Normally Pinbot has white flipper bats. This machine came with some ribbed blue bats. They don’t really do anything for me, so i’ll be looking to replace them. The rubber is dead (and I’ve since removed it) so that will be replaced also. As mentioned, the right flipper does not work, but the left is fine. There is some playfield damage in this area, but it’s not an issue since the whole playfield be will replaced shortly.
Playing pinball is fun and it’s something people of all ages can partake in and enjoy. For me, learning how the machines work and getting your hands on the parts that make the games tick take it to a whole new level. In fact I spend more time with my hands on parts than I do on the flipper buttons.
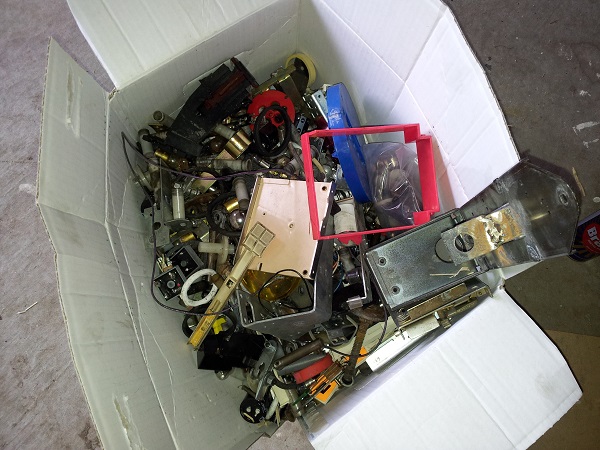
When I was working on that first machine back in January and February, I often found the process very stop-start. In part, this was due to my inexperience with pinball machines and not really being able to plan what I was actually going to need (or being aware of what was available). I kept finding myself held up while trying to source random parts. Certain screw types, nuts, plates, frames, wires, housings, bulbs, etc. Some were easy to source while others more obscure and no real part number to reference. I experienced it again (although to a lesser degree) when working on my Fireball Classic. In most cases the part (or a suitable alternative) were sourced thanks to various sellers or through wanted posts on Aussie Arcade. I decided part way through the Fireball I was going to somehow source a pile of random spare parts from different machines which would help aid me with future repairs / rebuilds.
Enter the “crap box” (or boxes now that I’ve picked up a few). I found these boxes irresistible. Like a big box filled with lucky dip prizes. Some will be cool. Others will be.. well.. crap. Who knows what I’ll score – it brings excitement 🙂 In this first example, I have a 15kg box of random parts that cost $6.60.