I’ve been busy over the last few weeks, working away on giving this lovely Corvette an overhaul. That means it’s time to pause and give an update on the progress so far. In this update I’ll be starting with the apron area and touring my up the playfield with pit stops at the flippers, slings, upper flipper and middle playfield. I’ll try and squeeze in some work on the upper playfield area too. Time to get started. First up – the apron.
repair
All posts tagged repair
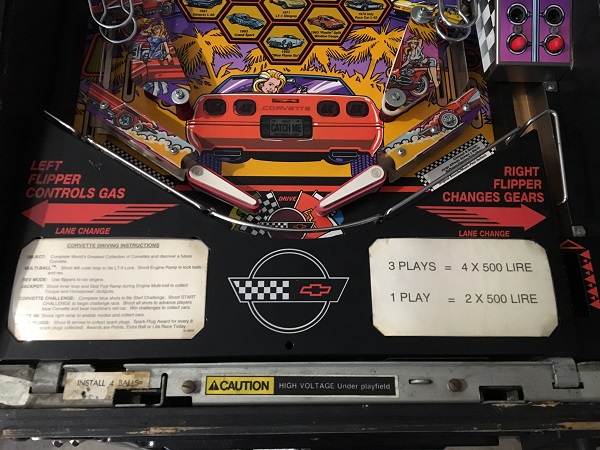
After being burnt out from pinball repair write ups and taking a bit of a break, I’m back with a new machine to cover. Corvette was released by Bally back in 1994 and had just over 5000 units made. The playfield is loaded with fun things that include 3 flippers, 3 ramps, a ball diverter, ball save kick back, a drag strip, pop bumpers, spinner, engine (that vibrates in play and interacts with the flipper buttons). Mix in good shots along with fun modes that include some great sounds and you’ve got yourself a fun game to play. I’m not a car person and have no interest in Corvette as a brand, but this is a fun game to play!
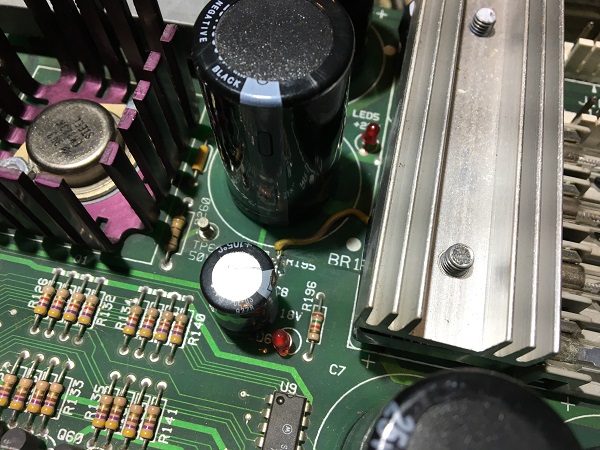
When the game first arrived for its rebuild, it wouldn’t boot and instead displayed the somewhat common “Check Fuses F114 and F115” error message. The owner told me the game had been booting, but then stopped one day after he moved it. Every other time I’ve hit this same error message, the fuses have been fine. This time was no exception as both fuses were removed, tested and found to be good. The game was switched back on and I observed the series of LED’s on the board indicating the presence of power along this part of the circuit. There is a lot of information out there for this error and a nice diagram of the circuit here:
http://www.pinwiki.com/wiki/index.php?title=Williams_WPC#Check_fuses_F114_and_F115_message
The board isn’t getting its 12V. There’s not a lot to it. Following this back along the board, I quickly spotted a repair that had been done sometime in the past.
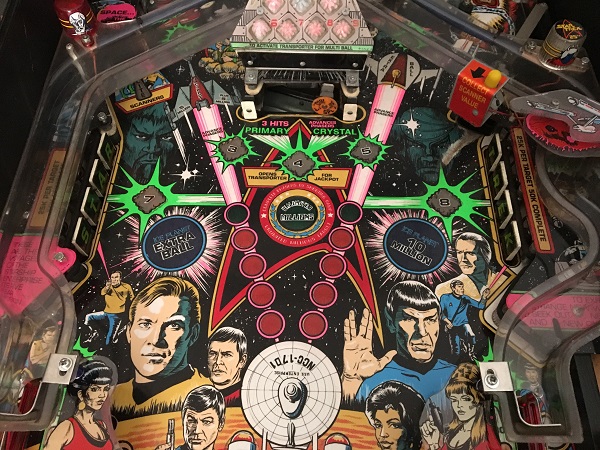
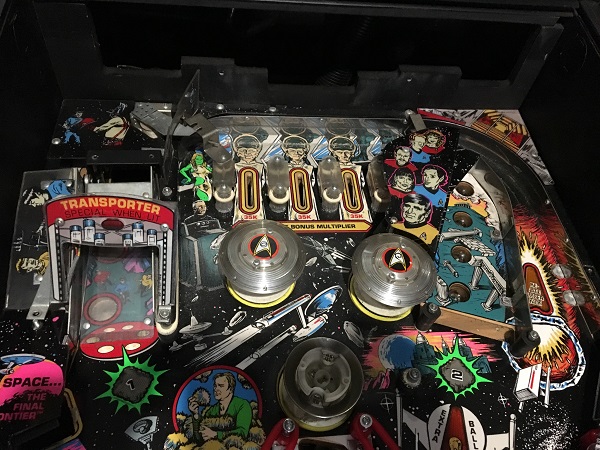
It’s time to wrap up the work on my Star Trek 25th Anniversary so I can have it back together and playable. The last section of playfield to look at is the top. This area is home to a set of three pop bumpers and also the ramp raise/lower assembly. The lower pop bumper was missing its cap, but I located this a few weeks earlier at the back of the cabinet. It was quite filthy, so can assume that it’s been lost there for awhile. The ramp is missing the small blue metal flap, which I want to replace.
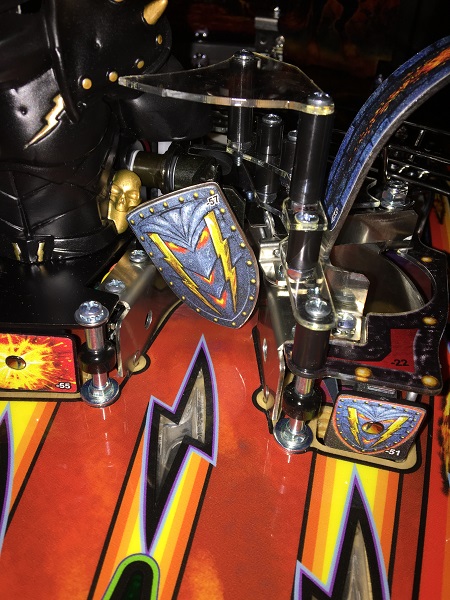
When my Black Knight arrived, I wondered how long the shield would last before issues kicked in. It’s a part of the machine that takes a real beating during play, so I’d expect it to wear out over time. I didn’t expect to experience issues on the second night of owning the game however. Part way through a game, I noticed the shield was no longer sitting correctly and was now on an angle.
Time to dig deeper into the Star Trek overhaul and look at the middle playfield section. This area is home to two banks of drop targets, a VUK and also a swinging target that moves during play. There is a large ramp that covers the sections of playfield I need to get to though, which will need to be removed. Once that’s off, it will remain off until I’ve finished working on the playfield as it’s a pain to get on and off again. There is also a subway ramp below the playfield that links up the top left and middle scoops to the VUK which can be removed in this update too.