
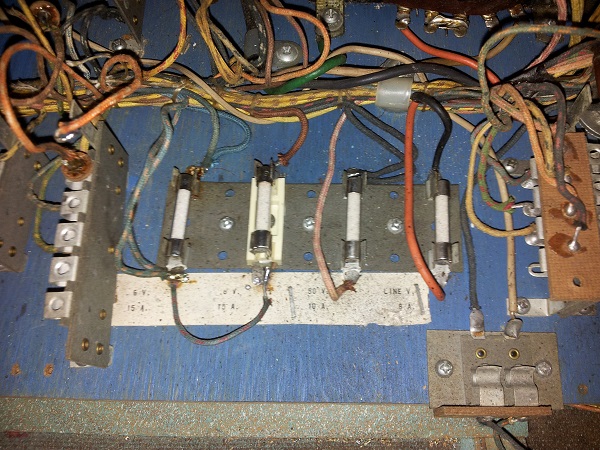
During my initial inspection of the machine in the first update, I had noted down a few things to look at before I attempted powering it on for the first time. This update will focus on these items. First on my list is the fuse panel. Located just inside the coin door, there is a small panel which is home to 4 fuses. My understanding is that the fuse clips on Bally EM’s are crap and a common source of problems as they often break. One of the fuse holders has already been replaced, with the new fuse holder being installed over the old one. The fuse holder on the far right (8A line fuse) is missing one of the clip arms, so this will have to be replaced.
power
All posts tagged power
While I haven’t quite finished my previous (or should I say current) project – Pinbot, a new project popped up a few weeks ago that felt like a good opportunity – so I grabbed it. This time, I’ll be looking at a Counterforce machine by Gottlieb. It’s part of the Star 80 series and was released back in 1980. This particular machine started life in Italy, before being imported here to Australia. I was attracted to it as the gameplay looks kind of neat – seems like a mash of missile command and space invaders played out on a pinball playfield. Plus it’s an opportunity to work on a System 80 machine, which is something I’ve not yet done – so it should be an interesting experience. My last few projects have been restorations where I’ve spent a bit of money doing them up. But this project will be a little different. Due to the damage on the playfield, the machine won’t gain much value with everything else restored around it. The detail in the artwork makes it impossible to paint or touch up. Therefore, my plan is to keep spending limited. Any worn or damaged parts considered important will be replaced (globes, rubbers, broken drop targets, coil sleeves, etc). Anything that is still usable will be cleaned up and put back into the machine. So the goal here is to service all parts of the the machine, clean it up (wow does it need a clean) and repair anything broken to make it a fully functional game once again. I’ve set myself a reasonable budget to prevent over capitalising on it, but I may run into some nasty surprises along the way. So we’ll see how that turns out 🙂
Continue Reading
With Pinbot safely at home now, I’ve spent the last two weeks doing lot of investigating on the machine to find what parts I must replace, what I’d like to replace and what will be fine after a good clean. Just like I did with my previous projects, I’ve been putting together a spreadsheet with part numbers, suppliers and prices so I can organise it all to minimise shipping costs and get the best for my $. It also helps me organise purchases so I can work on the machine in sections and I’m not caught short and leave sections incomplete because I don’t have the parts (that still does happen at times, but planning minimises it). I’ve been able to use the experience gained from those projects to help improve how I plan this stuff out and it’s good to see clear lessons learnt along the way.
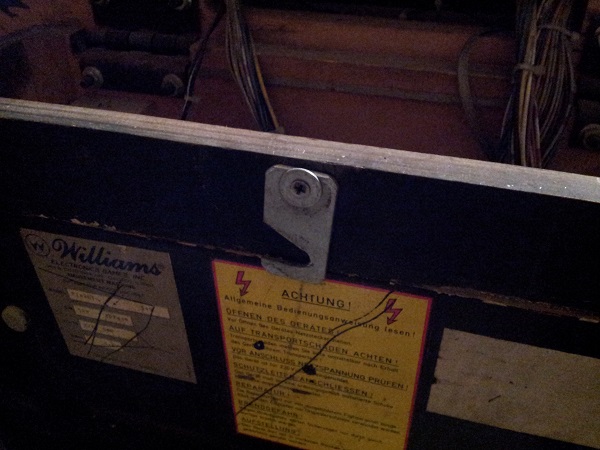
There are a few things I can work on now however to begin getting the machine back online and (eventually) inside the house where it will live. First up was putting a proper latch on the headbox. The latch that was attached only hooked onto a small screw and didn’t give me a lot of confidence in it.
Some good progress was made tonight. The big milestone. The cab has power! (and nothing blew up!). But first up, the screen has been installed. The monitor has been moved into it’s final position, and the acrylic overlay and artwork can now sit on top. A cross bar (bit of pine) sits at the base and has been cut to put some pressure against the base of the acrylic. The control panel will sit on the other side, and the join will be hidden with some black t molding I have.

After looking at a few custom projects, I noticed that people had gone with using an IEC socket.

It takes the standard power cables used with most (if not all) PC’s. It also includes a fuse. It was pretty cheap (under $8) and I -think- will be the best option for me. Ideally, I want the one switch (this one) to power on the entire cab (board, monitor, fans, marquee, etc) and this switch seems to be capable of this. Now I’m off to do some more research on just how to wire this up to do just that.