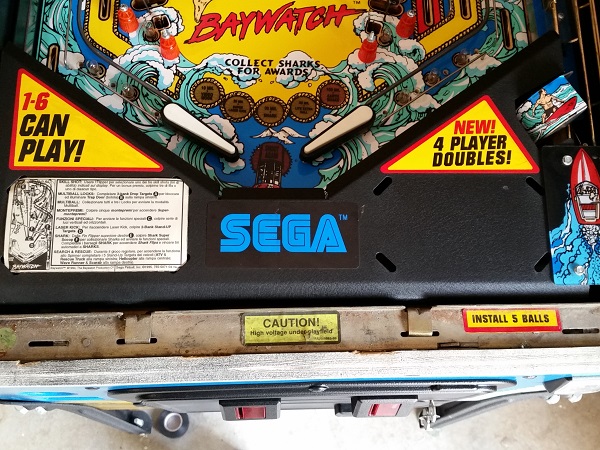
As mentioned in my previous update, progress has been moving pretty smoothly so far on the Baywatch overhaul. Part of the reason for this is due to working on a few things at the same time. I had been waiting on a couple of parts to arrive for the flippers in the previous update, so started work on the apron area. That way I kept making progress and it ended up being completed around the same time. It doesn’t always work out that way, but I like to keep things moving forward as much as possible so the owner isn’t without their machine for too long. As a result, you’ll see some photos in this update which contain progress from the flippers and slingshots in the previous update 🙂 Anyway – this update is solely focused on the apron area. This includes the ball trough, ball serve, shooter, up kicker and ball save assemblies. There is one problem I need to look at too, which is the ball not being served to the shooter lane correctly. Often it takes 3+ attempts to get the ball into the shooter lane. The metal apron is in excellent condition, as are the decals. A few small scratches are present on the SEGA logo, but nothing worth worrying about. The old instruction card (in Italian) will be replaced by the time I’m done. Two very minor scratches on the metal (just to the right of the SEGA decal) will be touched up with a very small amount of satin black, so you’ll never see them.
cleaning
All posts tagged cleaning
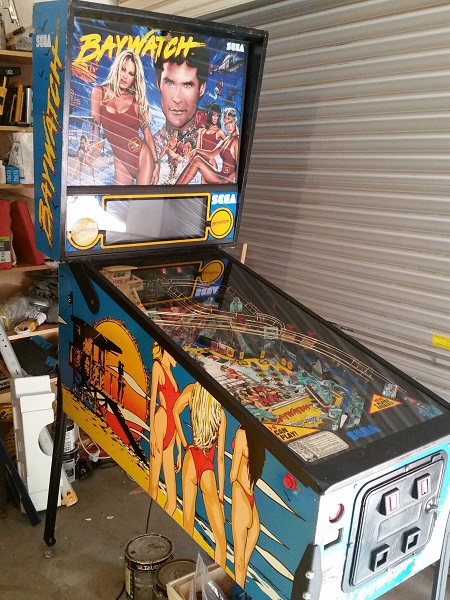
After completing the remaining work on the Williams Whirlwind recently and the owner taking it home, it was time to move onto the next machine for repair & service. This time I’m looking at a Baywatch machine. Released by SEGA in early 1995 and able to be played by 6 players, it’s got a fairly decent playfield layout and is a lot of fun to play. The game play caught me by surprise as I’m not a huge fan of the theme (I’m sure my teenage self would have been..), but I find myself saying ‘just one more go’ when playing it. That’s a good sign for any game. The machine has been in the owners collection for awhile, crying out for a full service. As you’ve seen in my other threads, I get in and rebuild everything. It’s not a restoration, nor is it just a quick wipe down and fresh rubbers. Each assembly will be stripped, cleaned and worn parts replaced. The playfield will be stripped and everything properly cleaned too. Any game play issues will be sorted out and I’ll also spend some time doing presentation improvements (mostly things the owner has pointed out he wants addressed). Anyway, time to get started.
It’s update time again! Returning with part six of the repair and service I’m performing on a Williams Whirlwind machine. The updates have been fairly regular, which is great as it means progress has been pretty smooth. I’ve had a few hold ups while waiting for parts, but that’s about all. In my last update I finished off servicing the remaining assemblies on the machine. In this update, I’ll focus on getting the remaining bits back onto the playfield to get the game into a playable state! I’m really looking forward to seeing how it performs once the final pieces are cleaned and the playfield is back together. I suspect I will make a few minor switch tweaks around the sling shots and pop bumpers to get them in a sweet spot sensitivity wise – time will tell. To begin this update though, the replacement plastic pieces I ordered from Pinball Center arrived. They have a clear protective layer on top, which is why they look a little dull.

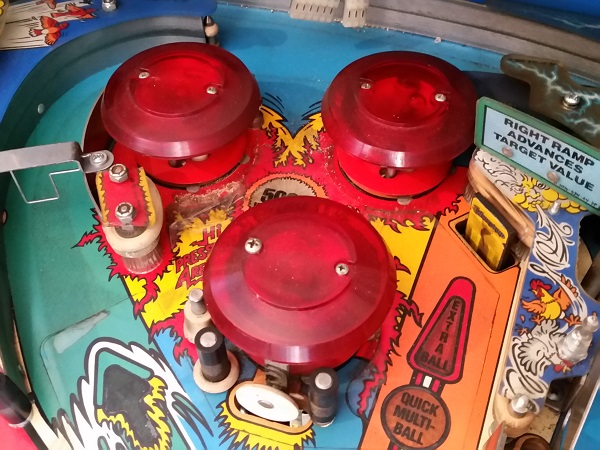
Having a set of pop bumpers on the playfield is almost mandatory for me when looking at pinball machines to play. The designers of Whirlwind must really have loved pop bumpers. Why have just one set on the playfield when you can have two? The only down side to pop bumpers is disassembling them as it cam be fiddly, especially those lamp sockets. The end result though after working on them really improves their performance, along with the presentation of a machine. It also makes them sound great too. The set I did in my previous update came up really nice and now it’s time to rebuild the second set. This update will be covering the final assemblies in the machine I need to look at, all of which are located at the top of the playfield. I’ll be starting first with the pop bumpers though.
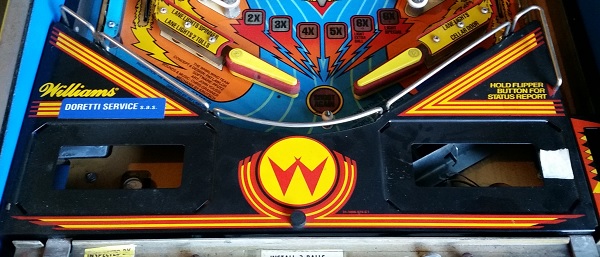
Time for another progress update on the Whirlwind repair & service I’m currently carrying out. This time I’m looking at the apron and all the assemblies contained within. I managed to work through this area pretty quickly, which is why this update is so soon after the last one. I forgot to take a photo of the apron before starting, so the one shown below is from the day the machine was dropped off to me (you’ll notice the old flippers, rubber, etc which were taken care of in the last update). The apron itself is in really good condition. The paint is mostly unscratched and no rust showing or paint flaking. There is an old operator sticker that needs to come off on the left side and some old white sticker on the right which also needs to be removed. It’s a bit dirty, but with a clean, I think it’s going to come up really nice.