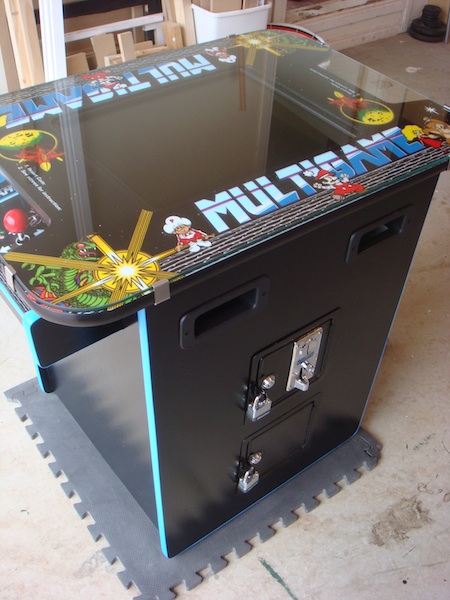
The glass and t-moulding arrived this week, allowing me to finish the project off.
Initiating photo overload 🙂

Various arcade related projects
The glass and t-moulding arrived this week, allowing me to finish the project off.
Initiating photo overload 🙂
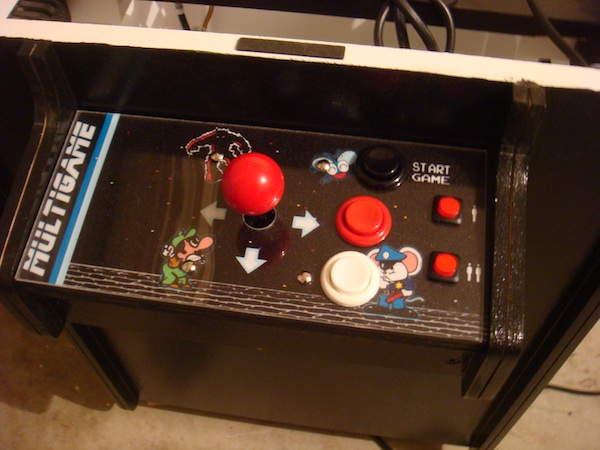
The control panels were next to be done. As with my previous projects, I decided to put a layer of acrylic over the artwork to help keep it clean and extend its lifespan. Plus I think it gives a nice finish to the control panels. As you can see with the P1 and P2 start buttons, I went with different buttons to ensure everything fit and was not overcrowded on the right.
I also extended to the top of the control panel to allow for a strip of t moulding to sit at the end (as I did with my Donkey Kong cocktail) which should give it a nice finish. Note: I still need to add the t moulding to the control panel front and sides – just waiting on it arriving. I’ve ordered both light blue and light green (Galaxian) and will see which one looks best.
This project was completed about a month ago and i’ve been a little slack in getting the posts up for it. But here they are – Project #4.
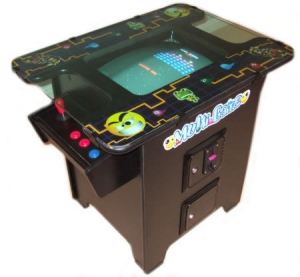
After a bit of a break from building machines, I was recently contacted about building a new cocktail cabinet. I had hopped to do a space invaders or frogger cocktail next, but this request was for multigame style artwork – so that’s what this will be.
After some investigation into artwork and what the new owner wanted, I ended up settling on this model:
Almost 6 months ago, I put a 90% complete fight stick project aside to continue work on a Donkey Kong cocktail cabinet with the intention of finishing it off a few weeks later. Today, I finally put the final touches into the fight stick and can now consider the project complete 🙂
A few nights back I decided to get the project finished. First up was making sure the fight stick itself could be recognised by a PC and PS3. This failed to work. The closest I could get was a windows error saying the USB device failed to load. After some testing and investigation, it looked like the USB connector on the Dual Strike PCB was to blame. A closer look at the USB (Type B) port showed one of the internal pins had been squashed back, ensuring a bad connection. Looks like at some point the port had something lean against it, and cause the pin to come lose. I got out the soldering iron and took it off the board. It probably isn’t clear in the image below, but the top right pin (inside the port) has been lifted up and is completely loose.

A replacement part was found at Jaycar for only $3. I added it to the board, connected up the PCB to the PC and success.
Continue Reading
I finally got around to completing the project this weekend.
Last week I organised the glass place to measure and cut the glass top for me. I also had some small DK marquees printed up, which will sit under the glass on the table top. These were simply done at BigW at $3 each.