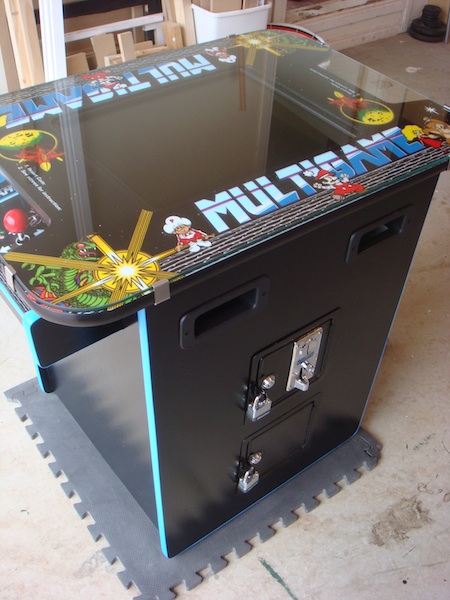
The glass and t-moulding arrived this week, allowing me to finish the project off.
Initiating photo overload 🙂

The glass and t-moulding arrived this week, allowing me to finish the project off.
Initiating photo overload 🙂
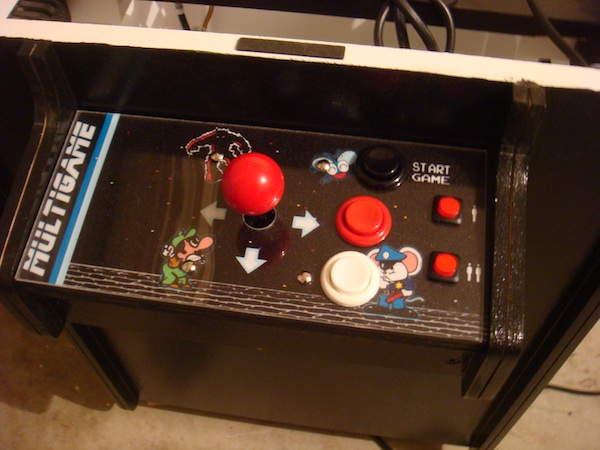
The control panels were next to be done. As with my previous projects, I decided to put a layer of acrylic over the artwork to help keep it clean and extend its lifespan. Plus I think it gives a nice finish to the control panels. As you can see with the P1 and P2 start buttons, I went with different buttons to ensure everything fit and was not overcrowded on the right.
I also extended to the top of the control panel to allow for a strip of t moulding to sit at the end (as I did with my Donkey Kong cocktail) which should give it a nice finish. Note: I still need to add the t moulding to the control panel front and sides – just waiting on it arriving. I’ve ordered both light blue and light green (Galaxian) and will see which one looks best.
I finally got around to completing the project this weekend.
Last week I organised the glass place to measure and cut the glass top for me. I also had some small DK marquees printed up, which will sit under the glass on the table top. These were simply done at BigW at $3 each.
After many months of postponing the completion of this project – it finally comes to a close 🙂 Last friday I went to the printers with the bezel artwork and acrylic and then returned yesterday to pick up the final piece of the arcade machine.
Work on the cab has been a little slow of late. Lack of time, and at a stage where it’s mostly planning what next and how to achieve some things. But this weekend was very fruitful.
My first task was to get both control panels constructed and ready to attach to the cab (along with painting, applying artwork, etc). This was quite easy and just a copy of the first one.