Having given the playfield a look over and making a few notes on things that will require attention, I decided to start working on it. The first thing I wanted to do was get the playfield stripped down. The small upper section of playfield was already stripped (both top and bottom sides). The lower section (large area) had lots of parts to remove.
restoration
All posts tagged restoration
So it’s no secret I love pinball. Not just the playing of these wonderful beasts, but (..and arguably more so) the learning about their inner workings and how to give them back their former glory. Like an overexcited apprentice, I want to understand everything right now and be able to do anything the veterans can. Thankfully I able to keep a level head (mostly :)) and respect the fact I’m still new in this area and enjoy the journey.
On my current pinball project (Fireball Classic), I had to do some minor playfield touch ups. Thankfully it was quite straight forward. But I was terrified given any mistakes could be hard to back peddle from. I also know what I did do could be done better – given experience. I wanted to get some more experience with playfield touch up and restoration and decided this could make an interesting side project to work on. If I could find some damaged playfields which could be written off in the worst scenario, then this would make a great learning exercise and benefit future playfield restoration work (like my Nugent for example).
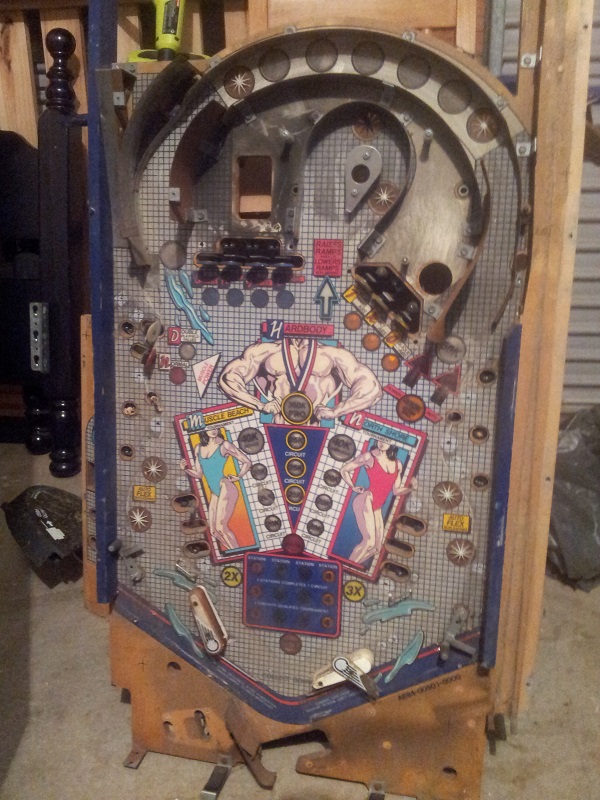
Recently I acquired a playfield from “Hardbody”, a Solid State game from Bally in 1987. A bodybuilding theme – I found it amusing there was a pinball theme based on bodybuilding. Even at the height of my gym training a few years back (where I was training 5 – 6 days week) I think I would have been embarrassed to play this 😉 But anyway, it ticked all the boxes.
Continue Reading
I’ve put the top right plastic issues to the side once again as I haven’t managed to get anywhere with it.
I decided instead to install the clear plastic in the top right and fire the game up to actually play it! I haven’t had the machine in a playable state since the first few nights it came home. Once I started to clean parts, I didn’t want to play it and spread all the dirt, dust and goo around the cleaned areas – so have held off playing.
It was great to actually -finally- play it. The small play session doubled as a good shakedown on the machine to see what sort of issues still remained and what required some fine tuning.
A few things turned up.
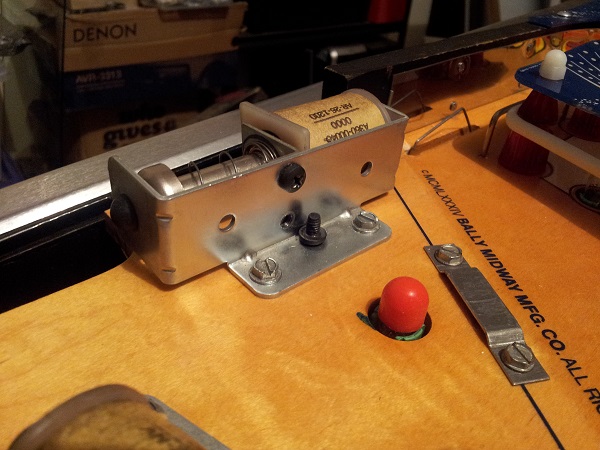
Firstly the ball save kicker was unreliable. Sometimes it would save the ball, other times it would kick out, but not make good contact with the ball. My first thought was the switch – perhaps not being sensitive enough. So I tested the switch, but that came up fine and was very sensitive. I removed the apron to have a look at the assembly. I found the coil was actually loose. The reason for this is there are two small screws which to the coil bracket and lock it in place. I had made the mistake of putting these on the outside when I reinstalled it after servicing it. The screws should sit inside. There is no thread on small metal bracket – only on the large assembly frame, so they have to be screwed in from the inside. Thankfully this was a nice easy fix.
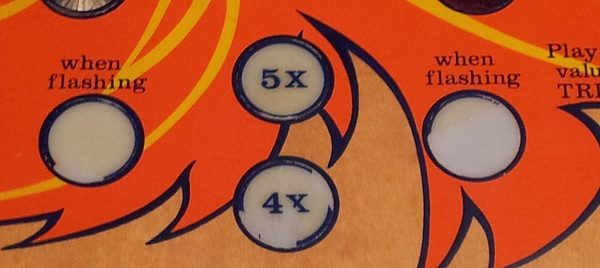
I fixed up two of the large inserts on the lower play field last night.
When I picked up the machine there was already some damage to some of the inserts. One of the worst hit was the right side “when flashing” inserts. It looks like a decent chunk of the plastic has been ripped up with the mylar that was removed from that area in the past. Some of the other inserts have suffered the same fate, but this was the worst hit.
My first go at play field touch up.
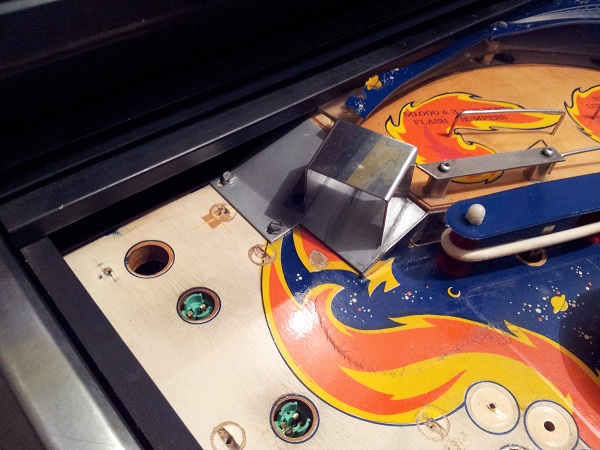
Just below the base of the ramp at the top of the play field, a spot had worn away completely (across orange, yellow and some blue). There was also some marking along the orange flame a little further down which required some attention.