I fixed up two of the large inserts on the lower play field last night.
When I picked up the machine there was already some damage to some of the inserts. One of the worst hit was the right side “when flashing” inserts. It looks like a decent chunk of the plastic has been ripped up with the mylar that was removed from that area in the past. Some of the other inserts have suffered the same fate, but this was the worst hit.
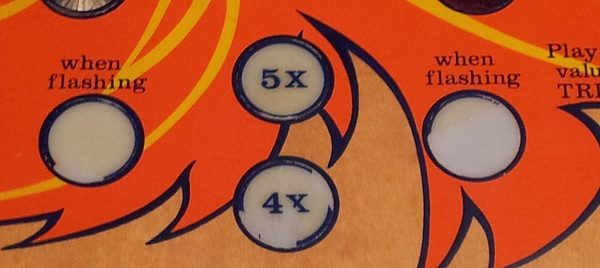
First step was to remove the insert. I didn’t have a heat gun handy, so instead grabbed my wifes (expensive ) hair dryer. With the play field lifted up, I applied heat to the underside of the insert. I kept a finger lightly pressed on the top side of the insert so I could feel how hot it was getting.
Once it was warm, I got a socket that was roughly the size of the insert, covered it with a soft cloth and tapped away at it behind the insert. After some gentle taps, the insert came out.
I decided to remove the other “when flashing” insert on the left as it too had some damage, but more so because it was going to look odd with 1 fixed up and not the other.
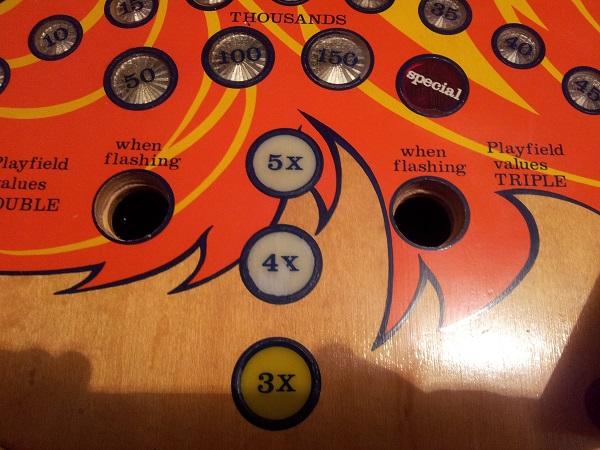
My plan was to try and rescue the inserts instead of replace them, but I purchased two new ones just in case. Here is the old lined up with the new. It’s hard to tell from the image, but the new one on the right has a small letter on the top of it – I will need to sand that down if I decide to use it. It’s easier to see the damage on the original insert here too.
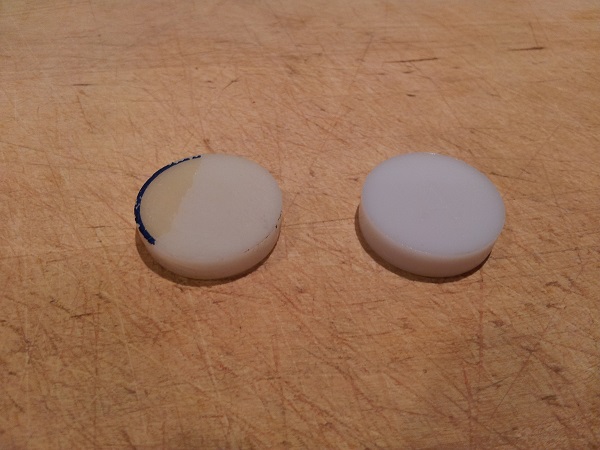
I got out some 800, 1200 and 1500 grit wet and dry sand paper and began work on the old insert. Starting with 800, then 1200 and finally 1500. It came up OK, but sadly there was some damage further into the plastic. So I grabbed one of the new inserts and sanded away the letter to get a smooth surface.
The photo doesn’t show it, but there are small lines deep into the plastic on the old insert (left side).
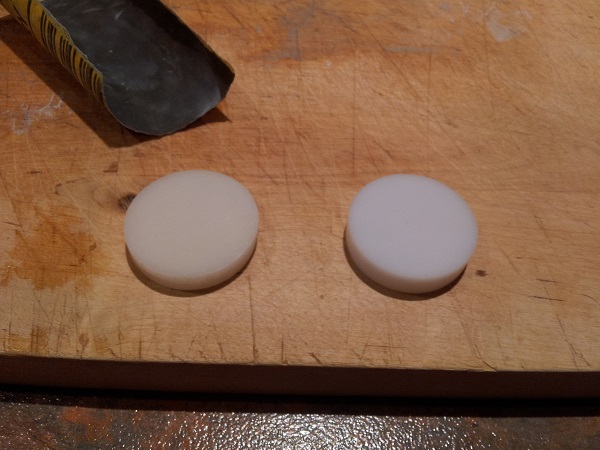
Because I was replacing one of the inserts with a new insert, it then made sense to replace the other one with a new one. Even though the old insert on the left sanded up fine (no lines deeper into the plastic), it was going to look odd with a brighter insert on the right and a dull one on the left.
I repeated the process on the second new insert to have it smooth.
Once both inserts were ready I also used some novus 2 followed by novus 1.
I then put some super glue on the inside of the play field holes before pushing the inserts back into position.
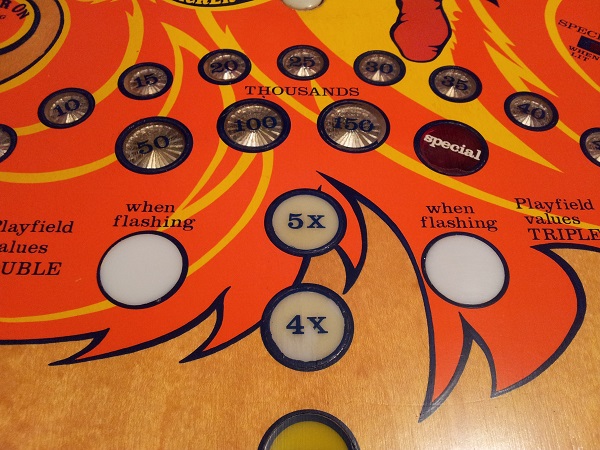
Thankfully there is a pretty even (and solid) blue outline around the inserts, so they don’t look too out of place. They are lighter than the other inserts (used for the multiplier), but it at least looks symmetrical. I’m not too disappointed with the result.
Ideally i’d love to fix the 2X and 4X inserts (along with leveling out the 3X insert), but I’m not game to touch them given they have text printed on them, and I have no way to replace the decals.
I’m glad to fix the insert on the right though It’s stood out at me ever time I’ve looked a the play field for the last few weeks.
