
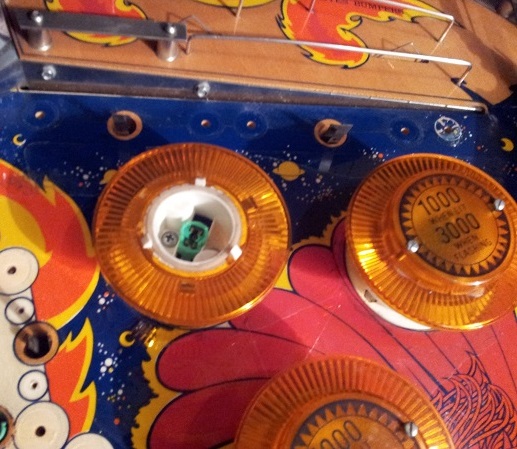
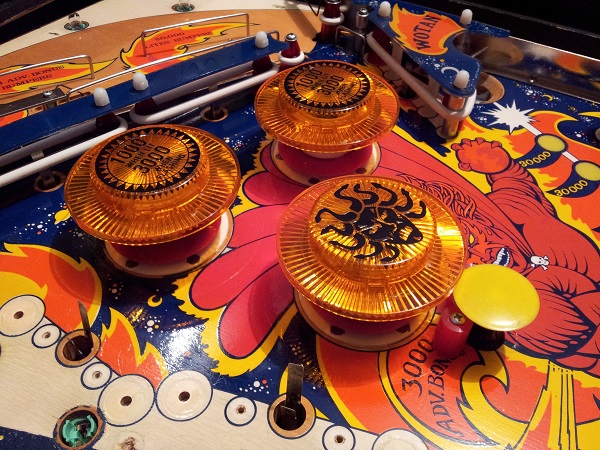
One of the final parts of the play field to get some attention is the pop bumpers. The main reason I had left these for so long was due to waiting on parts arriving from the US. There were some immediate issues I noticed with the pop bumpers. Firstly, the lower of the three should have a Medusa cap and not the “1000 when lit” instructions. The “1000 when lit” and “3000 when flashing” apply to the top two bumpers. These are activated by achieving one of the two skill shots on the upper area.
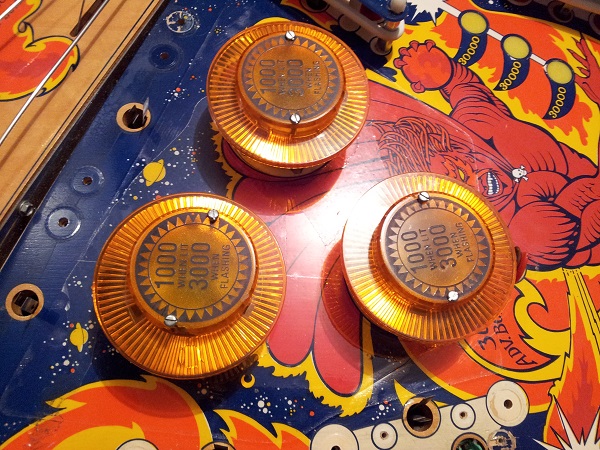
The next issue is the screws that have been added. At some point in the past these screws have been installed to attach the caps to the orange rings.
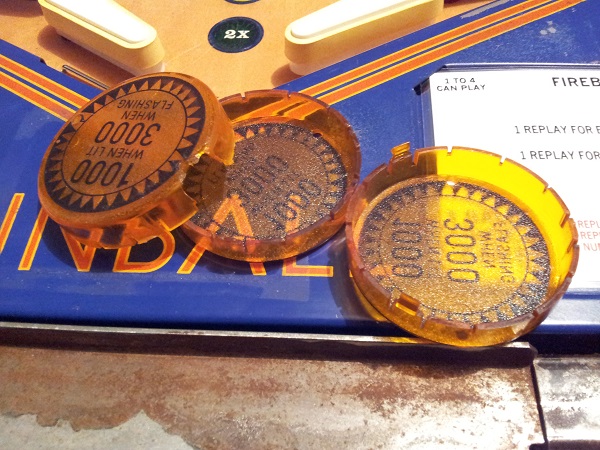
On closer inspection of the rings, I could see that one was missing a chunk of plastic from the side while the others were missing 2 or more of the legs that should lock them into place. Before I’m done these will be replaced. This explains the presence of the screws.
First step was to get the play field up so I could remove the pop bumpers. The assemblies are very similar to what I came across on the Nugent. A few differences, but essentially the same. The coil stop is a bit different though. It actually attaches to become part of the frame. I had a search around online for these but found they were no longer produced. There are other frames which have the coil stop included and look to replace these, but I decided against swapping them out due to budget constraints. I will keep the existing coil stop and frames. Perhaps in the future I will upgrade as I like to squeeze every mm of improvement out of my machines.
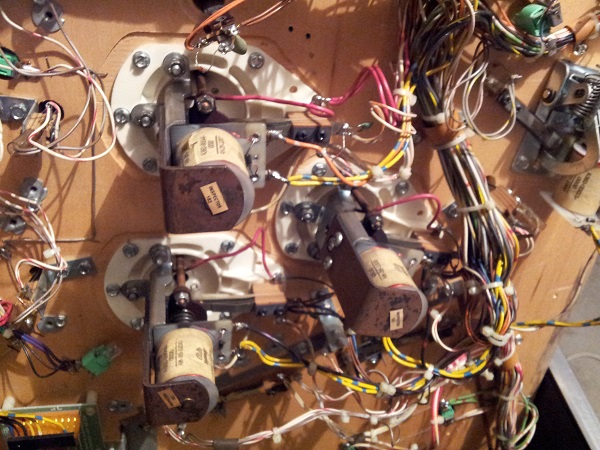
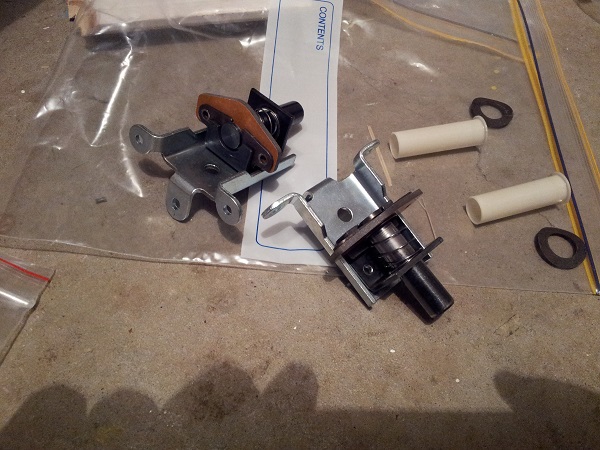
First step was to get the assembly off the base of the play field so I could remove the whole thing for cleaning. These were by far the dirtiest parts on the machine. Black dust caked on the coil, sleeve, springs, shaft, yokes, etc.

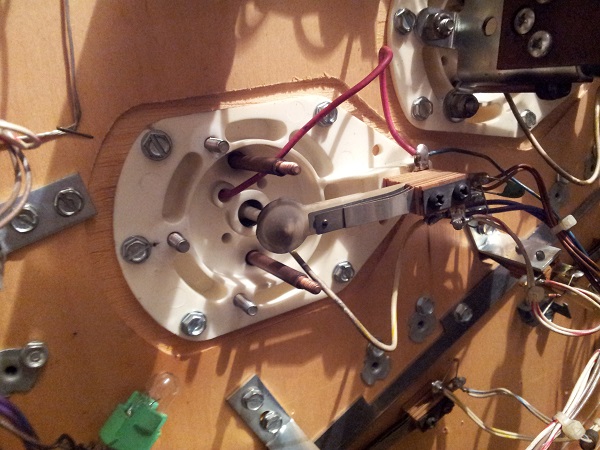
With the assembly removed, I could then get access to the spoon which was also covered in crap. I plan to replace all the spoons. At less than $1 each to replace, it’s not worth my time cleaning them – plus these are well worn.
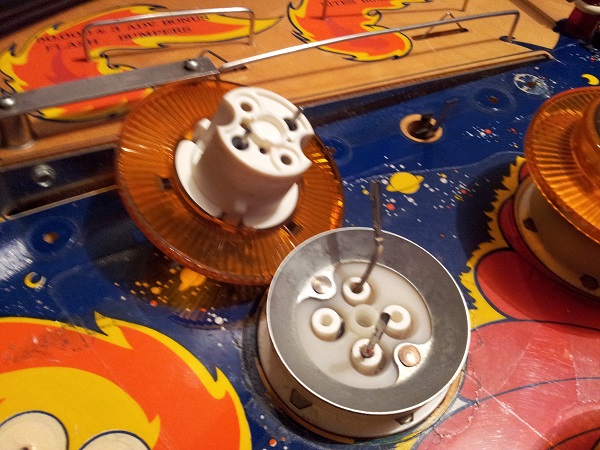
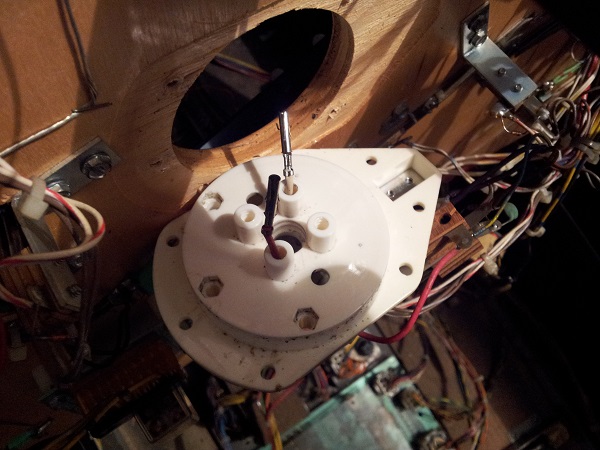
With the assembly disconnected below, I could then remove the pop bumper body topside. The body is attached by two screws inside, and the lamp socket is wedged in the middle. I like these sockets as they move around much less than the #44/#47 sockets. My globes are constantly breaking on the Nugent due the violent nature of the pop bumpers.
One really cool difference between the lamps on the Nugent and this machine are these were able to be disconnected without the need of a soldering iron. This removed one of the hassles I faced on the Nugent. Getting under the play field with a soldering iron to disconnect (and later reconnect) wires while avoiding all the other wires with a hot iron was a real pain. Simple connectors like these made it a 5 second task.
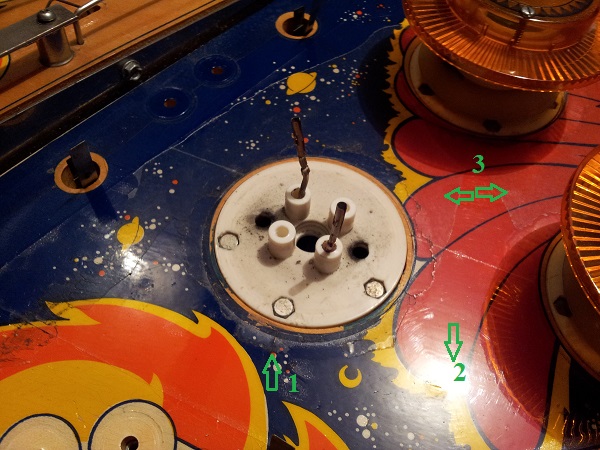
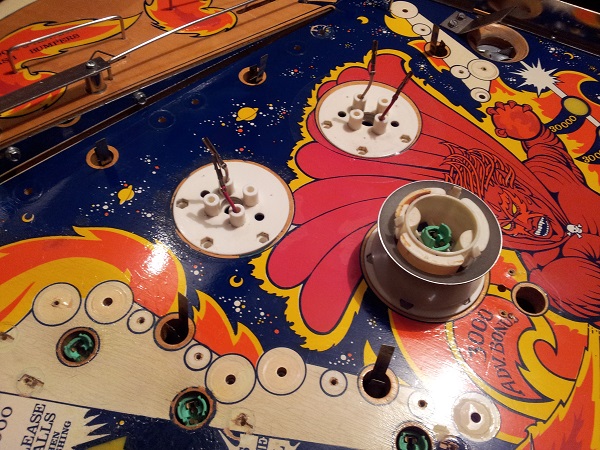
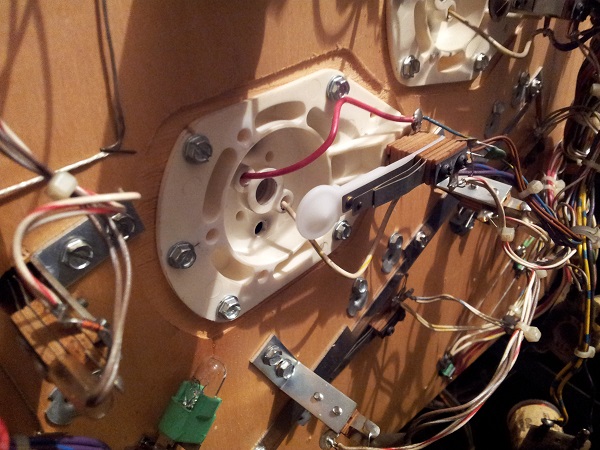
I could then remove everything, leaving on the plug (not sure what the correct name for this is). This photo also highlights something of interest in this area. There is not one, not two, but three layers of mylay in the pop bumper area. I’ve marked these in the photo to try and highlight them a bit better.
The first layer is actually remnants of mylar rings. Most of these rings had been removed, but some parts remain and they were quite noticeable due to dirt build up on their edges. The second layer was a large (and quite thick) triangle shape which covered the 3 pop bumpers. The final layer was a thinner layer that had covered most of the area too.
Originally I had planned to leave this area alone, but it was just too messy, even after cleaning. The mylar was lifting in a number of sections too. So I made the call to remove all the mylar here and replace it with new rings around each pop bumper (only a single layer this time…) and then wax the rest of the area.
With the assemblies removed, it was time to clean them.
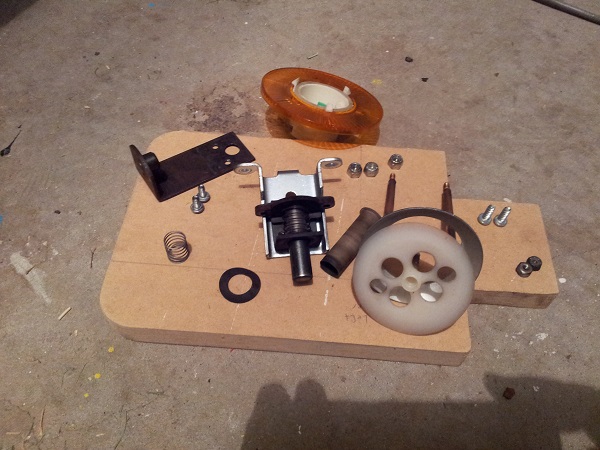
With all the parts cleaned, the assembly was ready to go back into the machine. The old sleeve was thrown away. The inner and coil springs were both replaced with new ones as was the fibre yoke that had some cracks in it. The rest of it was cleaned.
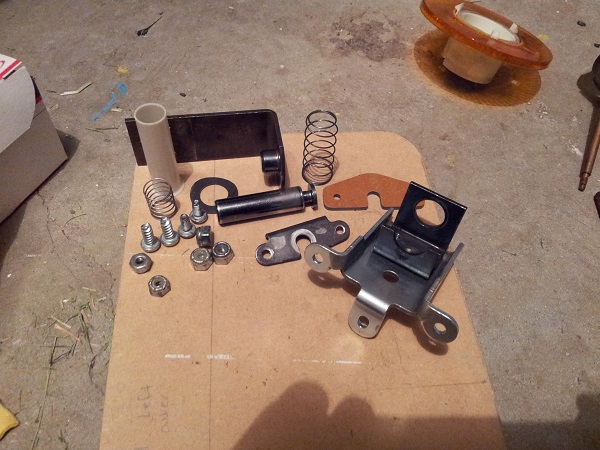
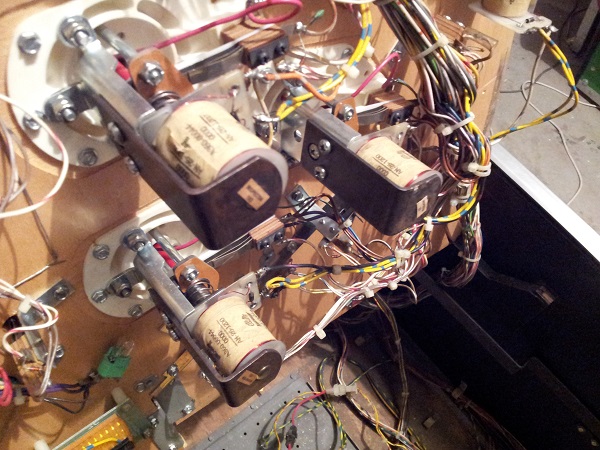
To give an comparison, here is one of the dirty assemblies next to a cleaned one. You can really see the difference 30 minutes of effort makes by getting these out and cleaning them. These pop bumpers are going to work far better than before.
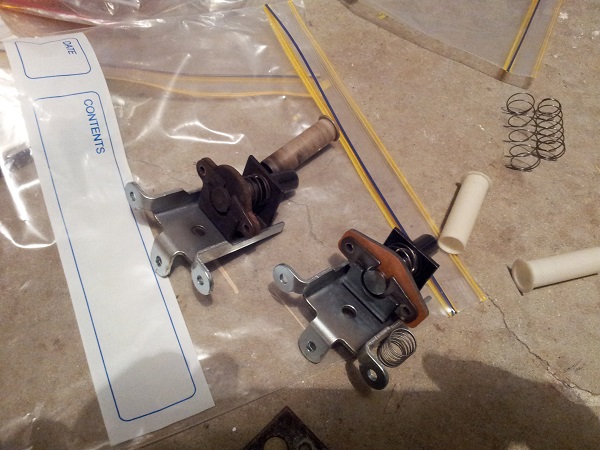
What was once dirty is now cleaned:
While I had some of the pop bumpers off I wanted to go ahead and remove the 3 layers of mylar. It was relatively painless and only some minor paint loss thankfully. With the mylar off, I gave the area a good clean to remove any left over goo and dirt. I then touched up a few areas of blue and red. This was followed up with Novus 2, Novus 2 and Mothers Wax. The end result has left it looking much nicer.
All of this was done over several nights. Taking things slow is the key I think. Mylar removal is not something I took on lightly. Paint touch up is tedious and my least favorite thing to do. Plus making sure all the parts are as clean as possible is well worth the time and effort.
I will be putting down new mylar rings around the pop bumpers though before I’m done.
It was time to lift the play field again and replace the spoons on each pop bumper switch. This is a bit of a pain. The two screws on the switch attach to the white base. Inside the white base is a small metal bracket they screw into. Only when you have the play field up, this metal plate falls out of position once the screws are removed and you need to remove the base to pop it back in.
On the bright side it was a good excuse to properly clean the base and remove dust built up in the holes.
The bright white on the new spoon is blinding 😉
With all assemblies removed, cleaned, old parts replaced and new spoons added it was time to reinstall the assemblies to the play field.
Topside, there was something else I needed to address. The missing mushroom bumper.
Thanks to an Aussie Arcade member, I was able to source the black mushroom body. The yellow caps are also able to be purchased new. The concern I had was what to do with the red posts that were also installed. Simply removing them would leave two visible holes in the play field. Not cool. The option would be to leave posts in there.
The problem though is the black mushroom body is quite small. It’s roughly 1 inch tall. That meant I had to find posts that were smaller than 1 inch (with the screw head included in the height) so they would sit under the yellow mushroom cap. If they were taller than 1″, then it would push the yellow cap up and cause the switch to constantly be closed. Not cool for gameplay.
I went through a range of red posts to try and find the right one to use (I decided on red to go with the new red buttons and red pop bumper skirts).
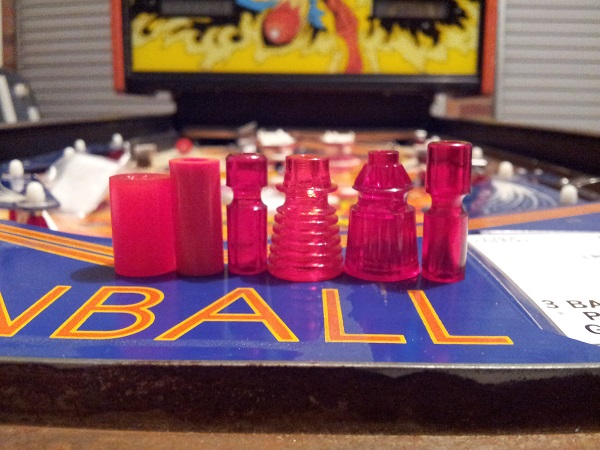
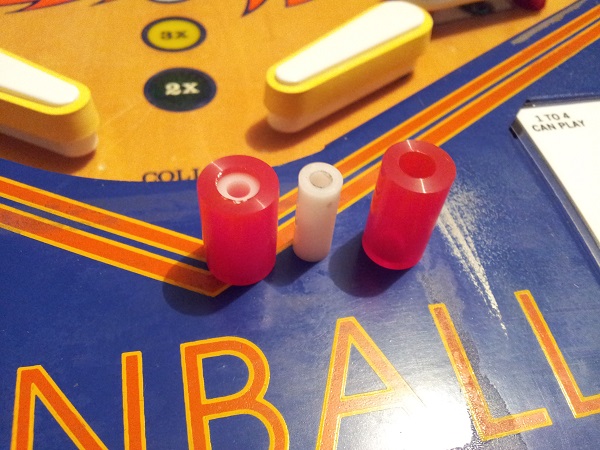
The posts on the far left ended up being the answer. Technically not posts, but sleeves were 7/8″ in height. I had some spare thin white spacers left over from my work on the Pole Position restoration which nicely fit inside the sleeve to give it strength. As an added bonus they are about 1mm shorter – allowing the screw on top to sit slightly inside the sleeve, meaning they nicely fit under the yellow bumper cap.
Here they are installed. I’m a bit sad they are there since they are not standard on the play field. But I felt it was the best option available to me. I suspect most people will not really notice them as they don’t look too far out of place.
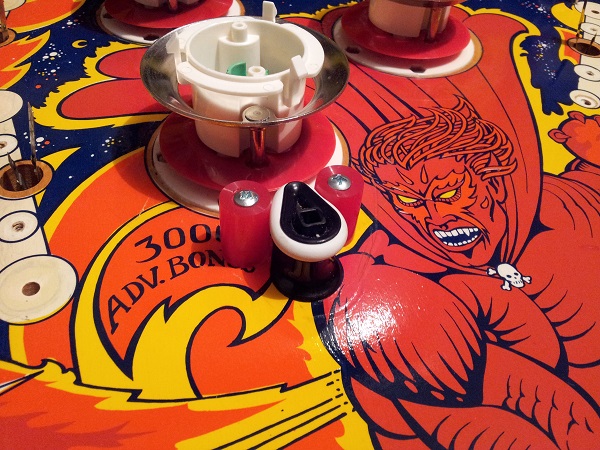
An interesting thing to note is there is also some minor paint touch up around the shoulder of the demon guy. It came up far better than I had expected and is hardly visible unless you are right up on top of it with a light.
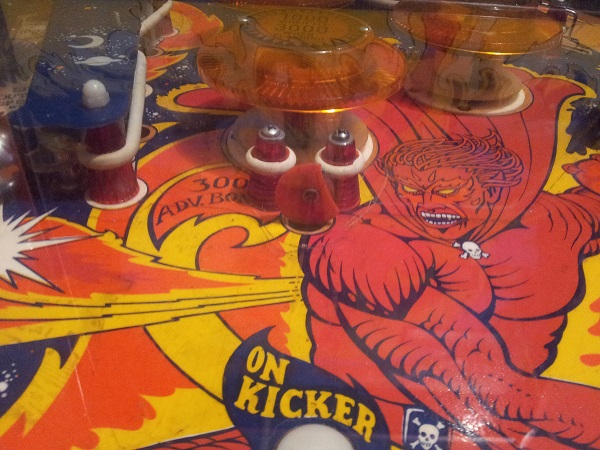
The pop bumper bodies had been reinstalled. New bodies, new orange rings, new metal rings, new skirts, new mylar rings and new globes. Play field cleaned, paint touched up and waxed. It’s looking pretty nice.
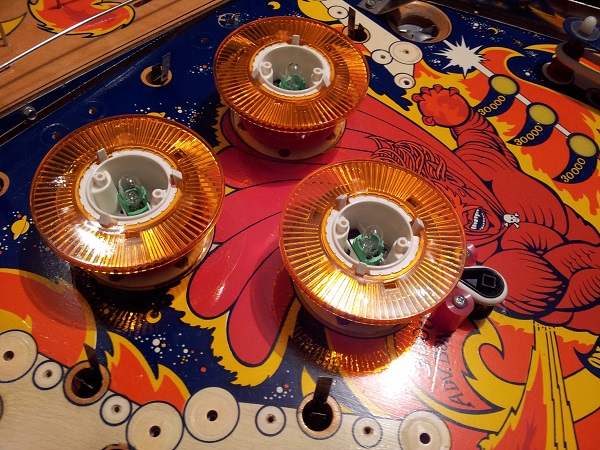
Finally, new caps installed. I’ve also installed one of the old yellow caps on the mushroom bumper, although I have 3 new ones on the way.
That’s the pop bumpers complete. Still more to do. I’m now going back over other areas of the play field and touching up and paint where it’s needed, followed by waxing. I still need to sort out the top right side and getting the top left plastics to fit correctly. But the play field is coming together nicely. Then it’s onto the artwork…