
So it’s no secret I love pinball. Not just the playing of these wonderful beasts, but (..and arguably more so) the learning about their inner workings and how to give them back their former glory. Like an overexcited apprentice, I want to understand everything right now and be able to do anything the veterans can. Thankfully I able to keep a level head (mostly :)) and respect the fact I’m still new in this area and enjoy the journey.
On my current pinball project (Fireball Classic), I had to do some minor playfield touch ups. Thankfully it was quite straight forward. But I was terrified given any mistakes could be hard to back peddle from. I also know what I did do could be done better – given experience. I wanted to get some more experience with playfield touch up and restoration and decided this could make an interesting side project to work on. If I could find some damaged playfields which could be written off in the worst scenario, then this would make a great learning exercise and benefit future playfield restoration work (like my Nugent for example).
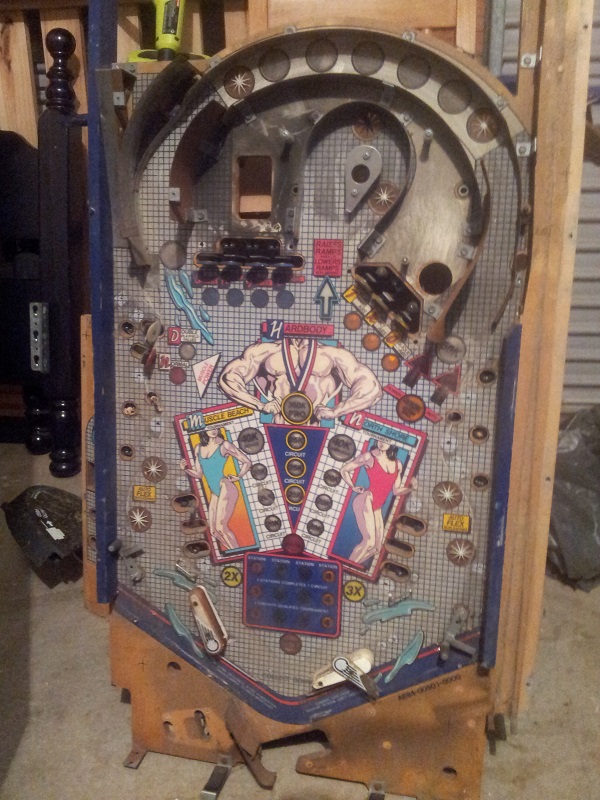
Recently I acquired a playfield from “Hardbody”, a Solid State game from Bally in 1987. A bodybuilding theme – I found it amusing there was a pinball theme based on bodybuilding. Even at the height of my gym training a few years back (where I was training 5 – 6 days week) I think I would have been embarrassed to play this 😉 But anyway, it ticked all the boxes.
– Playfield needed a good clean
– Mylar covered and was lifting
– Rusty metal parts required clean & polishing
– Chips / divots from play field
– Artwork needs touching up
– play field damage
– price < $40
I’m not sure where this project will end up. Best scenario will be the play field and parts can be moved onto loving homes where they can be used. Worst case scenario being it gets trashed (but I learn from many mistakes – which would still be a good scenario – so it’s win-win :)) At the cost of $35, I felt it was going to be money well spent. I’ll get weeks worth of entertainment out of it at a minimum!
It’s a project I’m in no hurry to finish, but will try to spend some time on it each week, even if it’s just researching methods, techniques or advice on how to proceed with certain things.
Given it’s an 80’s bodybuilding pin theme, it’s only fitting we have some quality motivation music to listen to while working on it. Here is “Maximum Potential” from Power Glove – a local band here in Melbourne who recently worked on the 80’s themed expansion pack to Far Cry (Blood dragon). Some awesome 80’s synth with Dolph Lundgren’s voice lifted from his workout VHA tape (also called maximum potential) that was released way back when. If you’re not feeling pumped by the 30 second mark, your headphones/speaker or ears are not functioning correctly. Fits the pin theme perfectly 😀
So let’s get started.
When I picked it up, many parts had already been removed. Some parts were no longer present (most noticeably the plastics and some brackets). The play field comes in 3 parts. A lower area (the large piece). An upper area (smaller piece). The final (smallest) piece is a panel that sits at the back of the cabinet, facing the player.
The lower playfield section is the largest part of it. Some of the blue side rails are still attached. These have chips missing from them so I will look at cleaning them up and respraying. The metal rails I want to try and clean. The play field itself needs a good clean and some repairs.
The reverse side still has lots of parts. Lots of rust over them sadly. I’ll see what sort of results I can get with a tumbler and wire brush drill attachment (along with some polish).
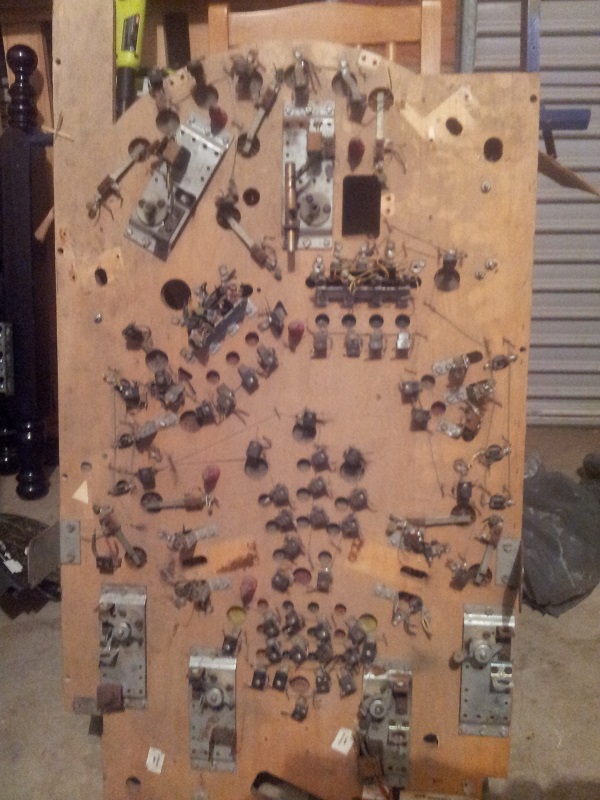
The upper section already had all the parts removed from the front and back.


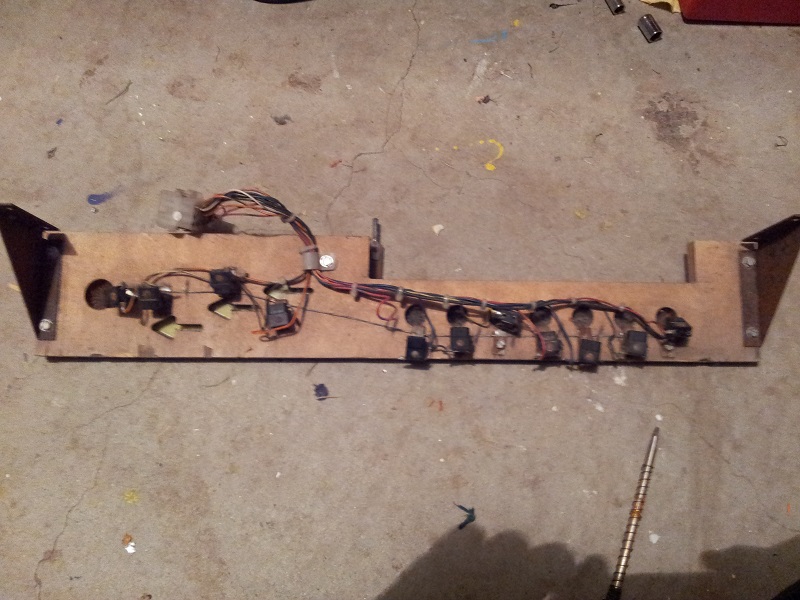
There is a rear panel that sits at the top of the play field facing the player. This has some parts still attached. This needs some paint fix up mainly and a solid clean.

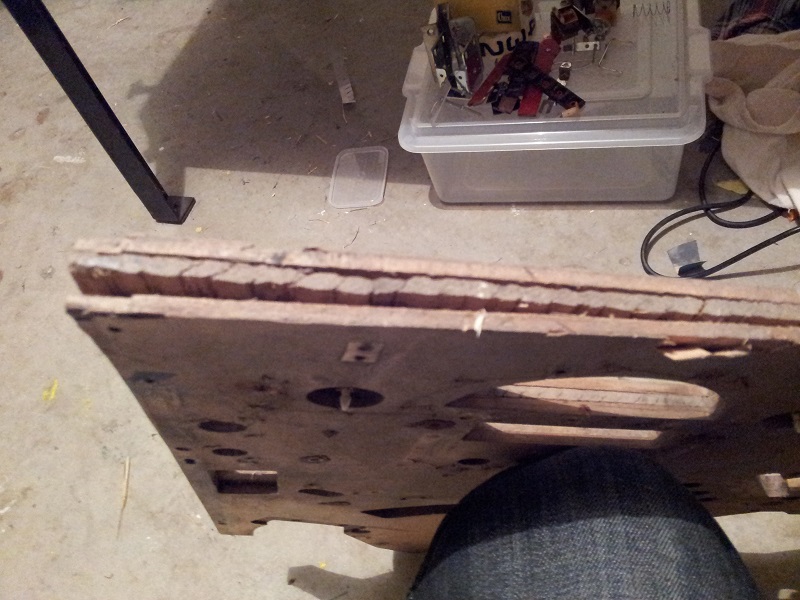
The upper playfield area has split across the top. This is going to require some attention.
So that’s the starting point. My first goal will be to get all the part off both sides of the playfield. From there I’ll give it all a general clean and remove the mylar. At that point I can evaluate what sort of paint work will be required.