
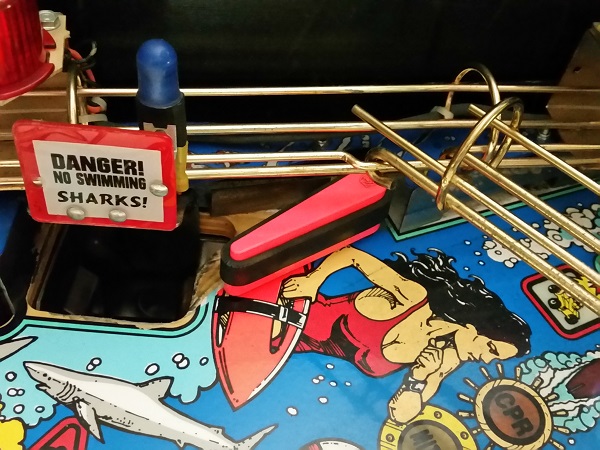
What’s better then two progress updates on a pin repair & service in the same week? Another one to go with them of course 😉 This update rounds up the final assemblies I can get at from under the playfield (besides the pop bumpers), before I move on to stripping the playfield. To kick this update off, I’ll start with the mini shark fin flipper on the right side of the playfield. I see this and think JAWS could be a neat Pinball theme. Some fun trivia – there was an Italian conversion by Europlay of an EM pin called Jaws – with a digital display and sound card added. Linky: http://www.ipdb.org/machine.cgi?id=5080. I’m thinking something more modern would be neat in terms of JAWS. Anyway, let’s service that flipper.
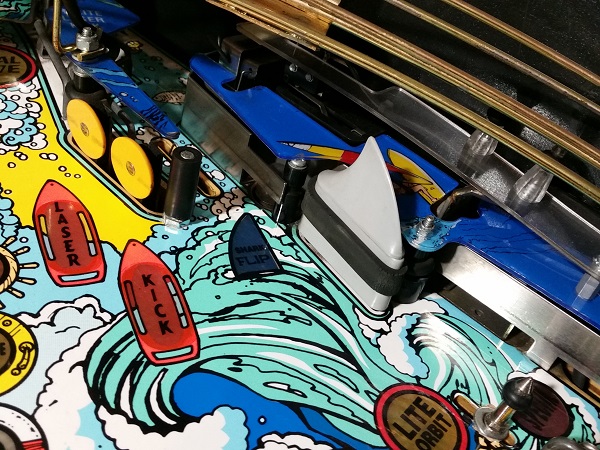
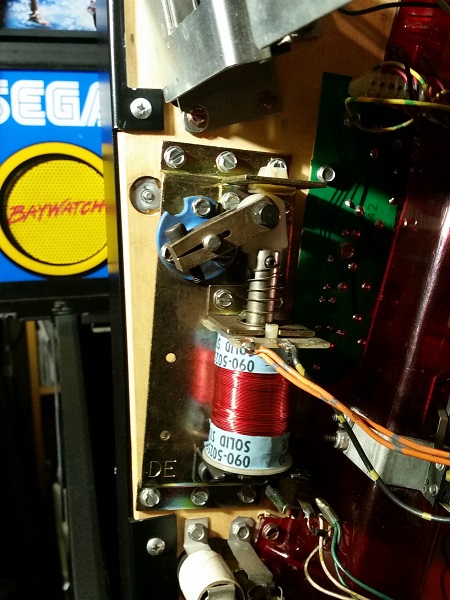
Under the playfield, we find it’s a bit dirty – which is not surprising. The assembly is almost identical to the lower flippers except it has no switch attached to the assembly and it’s return spring is handled differently.
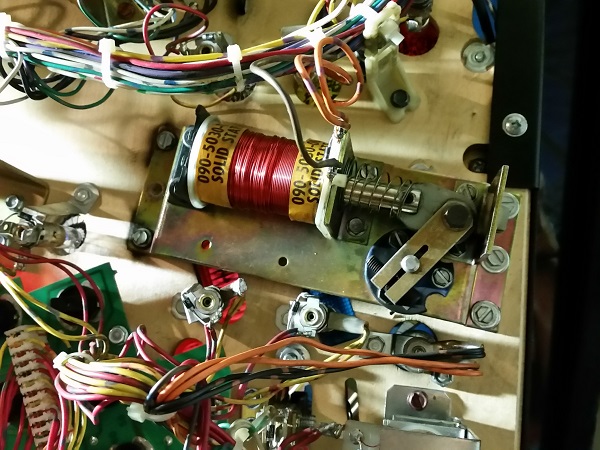
The assembly was removed for cleaning.
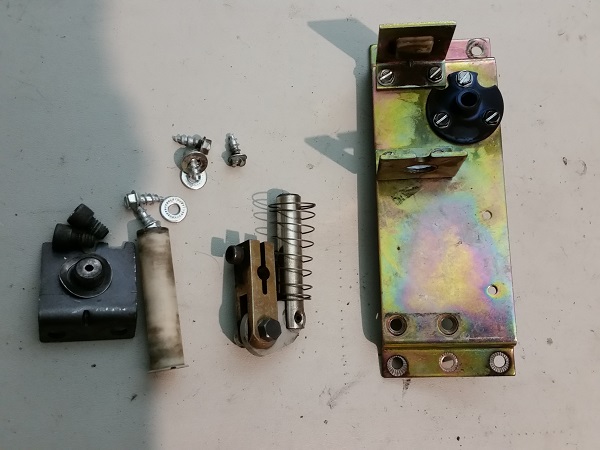
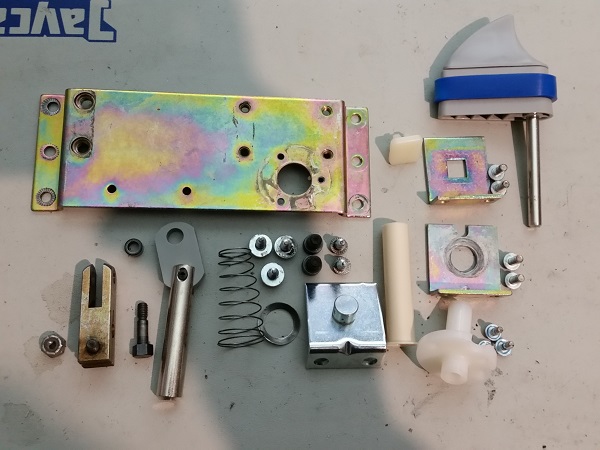
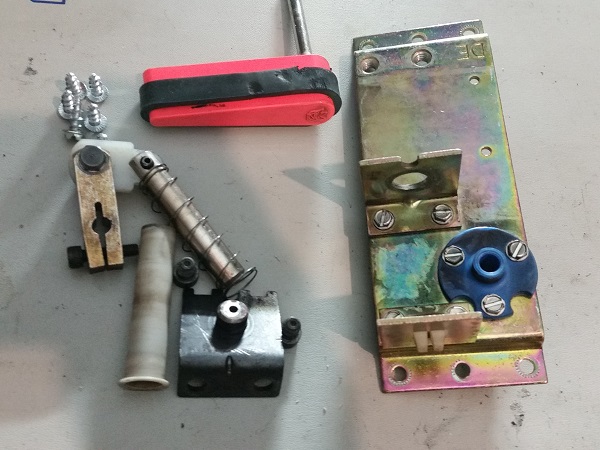
Everything was disassembled and cleaned. A new coil sleeve, bushing, coil stop, nylon stop and plunger were sourced. The flipper bat was cleaned up and polished with Novus. A new blue mini rubber ring was installed. The playfield area under the flipper bat was cleaned up and polished. With everything now clean, it was ready to be rebuilt and installed back into the machine.
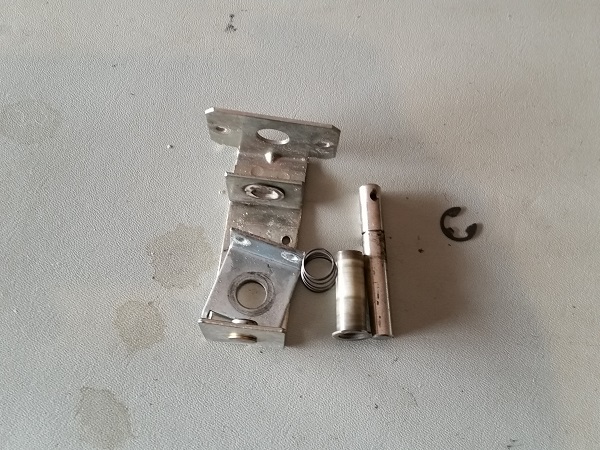
Next up is the final flipper – located half way up the left side of the playfield. Being bright pink – you can’t miss it. The bat has the Sonic logo, like the lower flippers. I love this little touch from SEGA on their machines.
Under the playfield, it’s the same set up as the shark fin – just a little cleaner.
The whole assembly was removed from the playfield for cleaning.
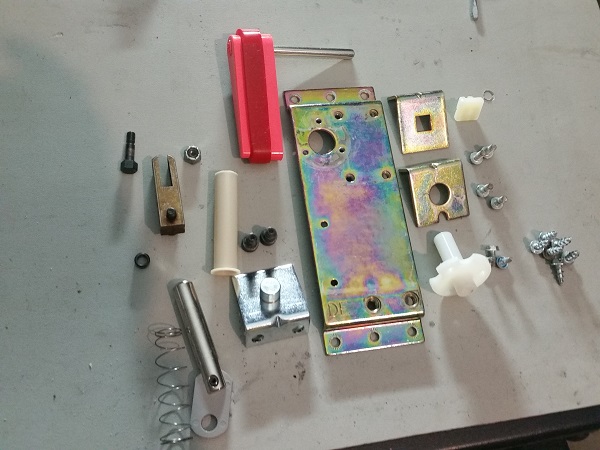
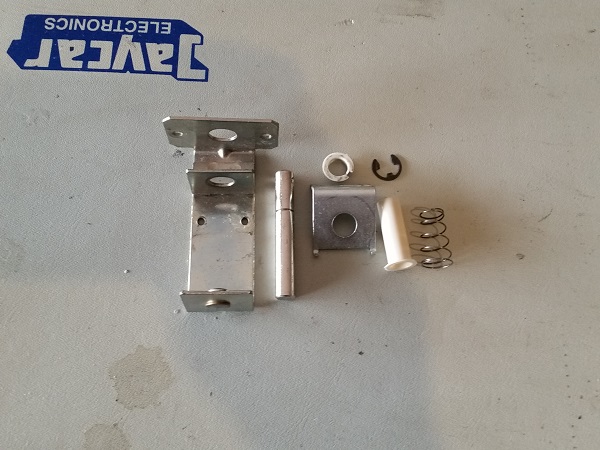
As with the other assemblies, everything was disassembled and each piece cleaned. The flipper bat was polished with Novus and new rubber added. Luckily this bat was not cracked or broken as they appear to be impossible to replace. A new coil sleeve, plunger, stop, bushing and nylon stop were sourced for the rebuild.
The playfield area around the flipper bat was cleaned up and polished before reassembling the flipper assembly and installing it back onto the playfield. All four flippers are now complete. The next major assembly for me to look at was the 3 drop target bank, which sits directly across from the pink flipper.
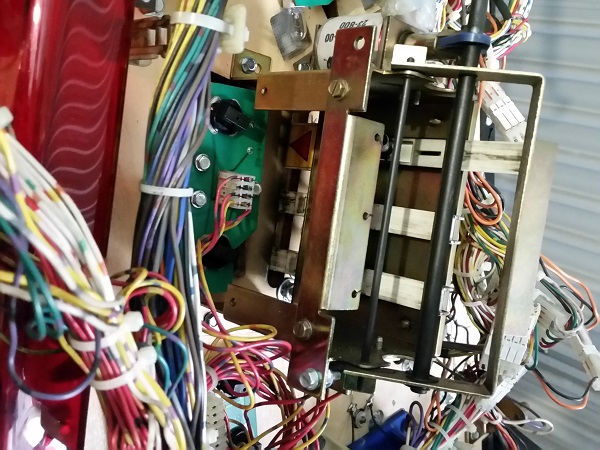
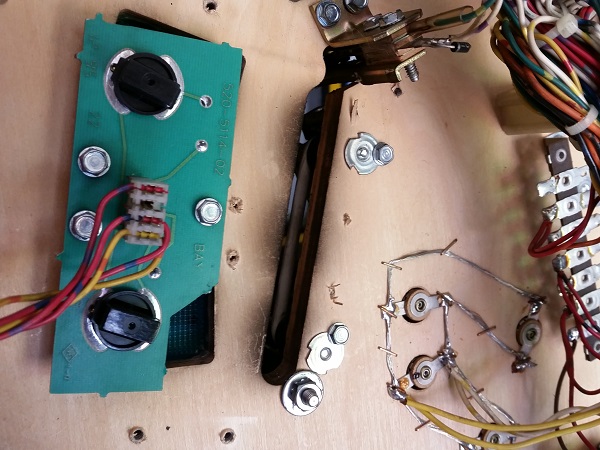
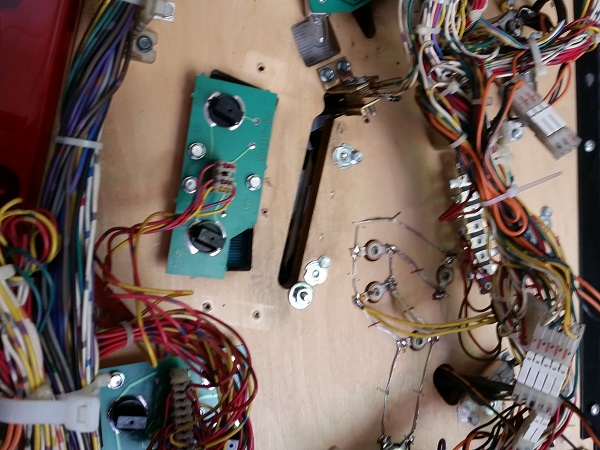
The assembly contains 3 switches and a coil, which are connected to the playfield wiring via an IDC connector. This makes it easy to remove the whole unit in one piece for cleaning. It sure does need a clean.
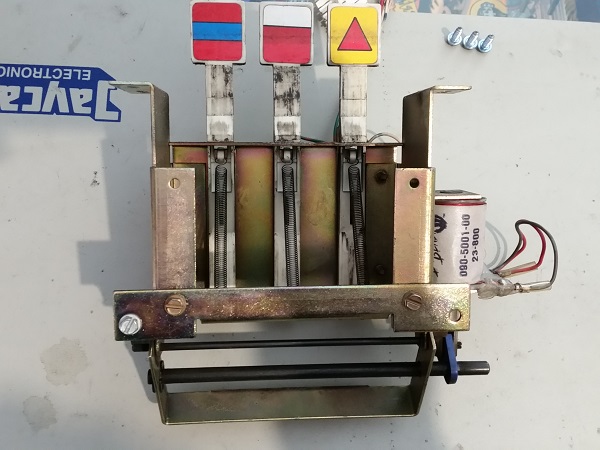
The drop targets themselves are filthy. Luckily though, none are broken as is often the case.

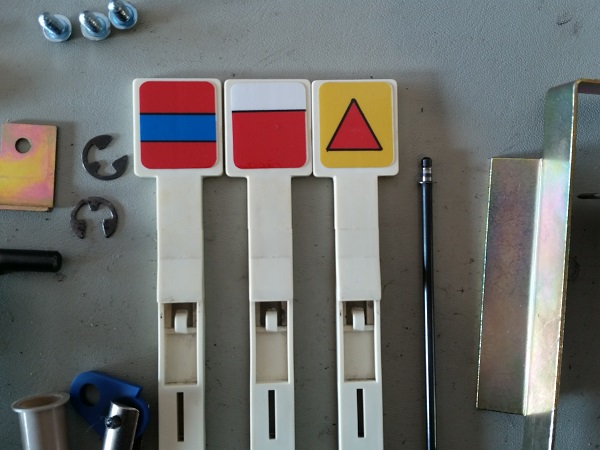
The the drop target bank was disassembled and each piece thoroughly cleaned.
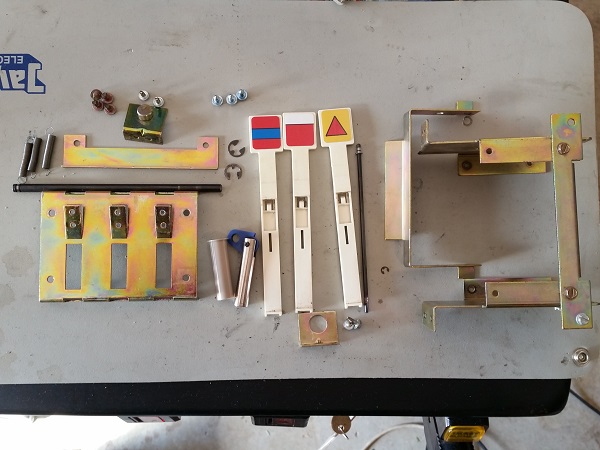
New decals were installed onto the drop targets. These were replaced as the old ones had a wear mark across the middle from years of use even after cleaning.
Before I reinstall the drop target bank, I want to clean up the slot the targets stick up through. A nice collection of black dust had formed there.
The area around the drop target slot was cleaned up and I was now ready to put the drop target bank back into the machine.
On the right side of the playfield is a kick back assembly, that fires the ball back around the top arch. It’s used as the third skill shot option and also part of the gameplay rules. The kick back assembly is located above the playfield and under parts – so I can’t get to that yet. But it is covered by a small metal door – which opens up when this assembly is accessible in game. By default, the metal door is closed.
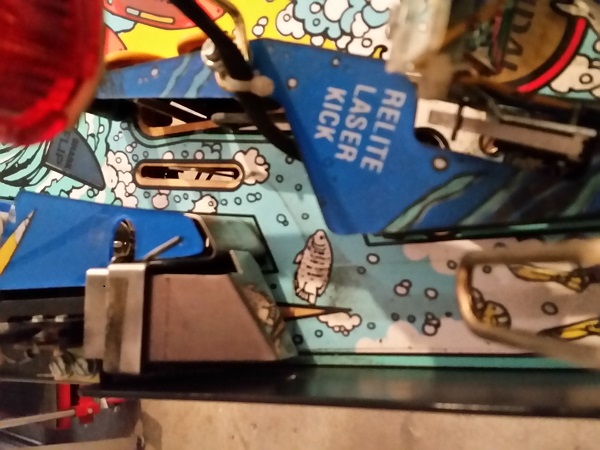
When the coil pulls the plunger in, it lifts the door and the ball can then sit in position for the kickback to fire it around the arch.
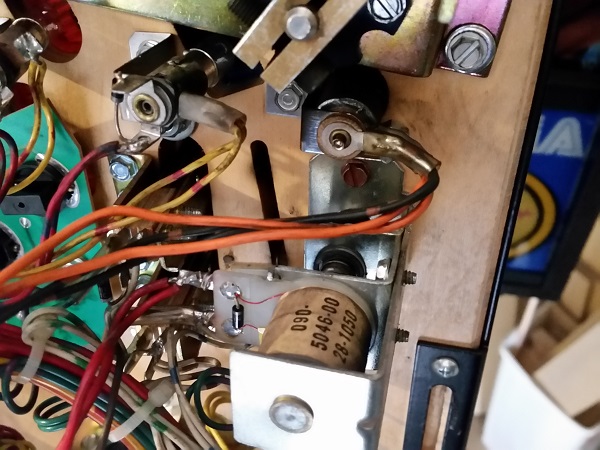
The small assembly was removed from the playfield for cleaning.
Everything was cleaned up and ready to be installed back onto the playfield. The old coil sleeve was replaced with a new one.
Next up were two vertical up kicker assemblies, which were removed, cleaned and reinstalled. I took photos of these but could not find them when it came time to do the write up. I move the photos to my PC pretty regularly after working on various parts of the machine, so I’m not sure where they disappeared to. Nothing exciting and as with the other VUK assemblies from the apron area, new coil sleeves and grommets were installed and the assemblies cleaned up. If I come across the photos in the future, i’ll come back and update this paragraph with the photos.
That’s another update complete for Baywatch. I’m now ready to strip the playfield and work on the few assemblies that live top side of the playfield. It can be a time consuming part of the rebuild as there are a lot of things that need to be cleaned. I’ll probably split that up in to 2 or 3 updates to make it more manageable. Anyway, progress continues to be made and I’m looking forward to seeing a nice cleaned game at the end of it all.