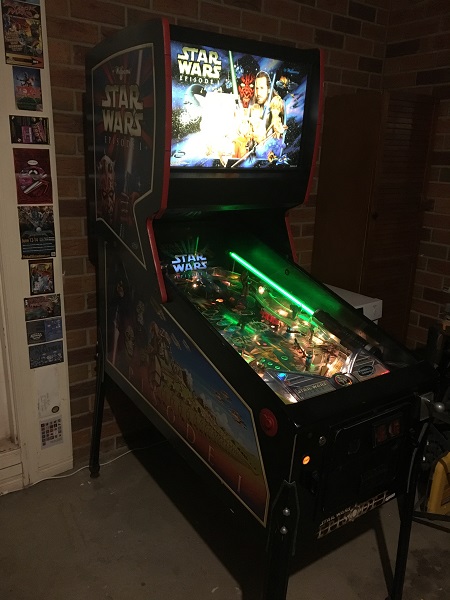
I’m a fan of the Pinball 2000 (P2K) games released by Williams and I’m excited to now be working on one – especially since it’s my own. I have a little bit of down time while waiting for the Harley CPU board, so decided to keep my hands dirty and continue tinkering. The next machine to get a rebuild is a Star Wars Episode One. It was released mid 1999 and is the very last game to be made by Williams before they sadly closed. Interestingly, you can (or at least could) buy conversion kits for this and Revenge from Mars – meaning you could run both games in the same cabinet by swapping playfields, ROM’s and shooter assembly. It’s a bit of a manual process to swap them, but still nice to have two games taking up the one spot. There were sadly only two P2K machines made (with a couple more planned – Wizard Blocks and Playboy) and it’s a shame they were not able to continue with them. I feel they are very underrated! There isn’t much wrong with the game that needs to be sorted out. It mostly just needs the assemblies serviced and some cosmetic improvements. I’ll be doing my usual rebuild of all assemblies and cleaning, along with some presentation fixes too. Time to get started!
I’ll start by sorting out the few issues I know about. The first issue I needed to address was the R2-D2 “sneaky lane” switch, which is used for earning an extra ball and awarding a skill shot. The problem is it gets stuck down once the ball rolls over it.
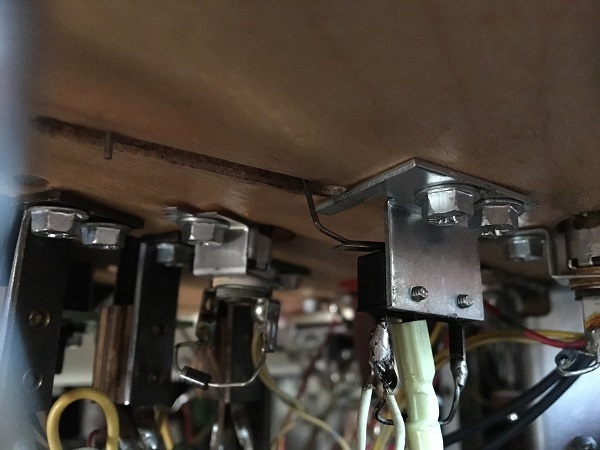
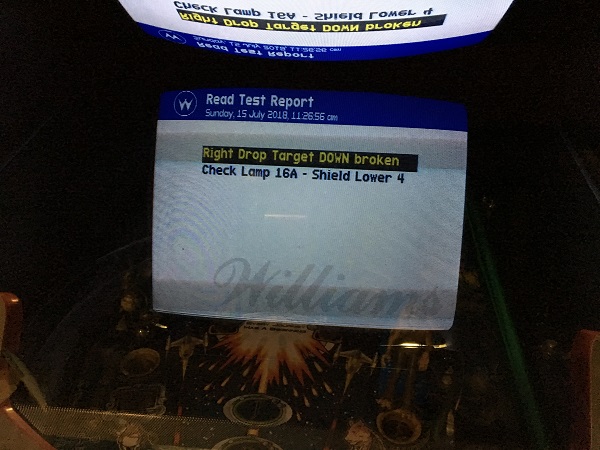
The switch arm is pressing against the playfield, which is preventing it from lifting freely. Using my switch adjuster, I gave the arm a few tweaks to prevent it getting stuck on the wood. This was all it needed and now the switch returns to it’s normal resting position once the ball passes over. The second issue to look at was the right drop target. There are two drop targets on the game, with one sitting in front of the left and right ramp entrances. The diagnostic report was telling me to check the switch.
I found one of the wires barely hanging on.
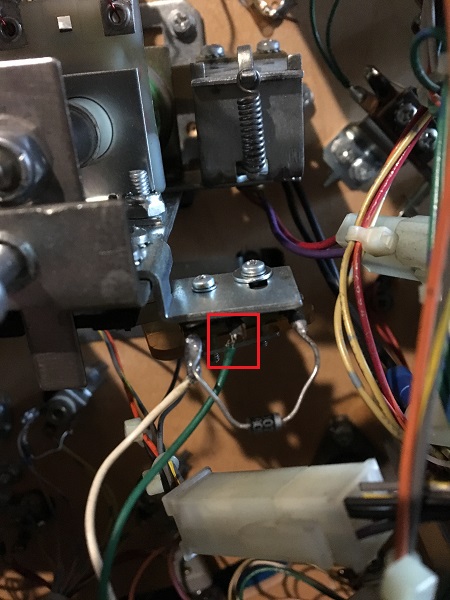
I clipped the remaining strands of the wire, stripped off some of the insulation and resoldered it to the switch lug again. I figured that was the problem, but there was still an issue with the drop target. When the target is hit, it doesn’t freely drop down. During play you can use lasers to auto drop the target, but this too only has the target to drop to about half way. A second hit usually loosens it enough to drop the full way, but can take a third hit sometimes. This has some gameplay issues where you have to hit the target a few times to register. It also causes the game to fire the small coil on the assembly to auto drop the target multiple times until it drops. I lifted the playfield and manually tried moving the target. There was a lot of resistance preventing it from smoothly dropping, so the target was disconnected and removed from the game for a closer inspection.
When the target is fully raised:
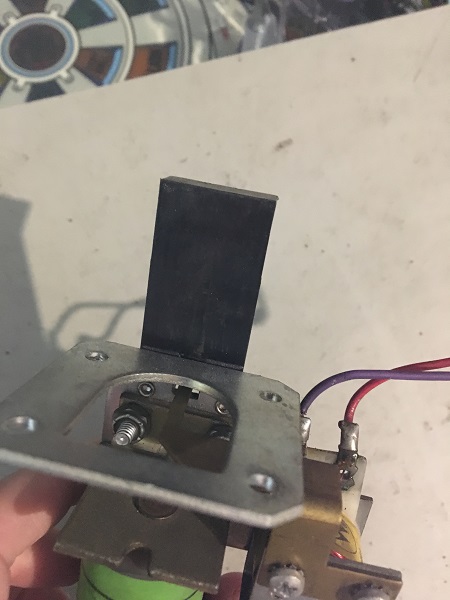
When the target a takes a hit:
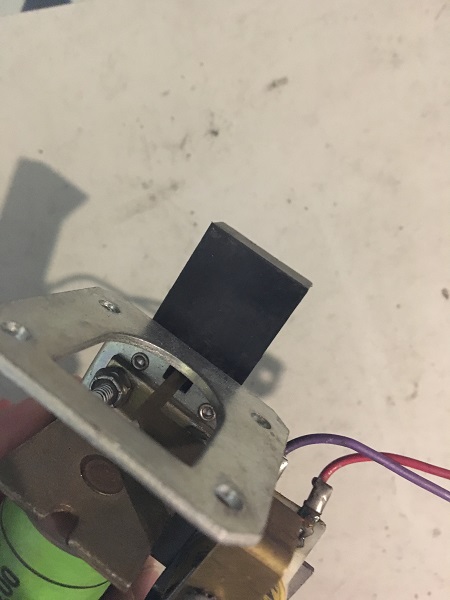
On the second hit, the target drops all the way down:
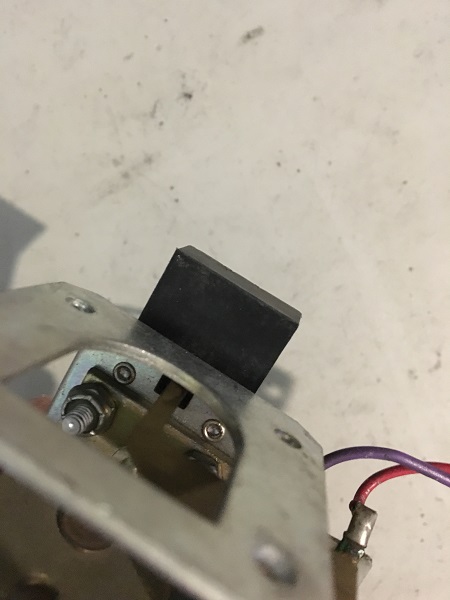
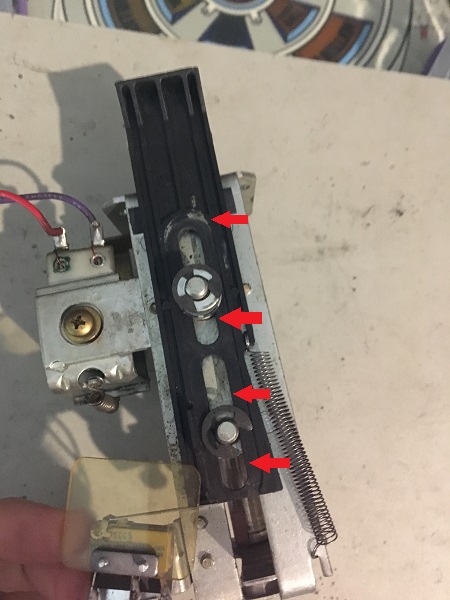
On some occasions it would take a third hit for the target to drop. On the rear side of the frame there was a build up of (what looked like) old grease that had hardened.
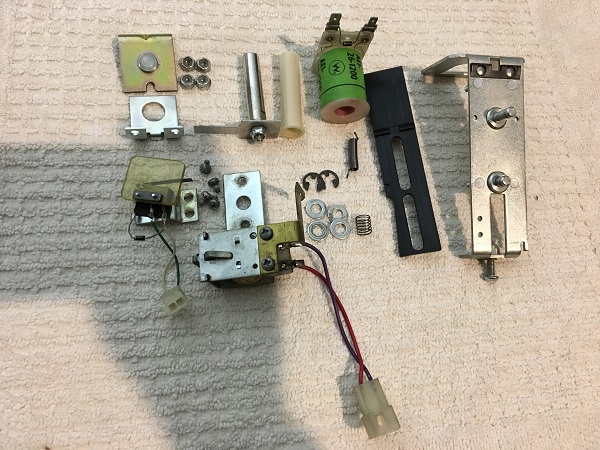
The drop target assembly was disassembled and fully cleaned. A new coil sleeve and black target were purchased to replace the old ones. I love how easily these assembles are removed from P2K machines – everything disconnects, even the coil. Now that it was clean, the drop target was rebuilt and tested. The target now had free movement and dropped immediately when hit. I checked the left drop target and it was better, but still had some resistance when dropping. There was the same hardened grease on the target, so I repeated the same cleaning process and it now has free movement to drop as well. I played a few games and now the targets feel nice and responsive, so I can tick that off my list.
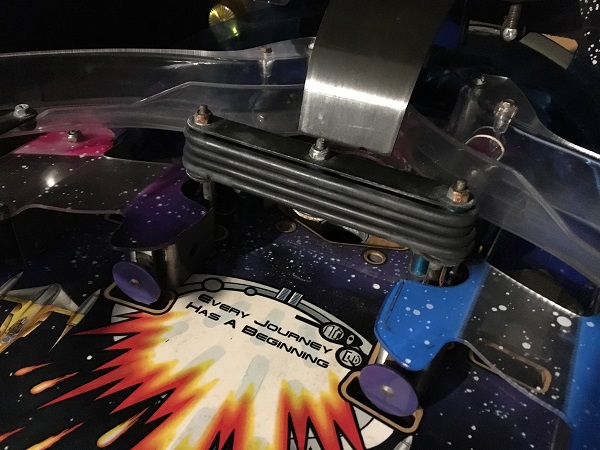
The next playfield assembly issue I wanted to address was the “shield”, which is the central target for the game. It’s made up of a wide plate with some double star posts and rubbers. This lifts up and down during play via an assembly below the playfield. It works and does move up and down, but I’ve noticed on a number of occasions it does not drop when it should. As shown here with the machine off, it’s still up and should be fully down. Perhaps it’s a similar issue to the drop targets. This one currently has too many rubbers on it too – there should only need to be two. Lucky they are there though as the ball would be smacking into the base plate and star post bases when it’s only half down.
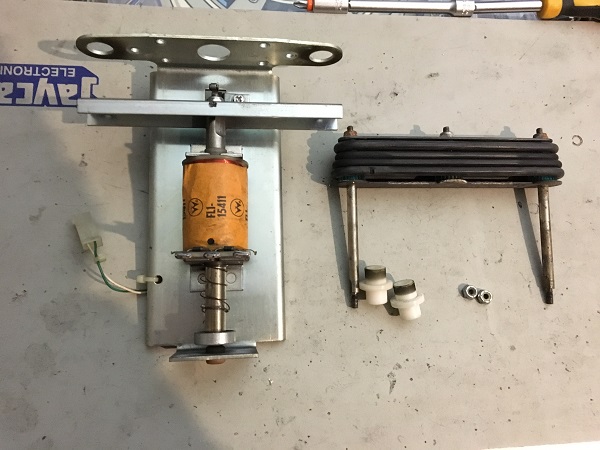
The assembly removes in two parts. Already I can see the spring is in need of replacement as it’s broken and not giving much strength to pushing the plunger back down.
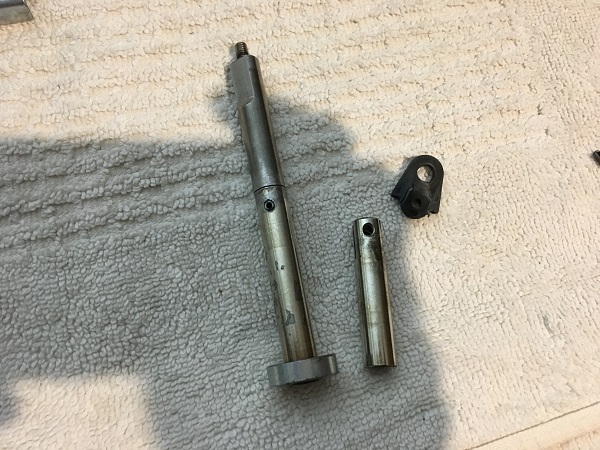
Manually moving the plunger though revealed the real issue was more than just the spring. The plunger was in fact broken into two parts. There were still remnants of the roll pin that used to connect the two sections of plunger inside the join hole.
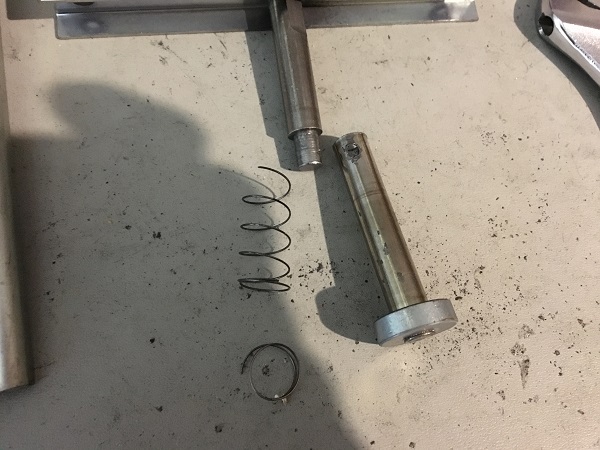
This can be repaired, but I decided to first have a look online to see if a new plunger could be purchased. After searching through my parts suppliers, none had any left in stock. So repair it is. I grabbed an old used sling shot plunger from my parts box and tapped the roll pin out. I then used it to join the plunger back together again. A great example of why you don’t throw old pinball parts out – random parts always come in handy! I found the plunger would not smoothly move through the coil tube. This was due to the top surface of the base plunger piece. It had begun to mushroom from being smacked against the top section while loose for who knows how many years. This needed to be filed back so it could move smoothly up and down through the tube to lift the shield.
A new coil sleeve and rubber grommet were purchased, along with new star posts and rubbers. I have coloured Titan rubbers to install around the game, but here I will be using black. This is probably the only time you will ever see me put black rubber on one of my own pins. The shield sits below the display area, which needs to be dark – hence the black rubber. Two new bushings were also purchased and some new lock nuts will be used to replace the old rusty ones. The spring was also replaced and the rest of the assembly cleaned up.
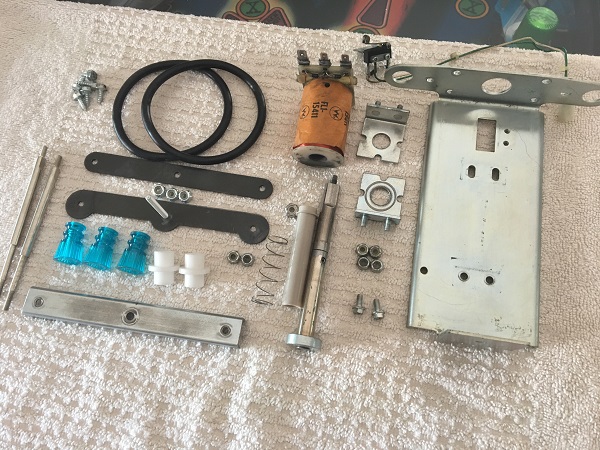
The shield assembly was rebuilt and installed back into the machine. The game was fired up and a few games played to see how the shield held up. It now dropped correctly as it should. It actually changes the game play a little, making it tougher. The ball now has more chance of rebounding back at you off the closed shield, instead of travelling through to the VUK when it was remaining open.
Next thing I wanted to do was update the software version. The game arrived running V1.0. Looking at IPDB, there were additional versions released up to 1.5 that contain various bug fixes and feature improvements. Version 1.2 has the bulk of the changes I’m interested in, containing some extra features and rules for the game. I was keen to get get that installed so looked into the process. While the software is not available from IDPB, it is available for free on the Planetary Pinball website- http://www.planetarypinball.com/mm5/Williams/tech/pin2000/software.html. Here you can download up to version 1.4 for both the serial port method and PUB (Prism Update board) method. I’m not sure why the 1.5 version isn’t there, but the PUB file for v1.5 is on IPDB. The Revenge from Mars updates can also be downloaded from the same link above.
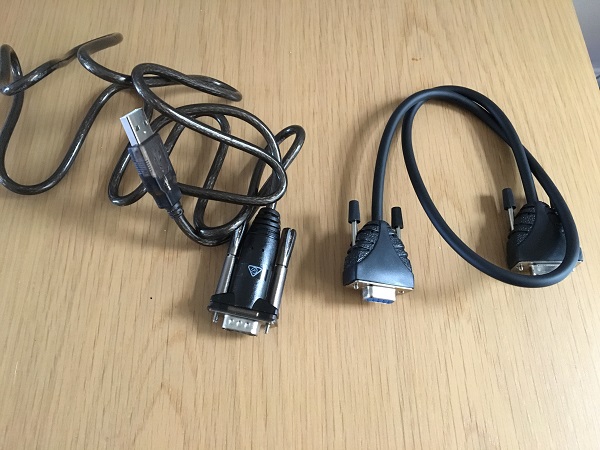
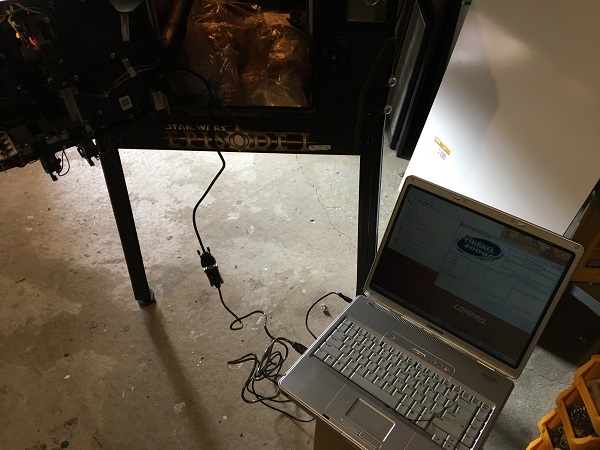
It’s not as simple as a ROM swap like on most machines though. To actually do the update, you need an old PC or laptop that has a serial port which can connect up to the Pinball 2000 machine. I don’t have a PC or laptop old enough with serial ports, so had to look at other options. I purchased a USB to Serial adapter and also a 9 pin female to female serial cable, which would let me connect up the oldest laptop I have to the SWEP1. A quick note: there is a second method for updating the software, which is via the PUB method. This requires you to have a prism update board (PUB), which you plug into your old PC, upload the update file to it, and then plug the PUB into the P2K machine before turning on. The game will detect it at start up and update the software.
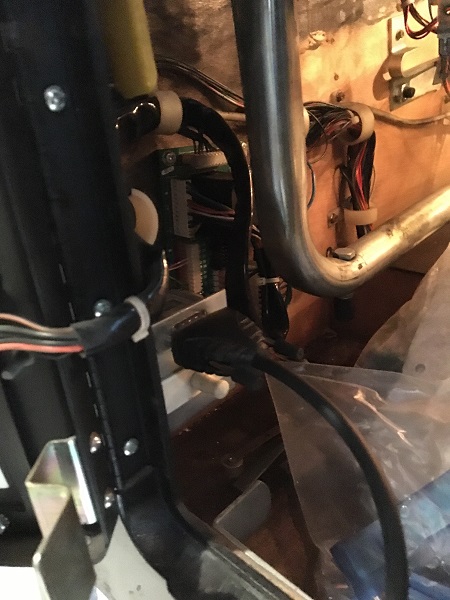
Just inside the coin door is a 9 pin serial port, which you connect the laptop/PC up to for performing updates. This then runs a cable from the coin door up to the PC in the headbox.
The next step was the grab the update manager software, which is also available on the Planetary Pinball page – http://www.planetarypinball.com/mm5/Williams/tech/pin2000/manager.html and install it onto my laptop (which is running Windows XP).
The USB to serial adapter driver was also installed and Windows now detected it. By default, it configures it as COM4, but the P2K update manager seems to only work with COM1 or COM2. Starting the manager up gave me an error saying it could not detect any available COM ports. Going in to device manager in Windows, I was able to easily switch the adapter to identify as COM1 instead. Now, the update manager started correctly.
Next step was to press the “Connect” button to have the update manager begin communicating with SWEP1. Once the connection was made, I had to scan the laptop drive for update files. I copied the update files from the link above into C:\temp. You leave it as a ZIP file – no need to decompress it. After a minute or so, the update manager reported any updates it found and was ready to go. It seems to scan the whole drive, instead of allowing you to select a specific folder, which slows the process down a little.
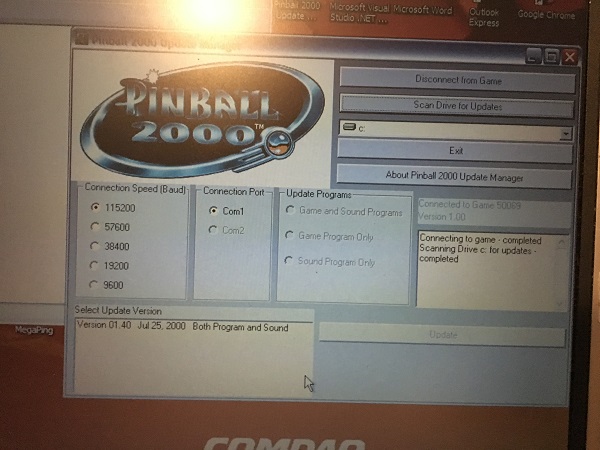
I ran in to an issue at this point. When I selected the update and pressed “Update”, the screen on SWEP1 would change to the update progress but fail immediately. It didn’t give any helpful error messages, other than “Fatal Error” and reboot the SWEP1 game. After some trial and error, I found that dropping the connection speed got it working. I had to drop to 38400, but this finally got the update process started. On the SWEP1 screen, it changed to a progress bar and timer (counting up). Due to using a slower speed, this took 40 minutes instead of the expected 10 minutes. This may be because I’m running through a USB to serial converter, or my version of windows. I’m not sure. But setting the slower speed made all the difference.
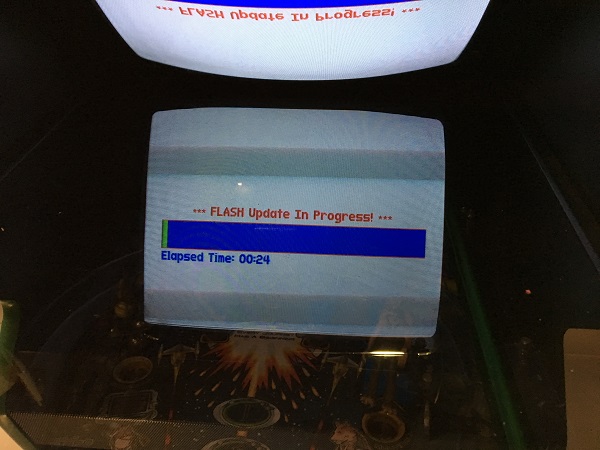
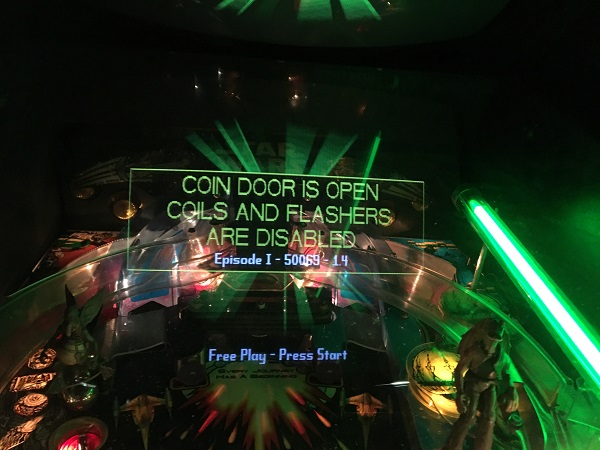
Once the update completed, the game automatically restarted and was now running version 1.4. I went in to the settings and enabled ball save on a 4 second timer (which was one feature I was looking forward to having with the update). I played a few games to make sure everything was fine and the game held together without issue. I noticed a few little extra things during play as a result of the update, so it was worthwhile doing.
One presentation issue that stands out the moment you look at the machine is the state of the t-moulding around the headbox. It’s cracked in many places around the edges and also coming away in some spots too.
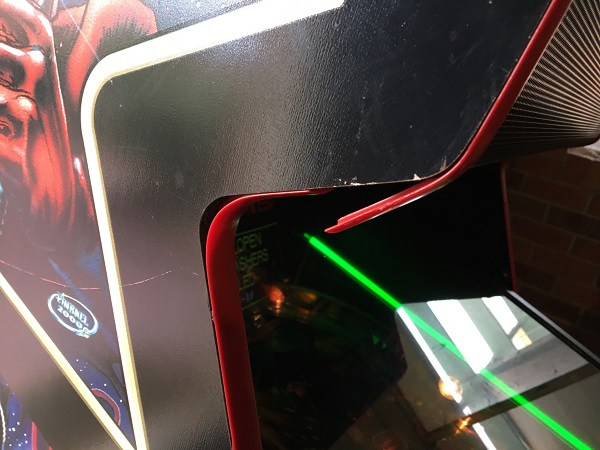
Both sides suffer from it, so I was keen to remove the old lot and install fresh t-moulding. The old stuff is quite brittle and snapped in many places while removing it. The only difficulty in removing it was where the spine had snapped away from the surface, which then had to be dug out of the slot (without damaging the cabinet).
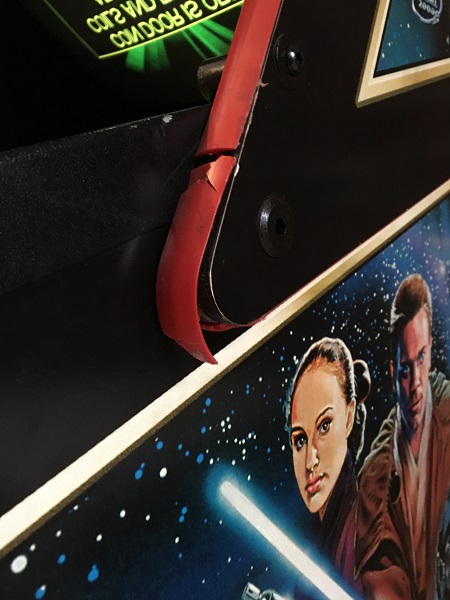
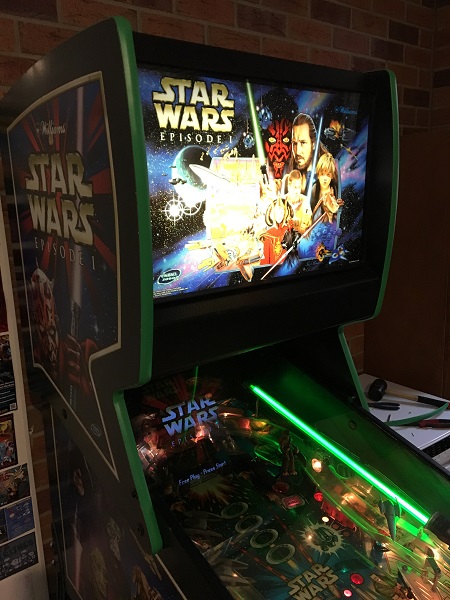
The cabinet uses the 18mm wide variety of t-moulding and I decided to go with green, matching with the light saber. I purchased a 3 meter length and that was enough to get around both sides with minimal left over. The new t-moulding looks so much better!
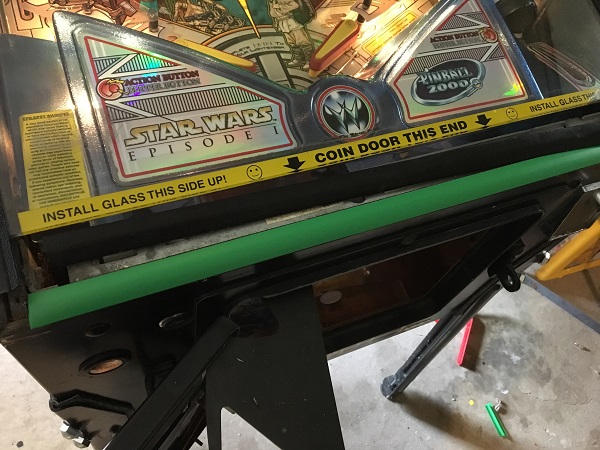
Under the lock down bar was a small strip of black t-moulding, which I suspect is there to protect the glass from scratches as you remove it. I had just enough green left over to replace it.
Next item on my hit list was the coin door. It’s not terrible by any stretch, but has some wear around certain spots I’d like to clean up. The coin entry slots are a bit mangled from its time out on site and I’d like to get rid of the coin door lock brackets.
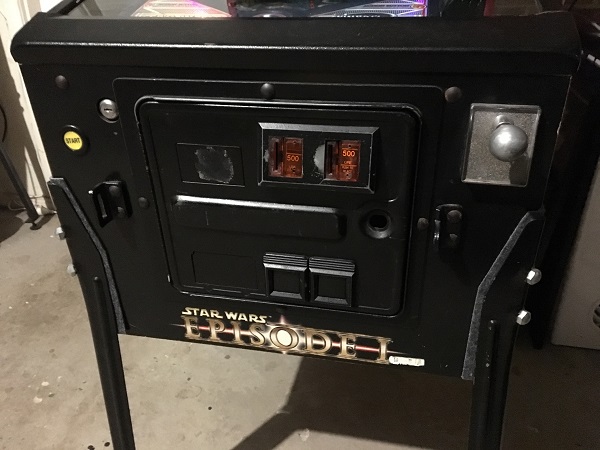
The coin door and lock brackets were removed. The brackets were put away in a parts tub, probably never to see the light of day again. The wear spots on the coin door were sanded to remove any remaining flaking bits and smooth it out. I then gave the door and it’s parts 3 coats of gloss black, followed by gloss speckle and 2 coats of clear. Since there is free time between coats on the coin door, I decided to press on and rebuild the shooter rod.
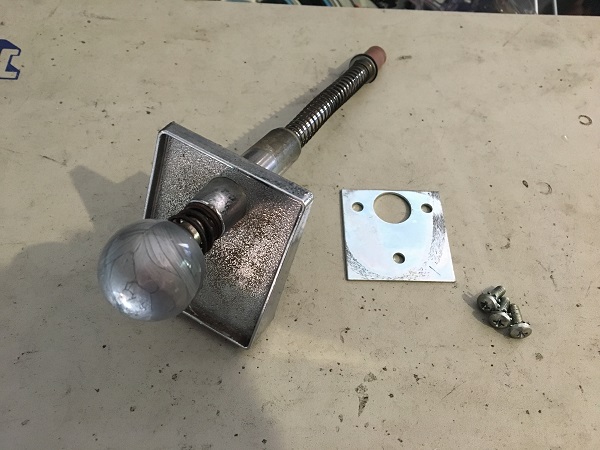
The shooter rod was disassembled and cleaned. A new coil sleeve, barrel spring and washers were purchased. A new green Titan rubber shooter tip will be used too, matching with the light saber. Light blue would probably work well here too since the apron is a nice transparent light blue. But I wanted to work a few bits of green in to match the light saber.
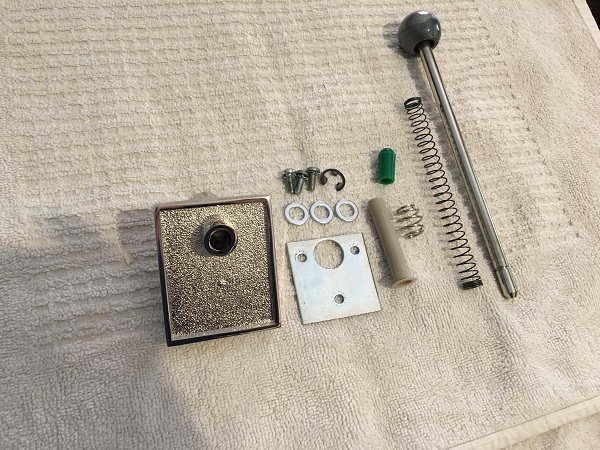
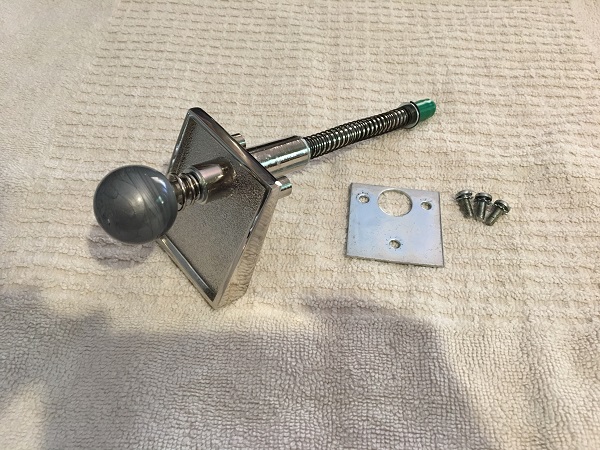
The shooter rod was reassembled and looking excellent again. It was now ready to go back on to the front panel of the cabinet.
With still more free time between the coin door coats, I decided to do something about the flipper buttons. The old ones were dirty and the right one scratched a bit from its years of service. A new set of housings and buttons were purchased. The flipper PCB’s that attach to the back of these were still good though and didn’t need replacing.
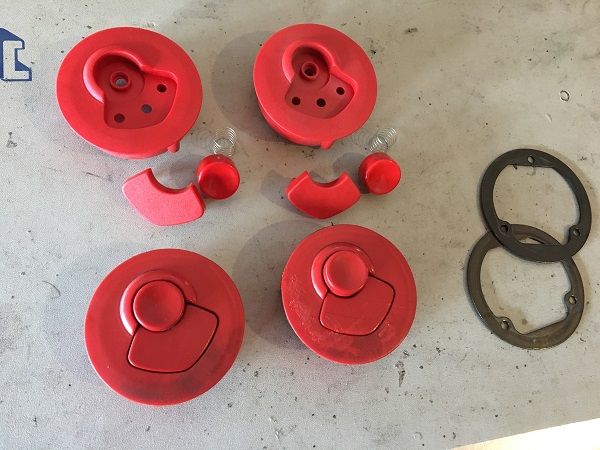
Eventually the coin door and it’s components were done and ready to be rebuilt.
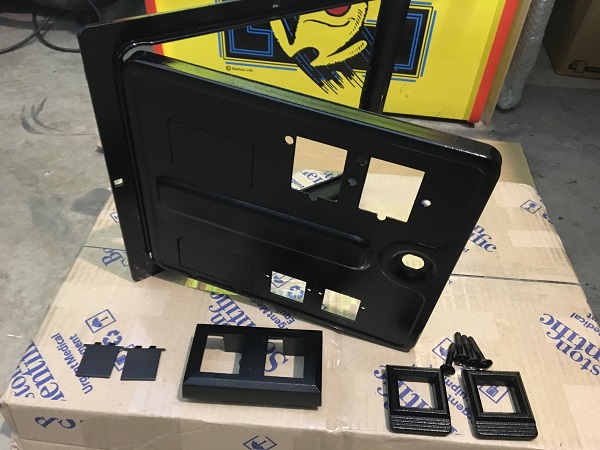
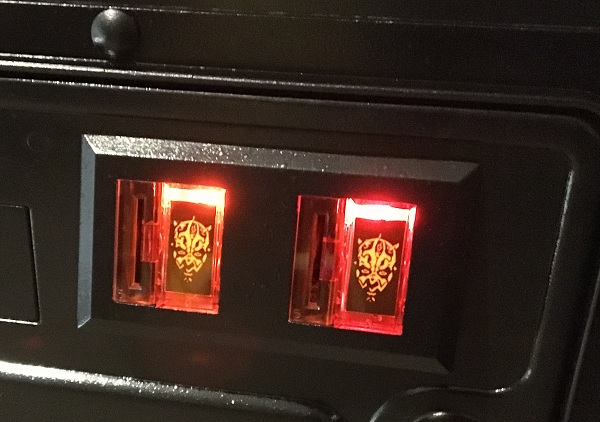
Before I put the door back together, I wanted to create some new pricing inserts for the coin reject buttons. I tried two designs, a light saber and Darth Maul, with the later winning out.
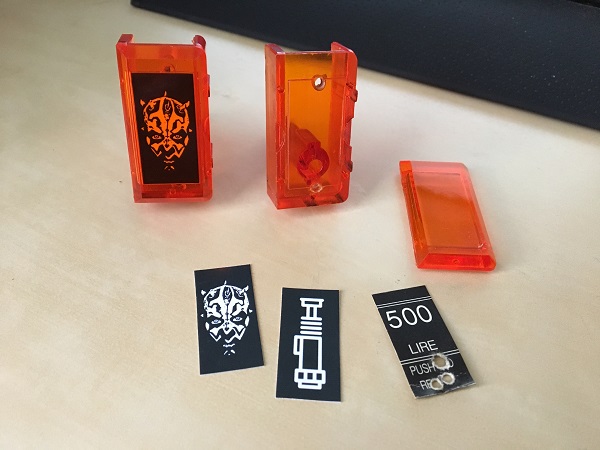
The coin door was installed back into the cabinet, along with all of its components. The bolts used for for the lock bar brackets were installed again too. A new lock on the coin door was also installed, along with new coin slot plastics.
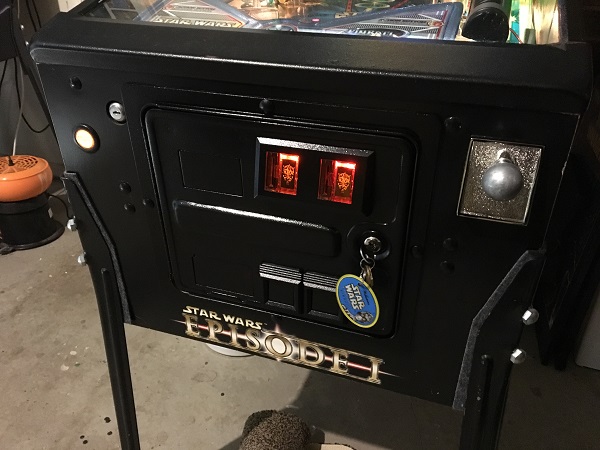
The Darth Maul coin inserts light up nicely. I switched to using orange LED’s here. It’s a shame they didn’t go with red plastic like on DE and Sega machines – it would have suited the Darth Maul insert perfectly! No matter though, this is way better than seeing 500 Lira.
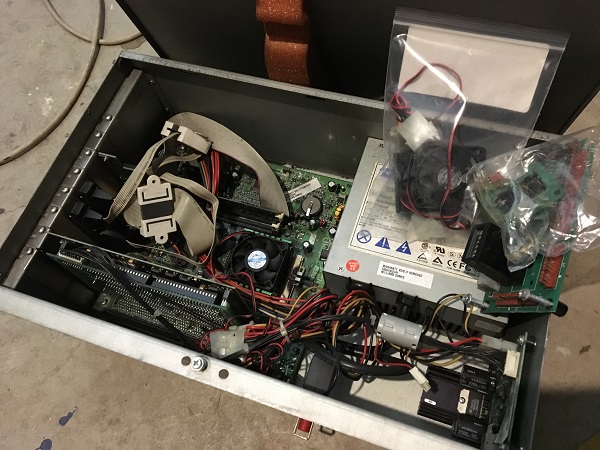
The CPU fan was a little noisy, so I decided to replace it with a brand new one. The old one has been there a long time and done it’s job. I went to Jaycar and picked up a new 50mm PC fan.
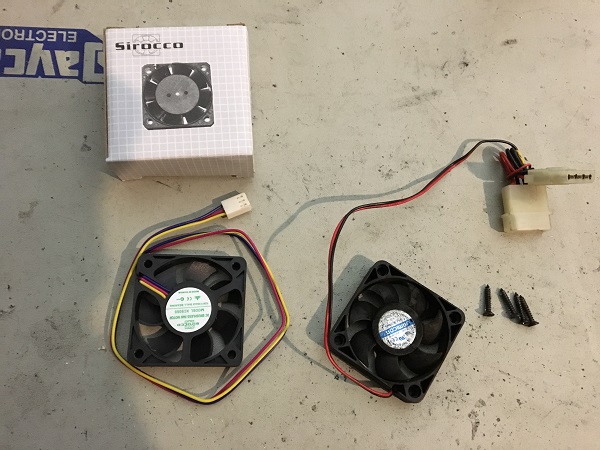
The new fan has a different connector from the original to source its power from. No matter though as the motherboard has header pins for this.
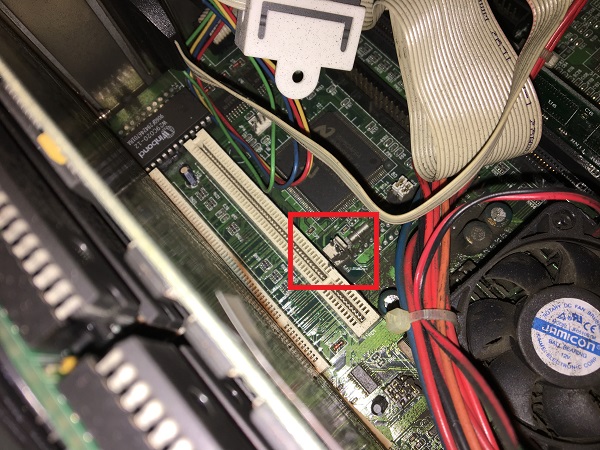
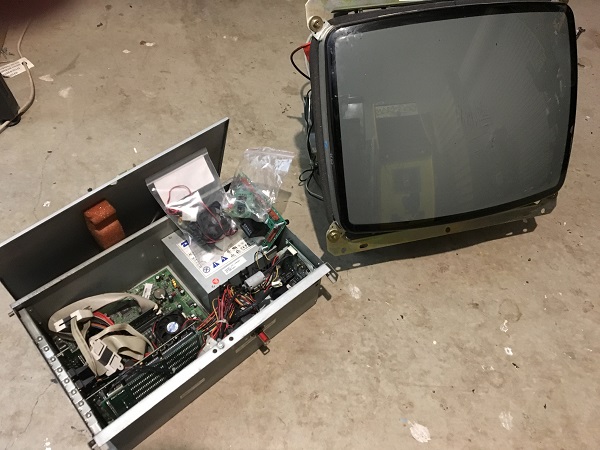
I vacuumed out as much loose dust and filth as I could from the case and replaced the fan. I also used a couple of small isopropyl alcohol swabs to remove some of the caked on dust around the heat sink and motherboard. The new CPU fan is now nice and quiet. To close out the first update, a very good mate of mine helped me out with an excellent deal on some P2K hardware. A spare complete working PC (with working prism card – you can almost buy a small country for the value of these things 😉 ), along with a spare working monitor, chassis and some other misc pieces. These will be kept safe in case ever needed.
That’s it for the first update on the SWEP1 progress. There was more presentation work done than I normally do this early. But that’s mainly because I’m having a lot of fun playing the game, which makes me reluctant to take it offline and pull it apart. Next up I’ll be getting under the apron to clean the ball trough and ball serve assemblies. I’ll also include the flippers, return lanes, sling shots and saucer assemblies in the next update too. The ‘newness’ factor will wear off in the next couple of weeks, which should make easier to take offline for a complete clean.

Hi,
great work. What color is the T-Molding? There is light and dark green in the Internet shops?
Maybe you have a link to the shop where you purshased the T- Molding ? i want to replace it on my SWEP1.
Thank you
Daniel
Hi Daniel, pretty sure it’s dark green you need. Light green tends to be the “Galaxian” green. It doesn’t help though when sites just list is as “green” and it’s not clear from the image, which green you’re purchasing. I purchased mine from GameDude.com.au – https://www.gamedude.com.au/brands/shop/p10-foot-t-moulding-green-3-meter
Hope that helps.
Cheers,
Andrew.
FYI, the T-molding under the lockdown is there so you can slide the playfield out completely without damaging the cabinet. I love that feature on the P2K pins, and it makes servicing/cleaning anything in the back of the playfield so easy!