
Something that has been been on my to do list for awhile is to make a few adjustments to the chimes. Space Orbit has a 3 chime setup (10’s, 100’s and 1000’s). The chimes work fine, but most of the grommets holding the chimes in place have aged and need replacing. Some posts are missing the nylon washers that sit between the grommet and lock nut too and these need to be replaced.
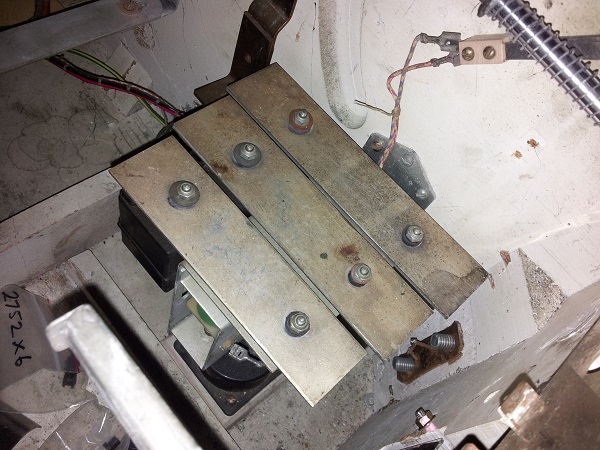
Removing the chime bars was as simple as undoing the 6 nuts on top. I removed all 3 bars and also their plungers. Some of the grommets were becoming firm while others had broken apart and allowed for a lot of movement of the chime bar. These can be purchased easily enough, so 6 new grommets were purchased along with new nylon washers.
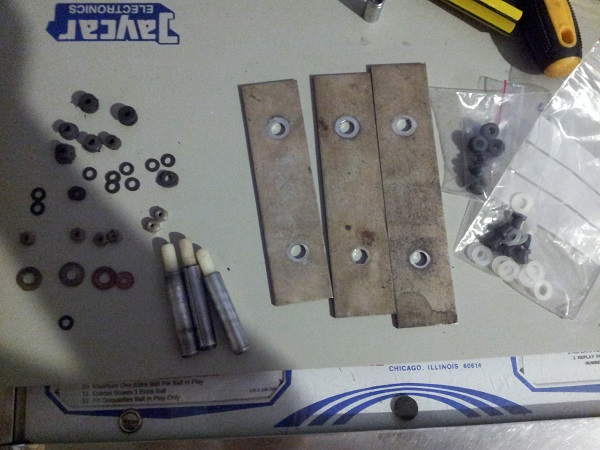
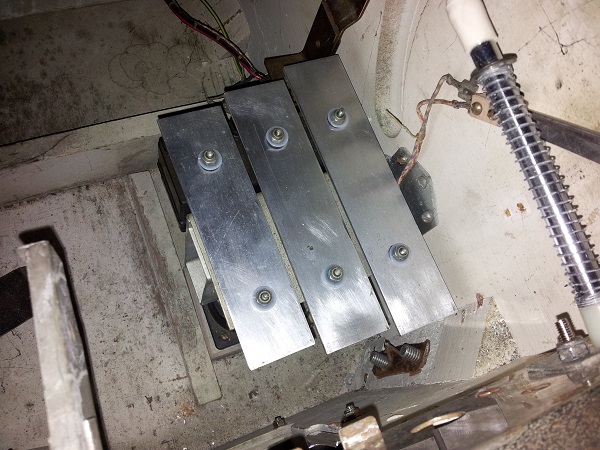
The plungers were cleaned and installed back into the machine. Nylon washers were added to the base, and the new grommets installed into the chimes. Each chime bar was also wiped down with steel wool to remove crap that had collected on them over time. Once the chimes were in place, new nylon washers were added on top and the nut put back on. The old broken grommets allowed the bars to move around a lot more than they should. The bars were now held in place much better and I’m happier with the sound each produces.
An intermittent problem I’ve been tracking was an issue where a coil in the machine would lock on – even in game over state. Finally this week, I was able to track it down. The offending coil turned out to be the one that controls the backwards step on the ball count unit.
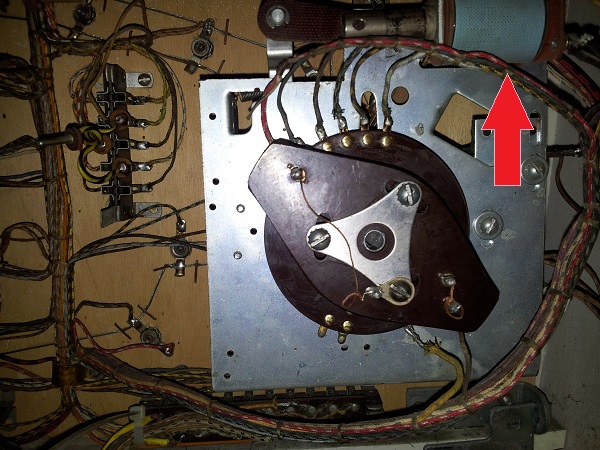
Tracking this has been a pain as it only happens every so often and manages to correct itself before I have a chance to poke too far into the machine to solve it. Because I had the rear panel off recently to look at other issues, when it occurred this time, I could easily tell the locked on coil was coming from the head box. Once I had confirmed which coil it was, it was pretty easy to track down where the problem was occurring. There are two switches the ball activates before being served. First is the trough switch, which will cause the ball serve arm to kick the ball up the ramp and out to the shooter lane. The second is the ball serve switch, which the ball runs over before hitting the shooter lane. This switch (as I mentioned in an earlier update) causes the the ball count stepper unit back 1 unit.
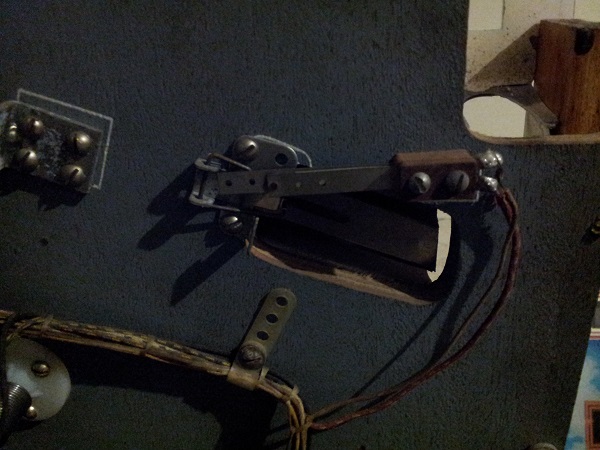
When the ball is shot up to the shooter lane, it will cross this metal switch arm, closing the switch and trigger the coil to step the ball count unit backwards. If this switch remains closed, the coil remains charged.
The metal arm on this switch was getting stuck. This would leave the switch closed (even once the ball had passed it). I could manually recreate this issue by pressing and holding the switch in – I could then hear that horrible stuck on coil sound that no one wants to hear. Even in the game over, holding this switch in will cause the coil on the ball stepper to charge and stay charged until the switch is released. The switch gap was healthy, but the metal arm that activated the switch needed a clean and small adjustment to prevent it from getting stuck when pushed down. I’m glad to finally have this one sorted as it’s been bugging me for awhile.
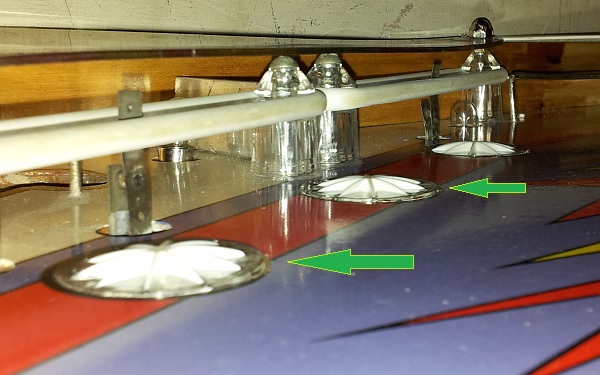
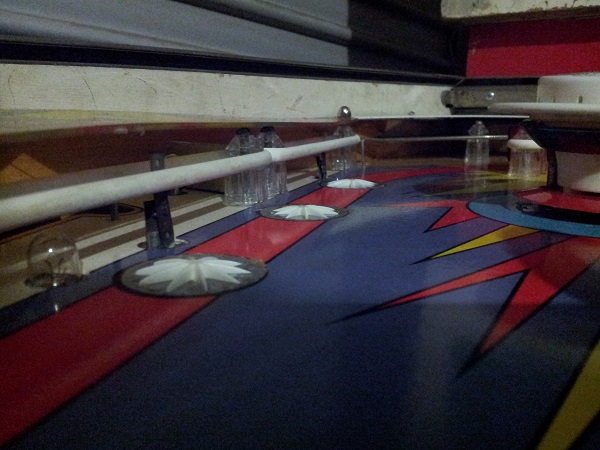
Now to look at a gameplay issue. A big part of the rules are 6 star roll overs that appear on the playfield. To activate add-a-ball mode, you need to roll over all 6. Sounds easy. But it’s not and it’s made even more difficult by the fact three of the six inserts are raised. Two of which I find impossible to hit off the flipper – for these I rely luck from the pop bumpers. I dream of making a nice shot off the flipper to roll over all 6 in one hit. Time to flatten those inserts out and bring that dream shot into the realms of possibility.
Removing inserts is nothing new and not too difficult. I removed the white star piece from each of the three first. Under the playfield I also moved the switch out of the way and the two bulbs that light each insert. Applying heat to the base of the insert with a hair dryer, the insert and its glue were heated up. Once warm, the insert was gently tapped out with a socket piece covered in a soft cloth and a rubber mallet.
Next I got my dremel tool out and cleared away the old glue from the walls of the hole. Being careful here not to make the hole bigger – only to remove left over glue. I also trimmed away any glue still attached to the insert itself. Fresh super glue was applied to the walls of the hole and the insert put back level into the playfield. These steps were then repeated for the other two inserts that were raised. The ball can now roll smoothly over each insert from all directions, which will allow each to be activated via shots from the flipper.
That’s all for this update. I haven’t managed to get any further with the 50,000 point setting on Novelty mode yet.