
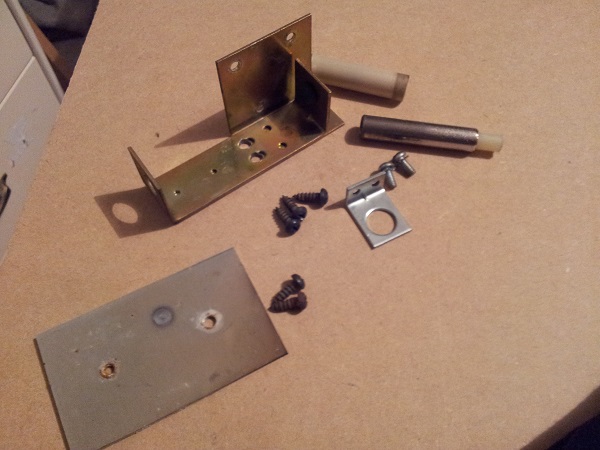
First off the bat in this update is the ball eject assembly. This is the guy that serves the ball up into the shooter lane. Nothing is wrong with it other than it needs a good clean (although I have to admit it’s the cleanest part of the ball trough on this machine).
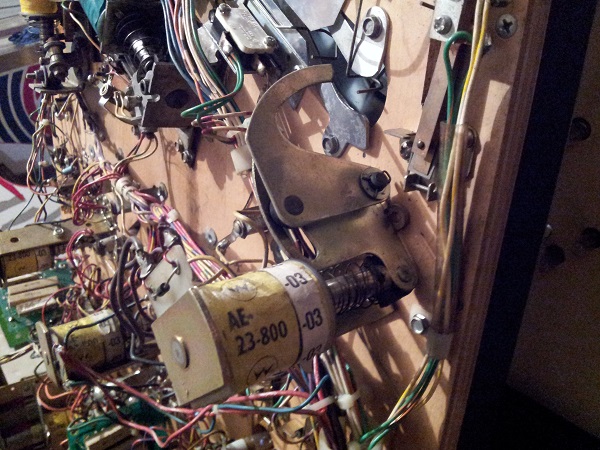
The assembly is made up of two parts attached to the playfield. The first is the coil stop, coil, guide and sleeve. It’s attached nice and firm with 4 screws and the plunger guide is attached with lock nuts so it won’t budge. The second part is the actual plunger and cam. This is also attached to the playfield. With all the parts removed I put them out ready for a clean.
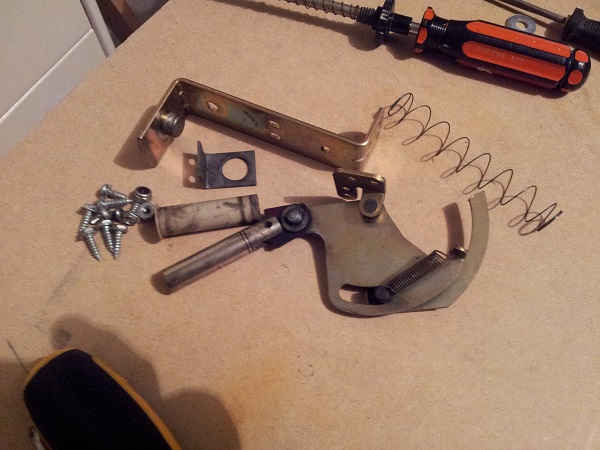
I cleaned each part and managed to remove quite a bit of crap that had built up over the years. The old coil sleeve was tossed as were the two rusty springs. A new sleeve and springs were added in their place. It was now ready to be assembled again.
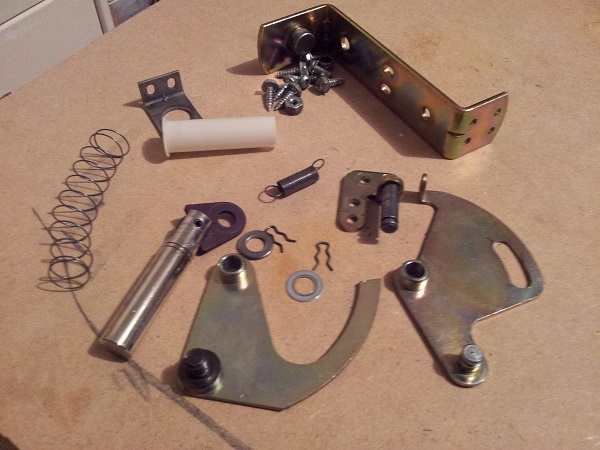
..and back together again, ready to be installed back into the machine. it now feels (and sounds) much better in operation.

That finished off the work I wanted to do for the apron and ball trough. I still need to print up some new instruction cards and will probably do that over the weekend.
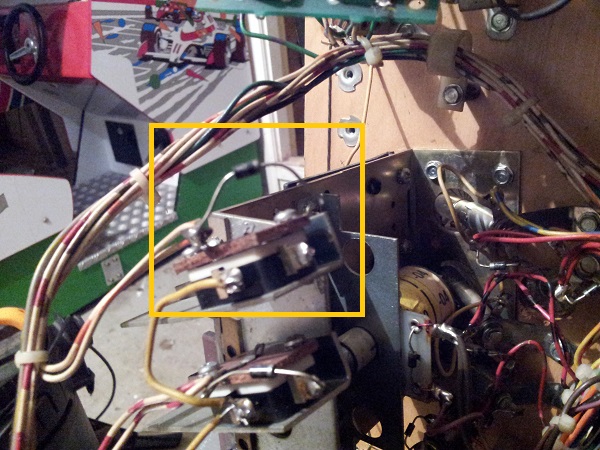
Next up was the knocker. The knocker really is straight forward as it’s nothing more than a coil, sleeve, bracket and plate. Never the less, I wanted to give them all a clean. In my other 3 machines, the knocker has been located in the base of the cabinet (generally towards the front). Here it’s located in the top right of the headbox.
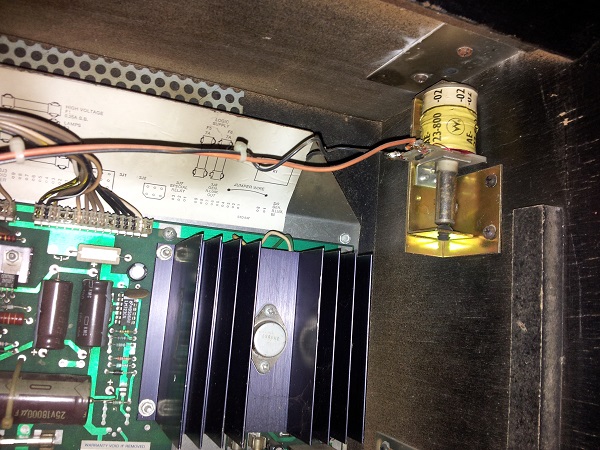
Removing the knocker assembly was quite simple, although the power supply did manage to get in the way of the third and final screw. All parts were removed for a clean.
A new coil sleeve was added and the striking plate was flipped around. Everything was then installed back into the machine. An interesting point I read in the manual was the game can be configured to fire the coil on a free game/special but not award the free game. This was/is intended for use with a redemption component if the operator chose to use one in lieu of free games. I found it interesting that manufacturers were thinking along these lines back then and it got me to thinking about how much influence operator feedback perhaps had back then to see features added to the machines to maximise profits.
While in the headbox I wanted to replace the dodgy fuse that was on the flipper board. The fuse had blown, but a wire had been soldered onto the fuse to bypass it.
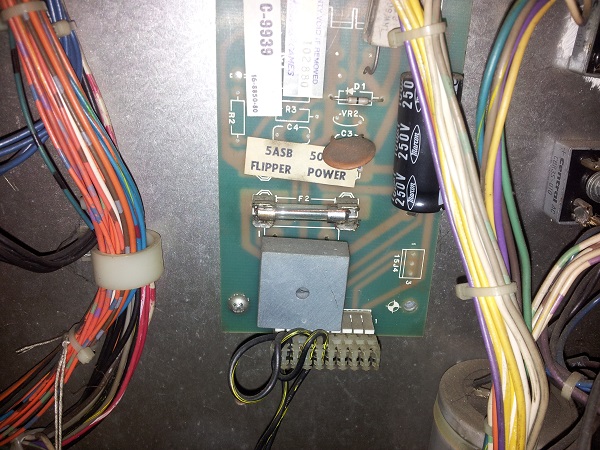
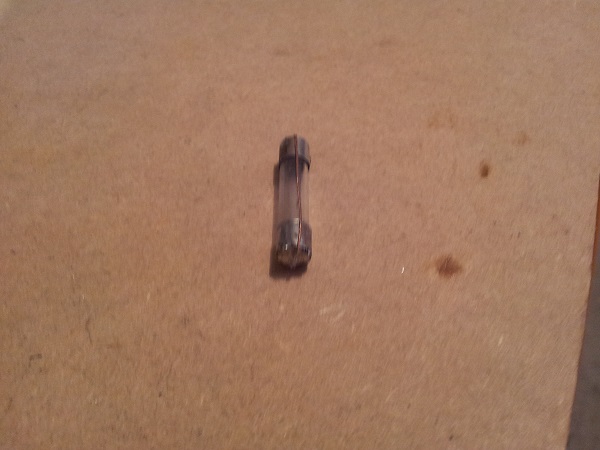
This was replaced with a new one as per the manual (5A slow blow if I recall correctly).
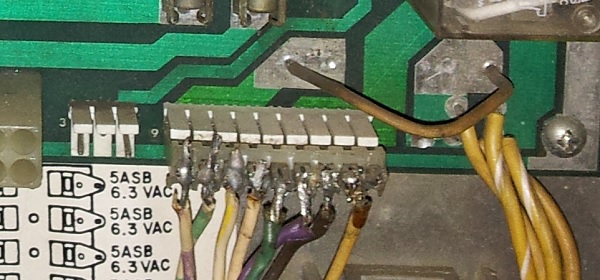
At this point I wanted to investigate the hum I was hearing as the lamps danced in attract mode. Firstly, I added all the screws back into the MPU board, sound board and power board. There were a few screws missing in each, but I got some help from PSPA to match them easily enough. I fired the game up and let it go through attract mode for a minute. The hum was improved, but still noticable. So the screws had made a difference, but I wanted to see if I could get it even better.
I decided to removed each of the 3 boards (MPU, sound and power) and clean the grounding points on each one. I used some very fine 1500 grit wet and dry to lightly clean the contact points on each board. I then did the same on the metal screw holes in the headbox to ensure a clean connection was being made. After wiping away any left over dust I reinstalled the boards and fired the game up again. The results were even better. There is still a very -very- slight hum, but it doesn’t seem to be in sync with the lamps like it was before. It’s about 100 times better than the other night now, so I’m really happy with that.
Something I want to look at shortly on the power board is one of the connectors. This doesn’t look reliable at all, so want to redo this connector. Any thoughts on where to source this connector and a tool to crimp it?
At this point, I figured I’d put some credits into the game and test out the switches and audio a bit. Since I’ve got parts missing from the playfield, I can’t play a game yet, but I was keen to see how the game held up once started.
I started up a game and tested out roughly 90% of the switches and lamps. The game held together really well. I “played” through an entire game, and found all the correct sounds were playing and the switches were all responding well. To say I was happy would be an understatement 😀
There were two noticable issues though. Firstly the flashers on the left side were not working properly. The second was the drop targets. I manually hit all 3 targets, at which point it should advance the planets and pop the targets back up. This didn’t happen. The targets did reset though when the 15 second timer ran out. So the coil was working, but the game didn’t detect all 3 targets down.
Switched off the game and lifted the playfield. Naturally, I forget to remove the balls first and they went flying. On a side note, I can’t believe how many times I forget to do this. There are times where I’ll be mentally saying “OK, remember to remove the balls first. Remove the balls before lifting. Remove them. Remove them” *lifts playfield* – Too late. “Aww crap, did it again..!”. Anyway…
I checked the switches and could hear then click as each target was dropped. It was then I noticed an issue on the left most switch – the diode had become disconnected from one of the terminals on the switch.
I soldered this back into place.
Just further across from the drop targets was one of the lamp boards. I could see one of the resistors had become detached at one end. I’ve read this is a common issue due to the stress and heat these things cop during play. For now I’ve soldered the resistor back into place, although I have a number of spares I could turn to if needed.

With the done, I put the playfield back down and started the machine up again. Tested the drop targets and they now detected all 3 hit. The game advanced the planets and reset the targets. The flasher lamps also worked properly again. I also scored a match at the end of this test game and head the knocker go off, along with the lamps on the topper – so those are all working nicely too.
Really happy with how the machine is coming along so far. It’s a slow process at the moment, but given how the game held up tonight when testing out the lamps, switches and coils I’m feeling confident it’s going to be in great shape at the end. The visor works too – not sure if I’ve mentioned that yet. The 5 drop target assembly goes up and down as does the visor which means the motor is working correctly.
Still lots to do, but really looking forward to getting this completed and inside the house 🙂