
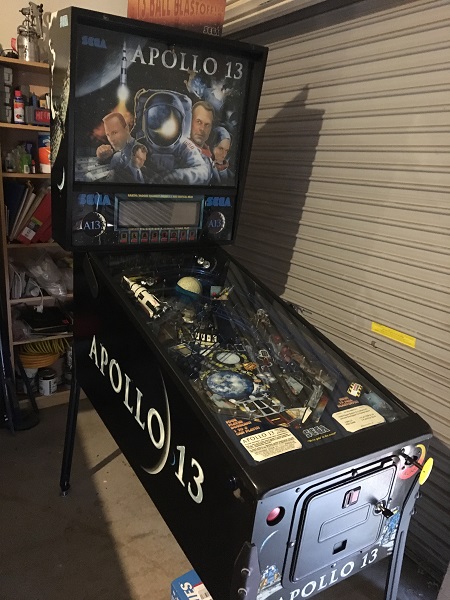
Free time & empty space. Who needs it? Well, I do.. but I enjoy working on pinball machines too, so those things have to wait. I didn’t get to enjoy 5 minutes of free space this time before the next game arrived for me to work on. In fact, I had a small shuffle around to create some extra space for this additional machine to work on. The freshly cleared area was instantly filled with a beautiful Apollo 13 from SEGA. I say beautiful because the condition is actually really good, with only a few small spots that need addressing. It’s Australian delivered and spent most of it’s life in a home. The game was released towards the end of 1995 and has so many balls (13) it needs two troughs to store them all. You’re up for a slab of beer every time you need to replace the set. That’s something to think about 😉 The game arrives with one known issue (sound not working), which will be my first item to address before I begin working my way through the game like I normally do. Although the game is reasonably clean on top, it looks like it hasn’t been given a good service in a long time (if ever) as there is a nice build up of black coil dust across all the assemblies below the playfield. I’ll be going through cleaning each one and replacing parts where necessary.
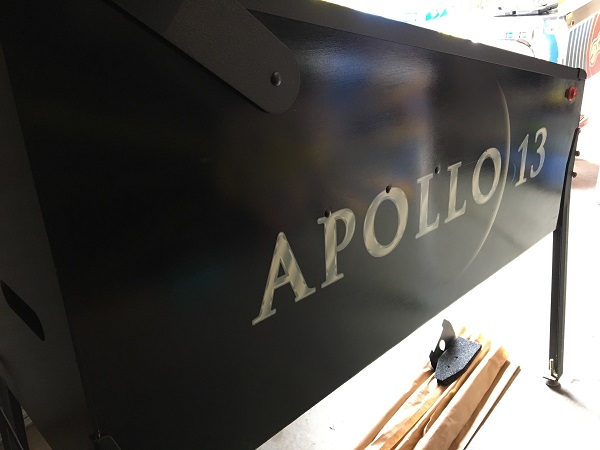
The cabinet condition really is superb. Both sides looks amazing, with the only real wear or damage appearing just below the flipper buttons (where greasy hands have worn away some of the black). They went for a really simple design on the artwork – but it works well with the theme I think.
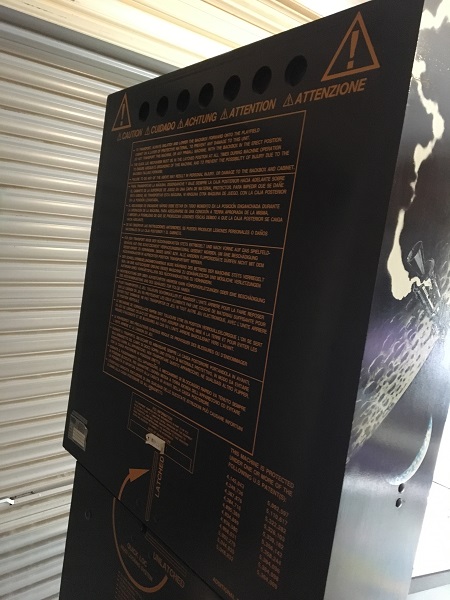
The back of the headbox and cabinet are also outstanding. You never see this area anyway, but it looks like it’s been freshly restored. Amazing for a 23 year old game!
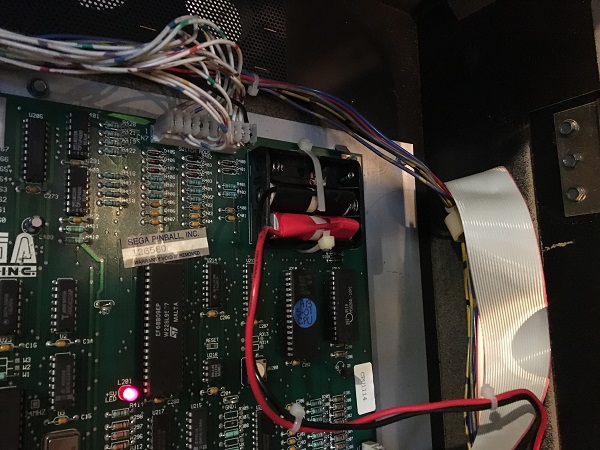
So let’s get this adventure started and begin by sorting out the sound issue. There’s no sound at all from the game. No effects, no speech and not even a pop or hum from the speakers. I decided to start at the speakers themselves and check the connectors. All looked good. I had a look at the connectors that lead back to the boards in the headbox. Everything looked good there too. I powered the game on and went into the test menu. I tried adjusting the volume both up and down, still nothing. I had the headbox door open from looking at connectors and with the game switched on, the power board caught my eye – the 12V LED was not lit.
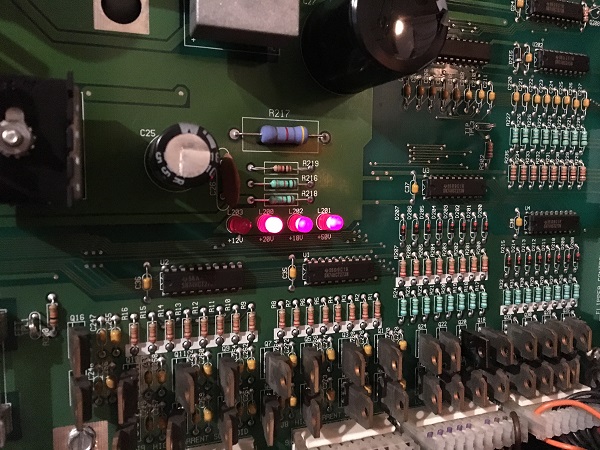
A quick check in the manual to confirm that yes, 12V was used for the sound. Some further investigation found that there are two fuses for the 12V, located at F8 and F9 for the 12V and it ran through BR3.
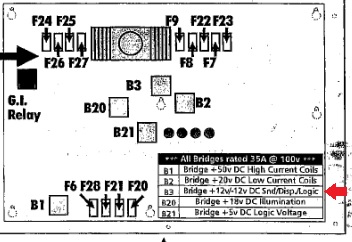
With the game switched off, I removed the fuses from the board and tested them. Sure enough, they were dead. Before swapping in new fuses, I removed the board and tested bridge #3 since this is responsible for 12V. It tested fine. So new fuses were installed and the game tested. Sound was now working. We often joke that it’s “probably just a fuse” – but in this case, it was. I’m always nervous to say “It’s fixed” where there are no obvious causes, thankfully the game will be with me for some time yet, so I can keep an eye on it as I go through working on and testing the game. I have noticed some static playing through the left speaker when the audio plays along with a small echo from the speaker while in the test menu. I’ll need to look into this a little further, but at least for now, the audio is there and all roms play under sound test.
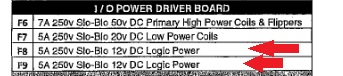
One really cool feature of the headbox design on this SEGA game is the display panel. I love how it opens up on a hinge, making it super easy to get to the boards and wires behind it without having lift the panel out. You end up with small wear / damage spots on the sides of the headbox if not careful getting the display panel in and out, so I love this design!
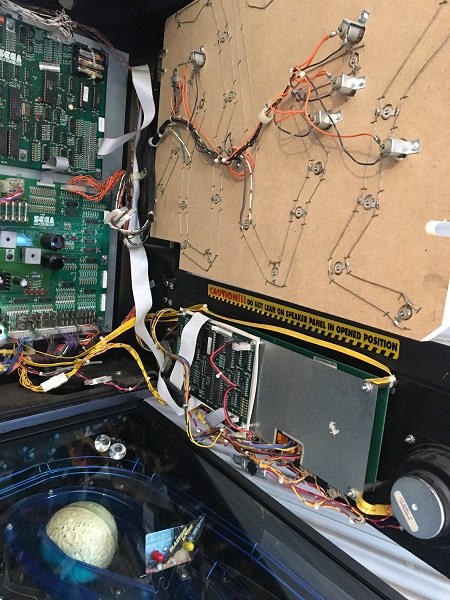
According to the new owner, the batteries had not been changed since the late 90’s – it’s a miracle there was no leakage and resulting board damage. Incredibly lucky! No point continuing to ride that luck though. Let’s quit while we’re ahead and put in a better solution. I want to get the AA’s off the board into a safer spot. I create my own remote battery packs for this sort of thing – they’re cheap, easy to make and simple to install. I like to use the enclosed AA battery cases so if they do happen to leak, even at the base of the headbox, it’s contained. Worst case scenario is the owner cuts off the old pack and spends $3 on a new one. Much better than hundreds of dollars in board work.
The battery pack installs into the AA holder on the board, meaning no board work and easily removable.
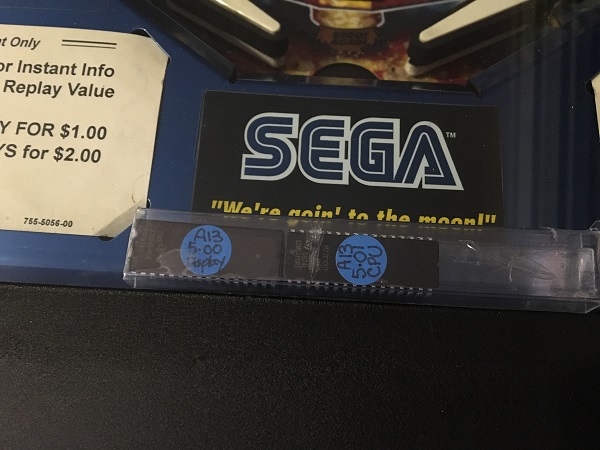
The owner also gave me a new CPU + display ROM chip set, which I installed at the same time. The game arrived with the version 2 and is now up to version 5. There are 3 sound ROM’s that go with the set, but it appears those were never updated.

Since I was in the headbox already, I decided to clean the base behind the display panel. It’s got the usual layer of dust.
A quick wipe down removed the dust and left the surface nice and clean once again.
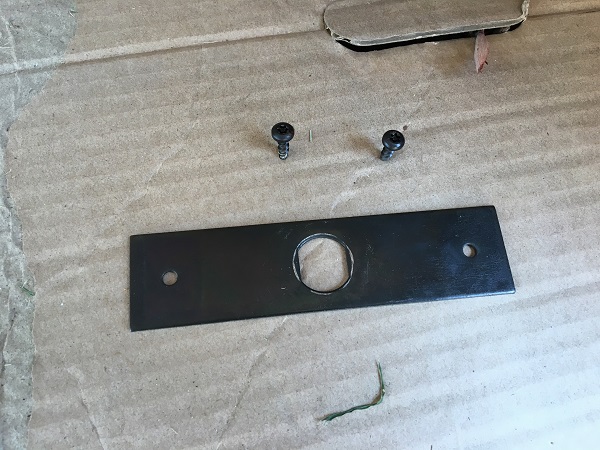
Still on the headbox, the backglass lock panel was looking a little old and could do with a freshen up.
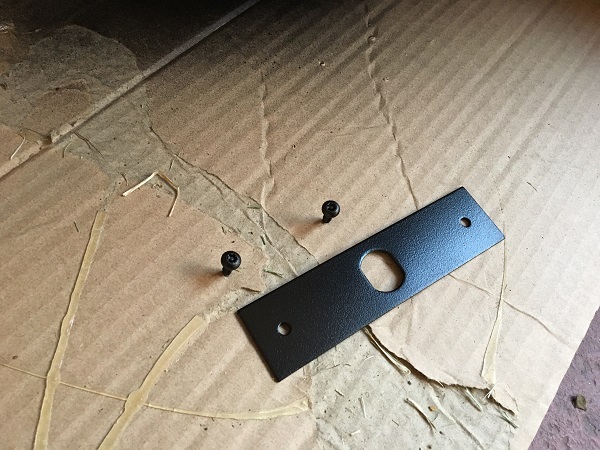
The surface was cleaned and lightly sanded before receiving a few coats of satin black. Looking much better. There are so many small things you can do on a game that cost next to nothing and lift the visual presentation. It’s well worth doing.
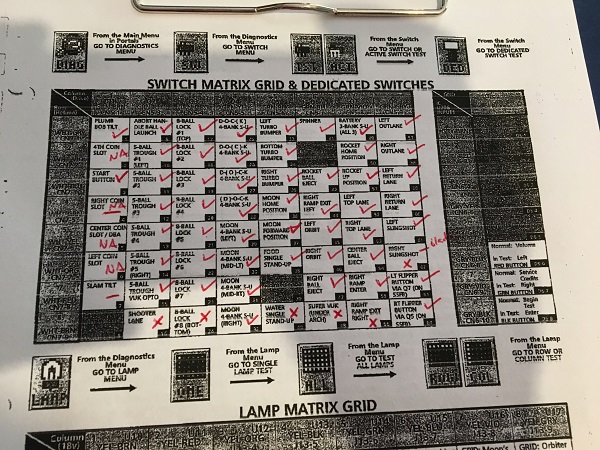
Time to look at some more interesting (game play related) things. The game plays fine as you can start, play 3 balls, activate modes and complete a game. Before going further on cleaning though, I wanted to make sure all switches were working correctly. Printing off the manual page, I went into test mode and stepped through each switch to find any that were not working. In the end, I had a list of 6 switches that did not register. The right sling shot was a known issue just from a visual inspection – the switch blades have broken off (on both switches). I’ll come back to this shortly. The other 5 were more interesting.
Since two switches in the row were working fine, my thoughts were probably a ground wire issue. If the are chained together, then one break in the wire will take the remaining switches out. I lifted the playfield and took a look at all 5 switches. Sure enough, I found 2 wires that had come loose.
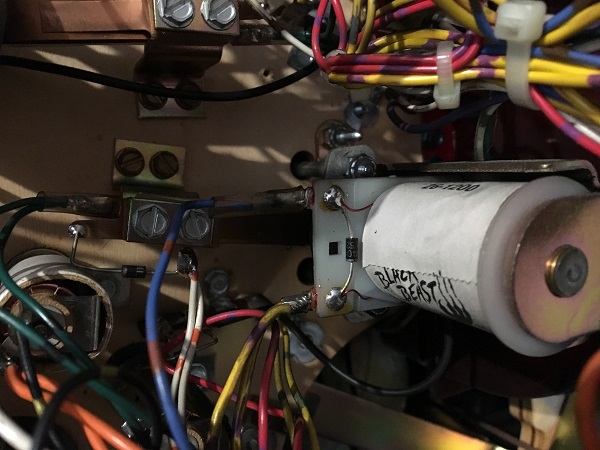
Both wires were soldered back on to their switches and then tested again. Now, all switches were working correctly (except for the right sling). Next up for testing are the coils. Again, I ran through the list one by one in the test menu making sure they worked. After stepping through all coils, only one was found to be not working. The right pop bumper did not fire at all, so will need some further inspection.
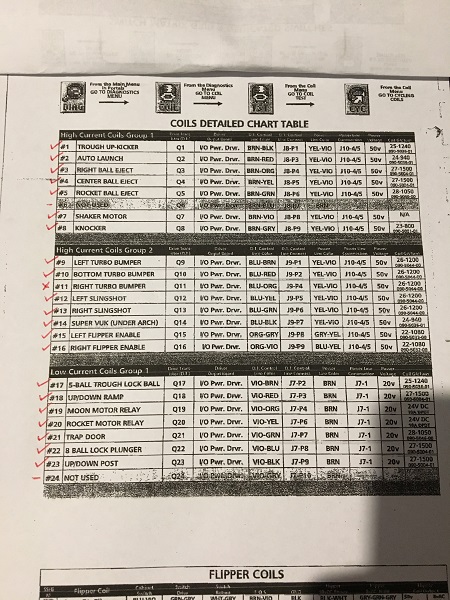
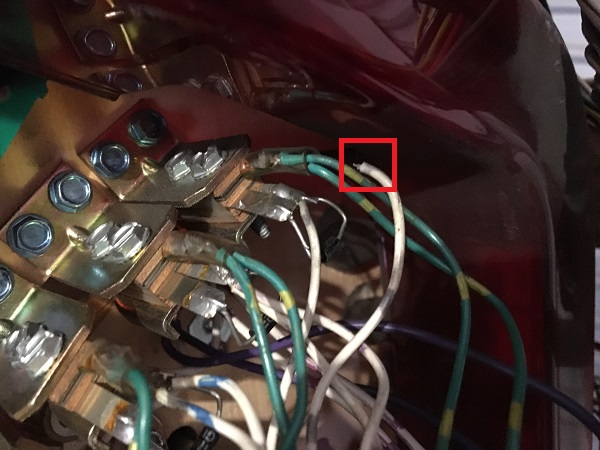
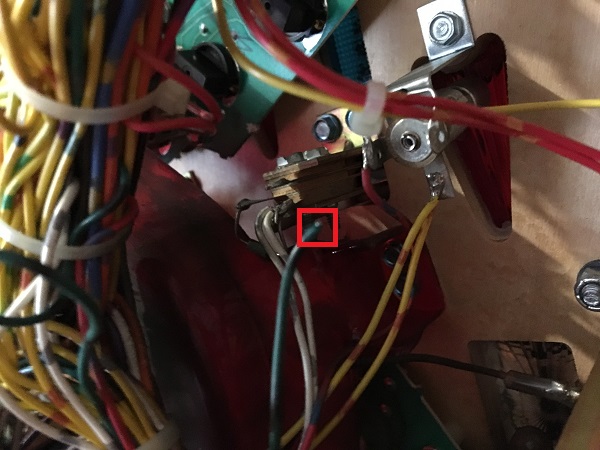
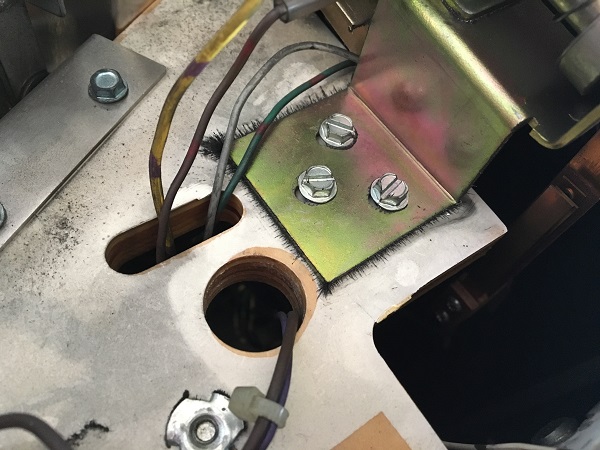
I took a look at the coil wiring, and at first glance it looked fine. I grabbed the manual to find out which connectors the coil run through, along with which transistor is used to drive it. I inspected these and they looked fine too. A test on the transistor also showed it to be fine. Before I went off looking for complicated solutions (been down that path before), I took a step back and looked at the coil again. At first glance the wires look to be connected, with the blue/red wire protected inside a plastic shield sleeve.
Pulling slightly on the blue/red wire slightly presented a different story. The wire pulled straight out of the sleeve and was no longer connected to the coil. Sitting inside the sleeve had made it difficult to spot the fact it had disconnected.
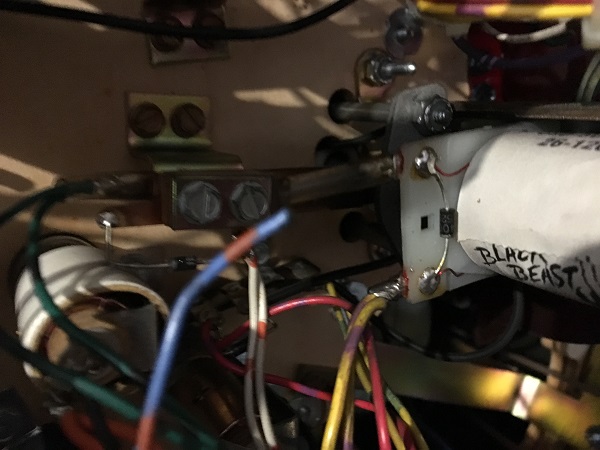
The wire was soldered back on to the coil and retested. All working again. This is why it’s always good to double check the simple stuff first! I mentioned the right sling shot switches were an issue earlier and now seemed like a good time to address that issue. The long switch blades on both switches have broken off. The coil works (via test mode) and the sling shot arm fires. I should only need to replace those two switches to get it running fine again.
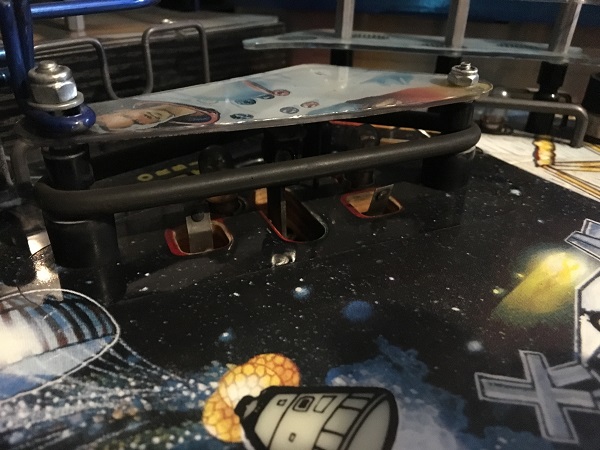
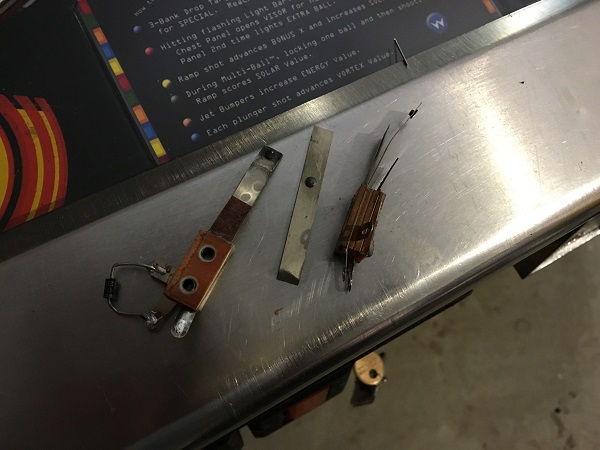
The broken switch blade ends were found in the base of the cabinet. Both switches need to be replaced.
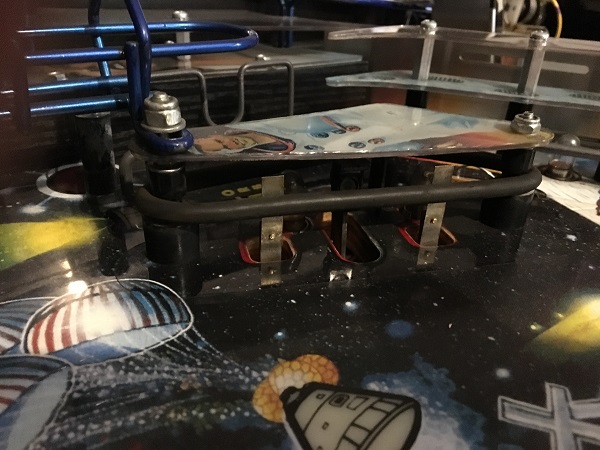
With the new switch blades installed and wiring soldered in to place, the game was put in to switch test mode and I verified both switches correctly triggered. I could now tick that off the switch matrix chart from earlier.
The main damage on the cabinet is just below the flipper buttons. One option is to spray paint this, but I never like how it looks and it can come off on your hands when playing. I’ve seen specific mylar patches for flipper buttons, but I’m not a fan of them.
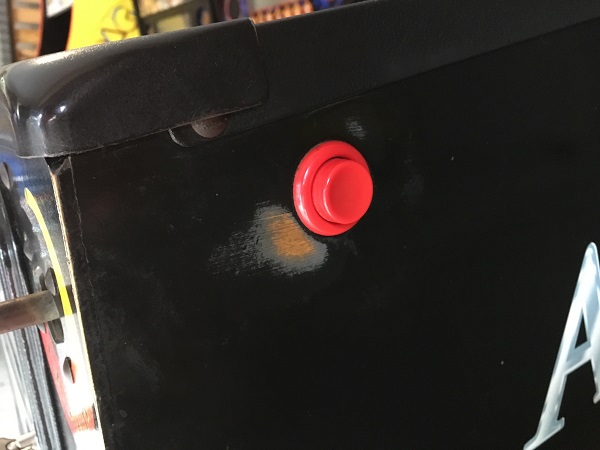
Another solution is to install metal protectors that sit over this area. I sourced a new set and installed them. The owner was keen on having back lit flipper buttons, so a clear set were installed.
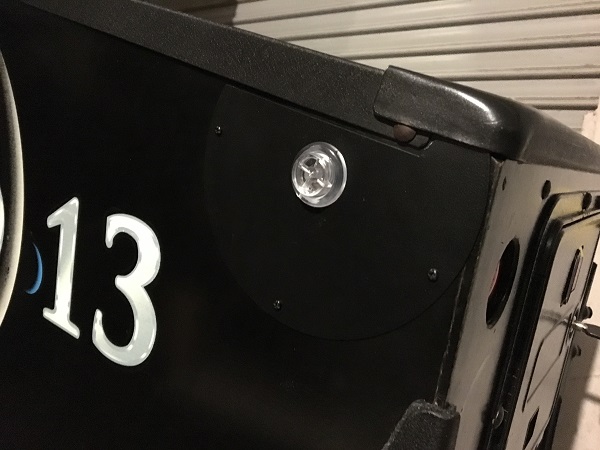
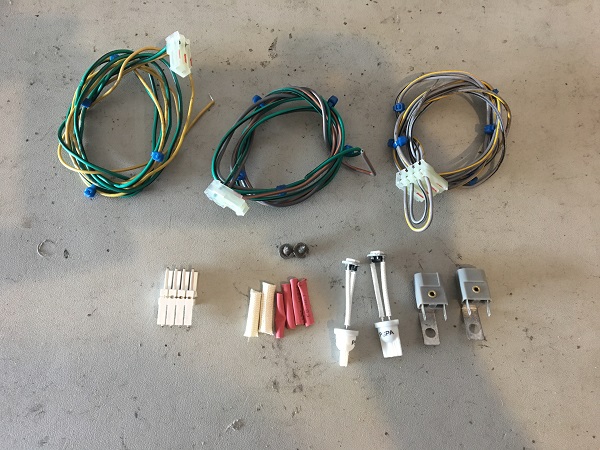
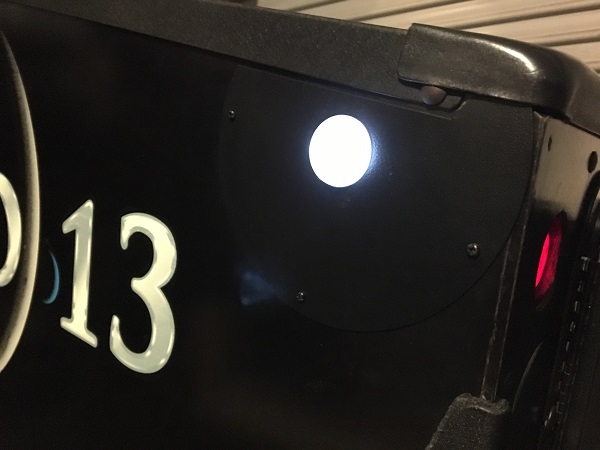
For the backlit flipper buttons, I just put together my own kit. It costs around $15 – $18 for the parts, and hooks into the GI coming from the coin door price light. I had been thinking transparent blue would work well, but having seen both in action I think white easily looked the best.
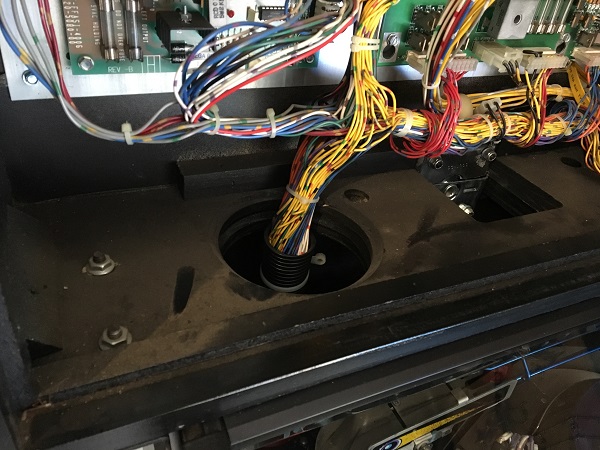
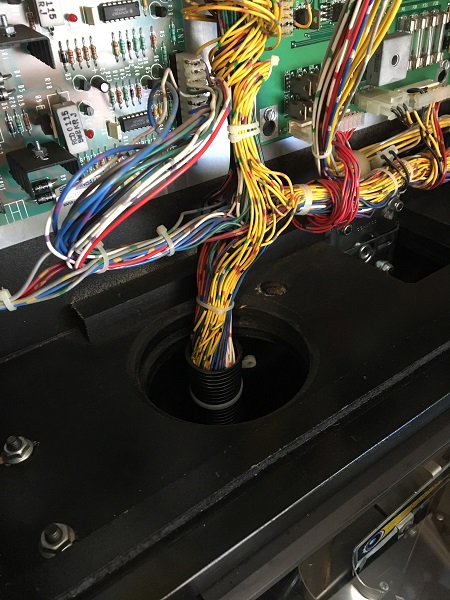
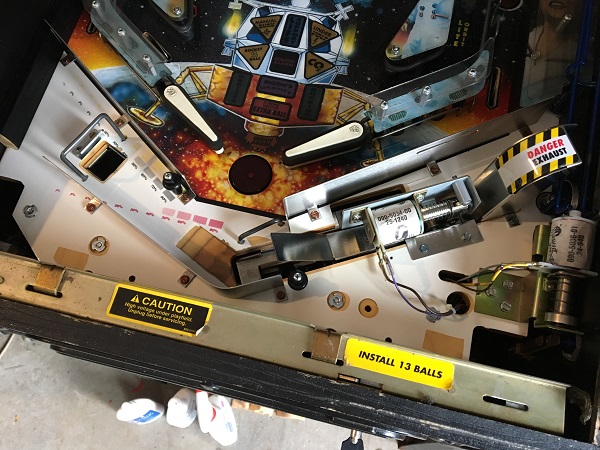
To round out the first update on Apollo 13, I decided to give the apron are some attention. This area is always a hotbed of filth that happily collects here over the years. It’s well worth cleaning under here as the collected filth will be spread across the machine as the balls pass through the trough. I love the blue anodized look SEGA used on the apron (and rails) – it looks great and works well with the theme!
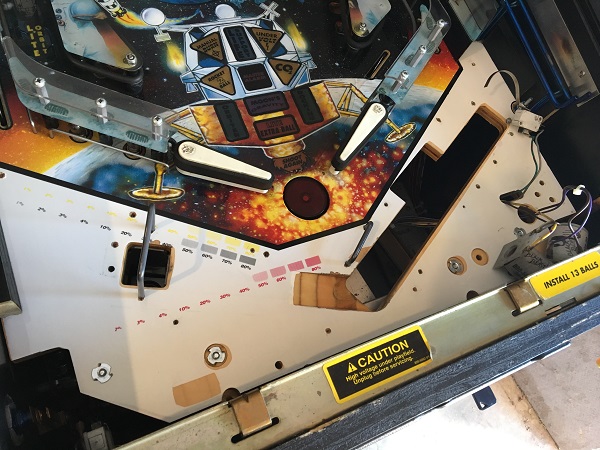
The apron is attached via 2 screws below the playfield. Once removed it slides off. I had to remove the small plastic piece that covers the shooter lane as it gets in the way when trying to slide the apron off. Below the apron, the usual layer of crap was found.
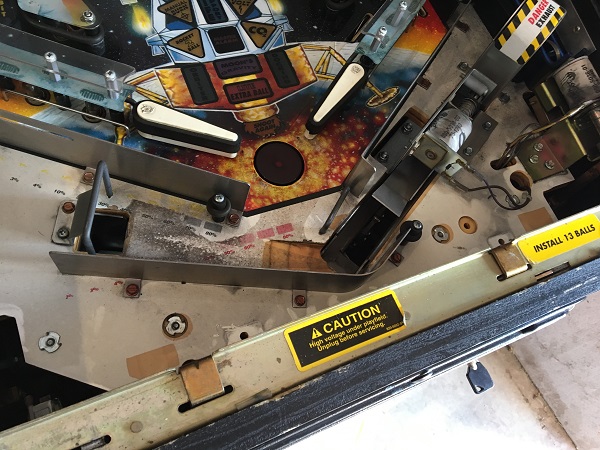
A lot of small metal filings have found their way to the ball launch assembly frame. All of this will clean up easily enough though. I’ll be removing the assemblies next so they can all be given a proper clean service.
The playfield area under the apron was stripped to remove all assemblies. The ball trough is still installed for now, but that’s coming out next.
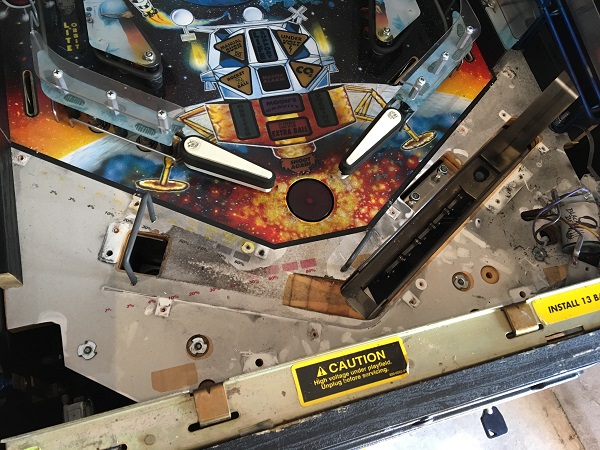
The metal ball guides from the trough were scrubbed clean to remove any filth that had built up over the years. The small metal shield that sits over the VUK assembly was also cleaned, along with the apron plastic. The underside of the plastic had collected a fair amount of coil dust over the years, which was cleaned away.
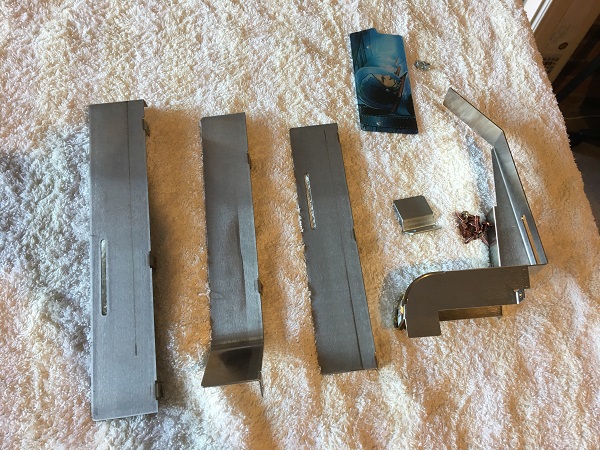
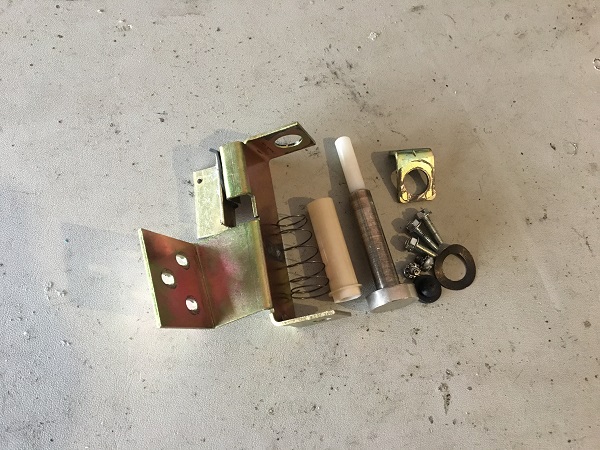
The ball trough assembly was disassembled and cleaned. A lot of crap had become stuck to the small wheels on each of the switches, so each one was individually cleaned. The trough itself had a layer of filth which was also cleaned away. A new coil sleeve and rubber grommet were sourced for the rebuild.
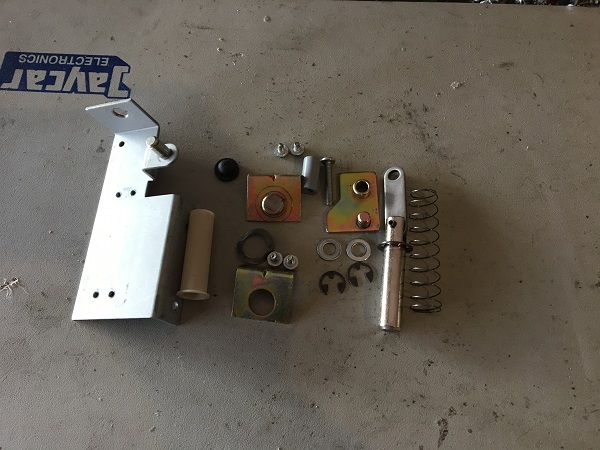
The ball serve assembly was disassembled for cleaning. It will also get a new coil sleeve and grommet before being put back together.
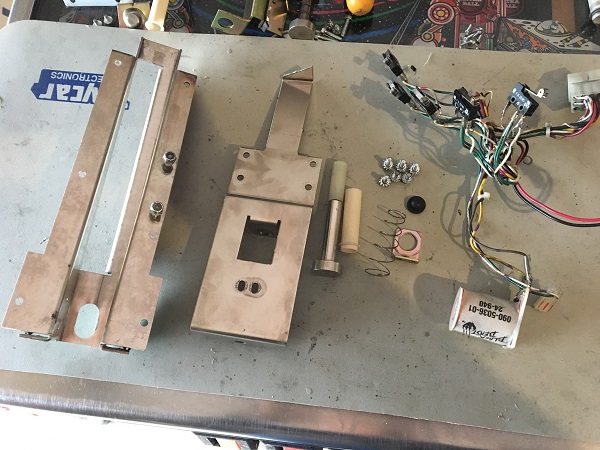
The last assembly from the apron to look at was the ball launcher. The coil retaining bracket has seen a lot of action over the years, but is still strong and doesn’t need replacing just yet. The compression washer was broken though, so needed to be replaced. A new coil sleeve and rubber grommet were sourced too.
With the assemblies ready to go back into the game, it was time to clean up the playfield. The filth cleaned away without too much trouble thanks to Nifti and a soft cloth. The surface was finished off with some Novus 1. The coils and wiring were given a wipe down too to remove any loose coil dust.
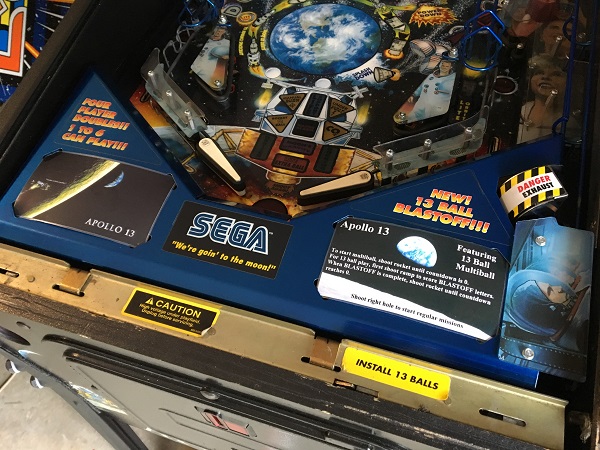
The trough pieces were installed back onto the playfield. First the metal ball guides, followed by the ball trough and shooter assemblies. The apron area is now looking in a much cleaner state.
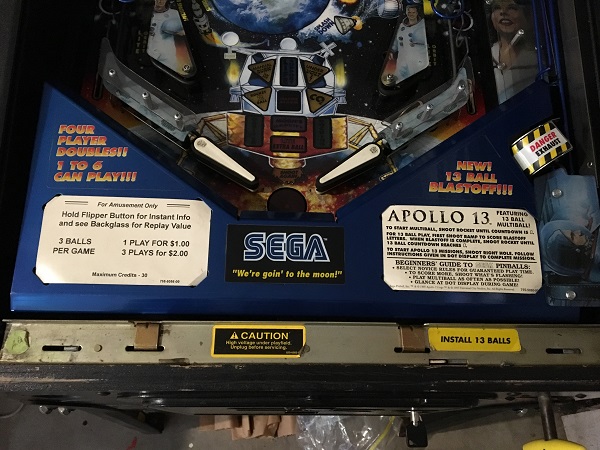
New instruction cards were printed off, something a bit more interesting than the standard pricing ones. Both sides of the apron were wiped down to clean away any remaining dust before being installed back onto the playfield. The shooter lane plastic was installed back onto the apron to complete this section of work.
That’s it for the first update on Apollo 13. The owner has a LED kit on order, which should arrive any day. In my next update I’ll be cleaning up the flipper and sling shot assemblies. I’ll also clean the up post and VUK assemblies in the area too. I’ll swap over as many globes to LED’s as I can as I begin to work my way up the playfield. While installing the insert LED’s I’ll also clean away any crap that has collected on the underside of each insert. I’d also like to remove the ball shooter handle for a freshen up too. Lot’s more still to come!
Thanks, will be servicing my own Apollo 13 shortly – will follow this!