
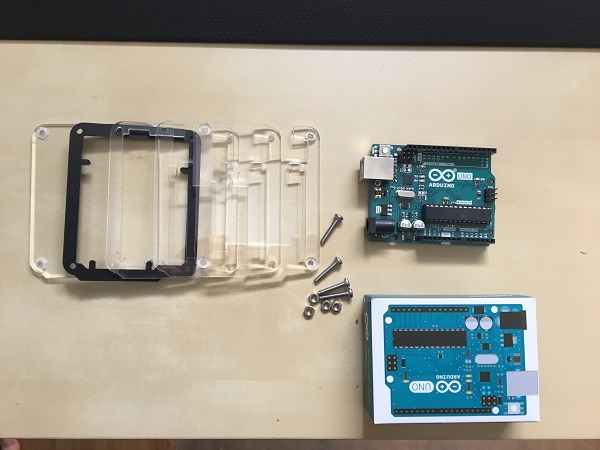
Something that has been on my “TO DO” list for awhile now is to create an animated LED strip mod for the flail ramp on my Black Knight: Sword of Rage PRO pinball machine. On the Premium and LE models, the lightning bolt cutouts on the metal ramp are lit from below the playfield with 2 strips of addressable LED’s. These are then animated by code in the game, allowing the programmers to play different patterns based on the active rules. The PRO model does not have these LED’s and it’s left black. I purchased a mod from Mezel Mods many months ago that adds 2 LED strips below the ramp BUT they are not animated. Instead all LED’s can only be the same colour and the animation support is limited to fade, solid or blink. You’re also limited to a selection of 15 or so colours. I want to make something much more interesting (and cheaper) so have decided to use an Arduino board to control 2 addressable LED strips so I can animate them. I won’t be able to hook them up to the game code and animate them in the same way as on the Premium and LE games, but I can perhaps use the state of the flail to change the animation. I see this as a good exercise in exploring Arduino and how I may be able to use it in my Pinbot 2.0 project. First up, an Arduino Uno board and case were ordered.
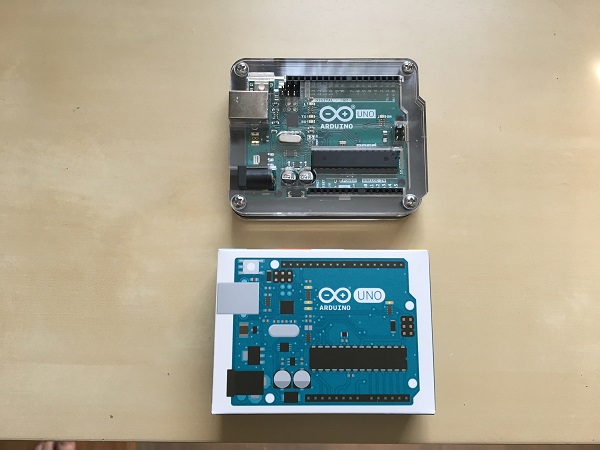
The case is very simple to put together and adds a nice protective barrier around the Arduino board.
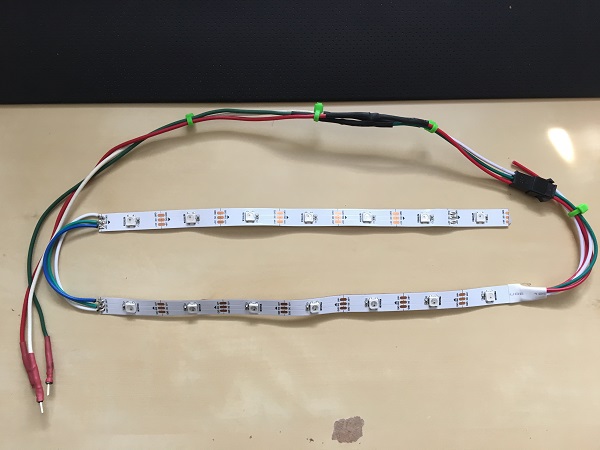
I purchased a 1 meter WS2812B LED strip which is fully addressable. This means I can control each individual LED on the strip, making it perfect for animation. The strip was cut down to the size required for the ramp and new pins were soldered to the 5V, ground and data wires from the strip. These pins will insert into the Arduino board.
With the Arduino and LED strips ready, it was time to look at some coding. There is a great library for Arduino called FastLED which makes interfacing with a LED strip like this easy. The FastLED library can be found on Github here – https://github.com/FastLED/FastLED. Once this was downloaded, I imported it into the Arduino IDE. The Arduino IDE can be downloaded from here – https://www.arduino.cc/en/main/software
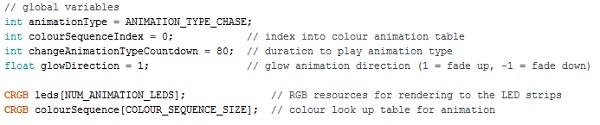
I created a new project and began putting code together. First step was to set up my definitions to define the number of LED’s I’ll be using, data pins, the animation types and number of colours to use for animation. Putting these values in clearly defined variables makes tweaking the values easy and the code easier to read.
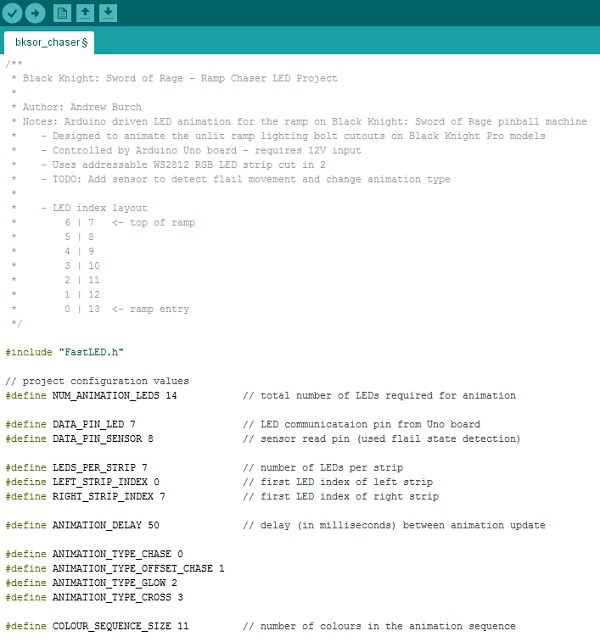
Then I defined my global variables that will contain the colour data, animation type, and colour index.
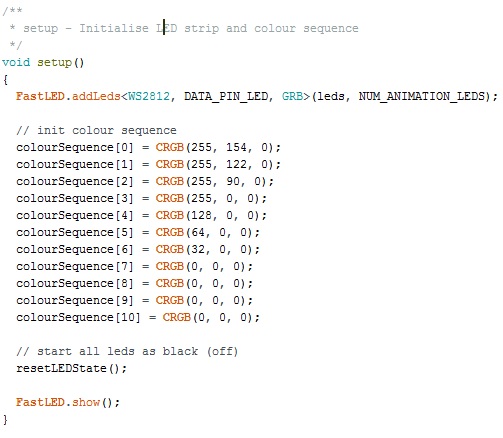
The setup() function is defined next, which initialises FastLED along with my colours for animation. Once I’m settled on the colour sequence, I’ll move this into a data array. All LED’s are set to off and then FastLED is updated (with the show() call) to push that data to the LED strip.
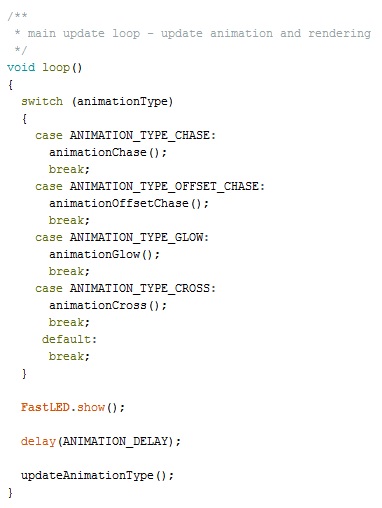
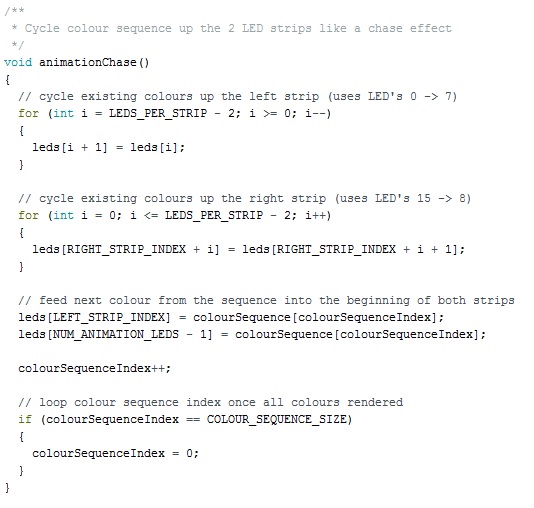
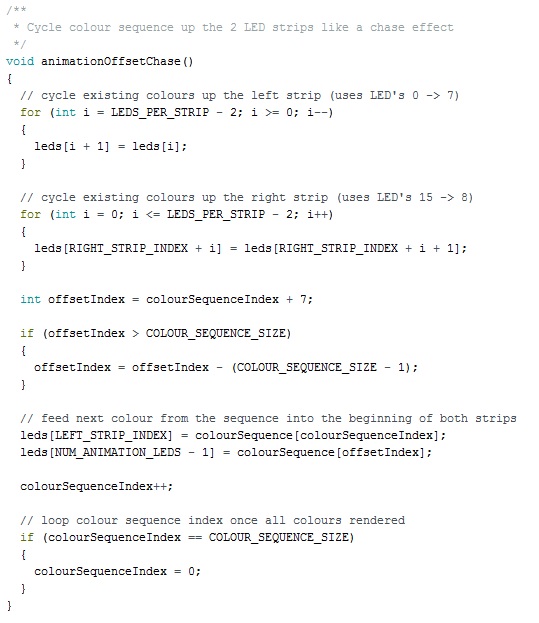
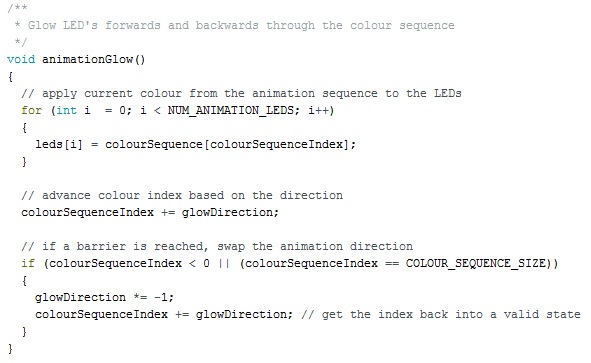
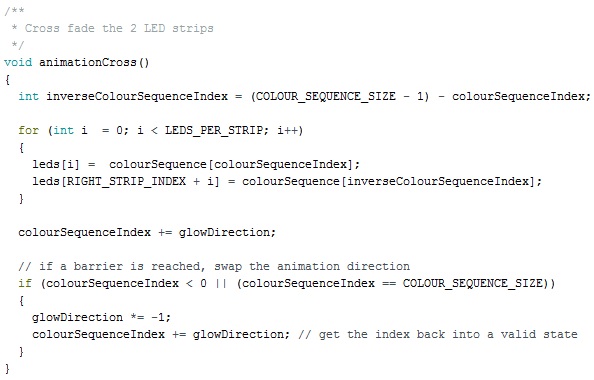
The loop() function is the main update loop for the project. In here is where the animation will happen. Using a switch case statement, I call the update function based on the current animation type. Each update function will update the state of the leds array which tells FastLED what colours to render on each LED.
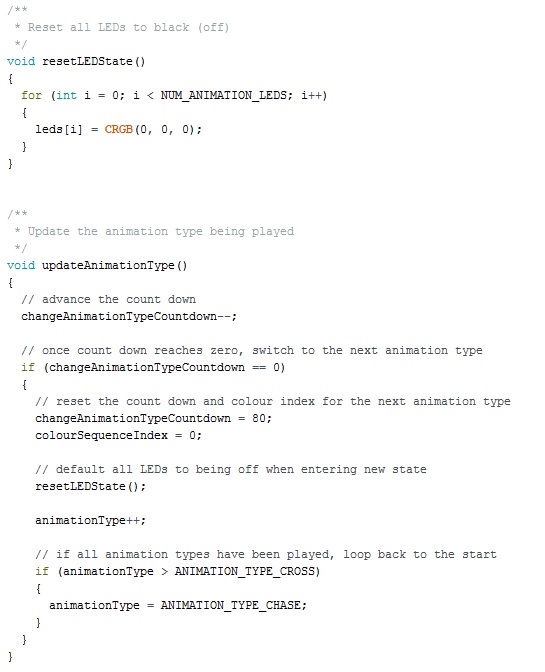
I have two other functions to define. The first resets all LED’s to off. This is called once at start up and then each time the animation type switches. The updateAnimationType() function will update the type of animation being rendered to the LED strips every 4 seconds. Once I had the sensor hooked up, this function will change to switch between the animation type based on the state of the flail (open, closed or moving).
I spent a couple of hours playing around with the code and evolving it to the point where I have 4 different animation types, which cycle every 4 seconds. Each animation type has its own update function. I have plans to create at least two more and will eventually pick the 3 most suited to the states of the flail.
The LED strips were hooked up to the Arduino board, which was then hooked up to my PC via USB cable. The code was deployed to the board for testing. After sorting out a few bugs, it was running smoothly.
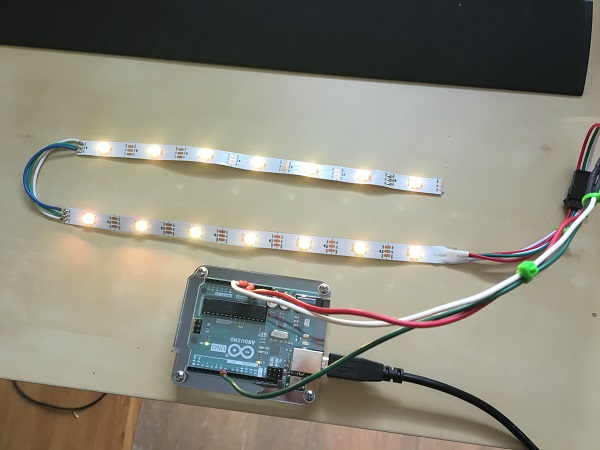
Here is a short video showing the project running by playing the 4 different animation types currently added. It’s currently hooked up to my PC via USB. When installed within the pinball machine, I’ll have it hooked up to the 12V port.
I’m not happy with the large spaces between the LED on this strip. This strip has 30 LED’s per meter. When lined up on the ramp, I think 60 per meter would work much better, so I will order a new LED strip to use.

I’ve uploaded the code to Github and will continue to add to it over the coming weeks with some more animation types, proper transitions between animations and of course support for a sensor to detect the flail state. https://github.com/enteryourinitials/bksor-chaser. I’ll also flesh out the Github repository with more information too.
That’s it for the first update. I’ve got the sensor and new LED strip ordered which should arrive sometime in the next week or so. Meanwhile, I’ll refine my code more and add some improvements, ready to support the sensor. I had some ideas for additional animations to try out which I’ll implement also. Another task for me to look at is how best to mount the sensor and Arduino under the playfield. I’m going to use the existing frame from the Mezel Mod version to mount my LED’s on when ready. Still plenty to do 🙂