
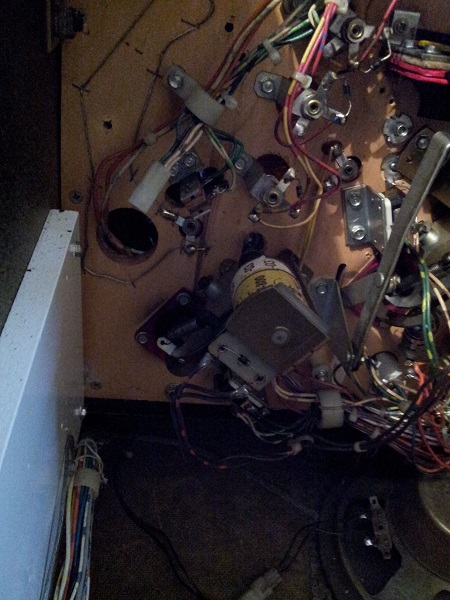
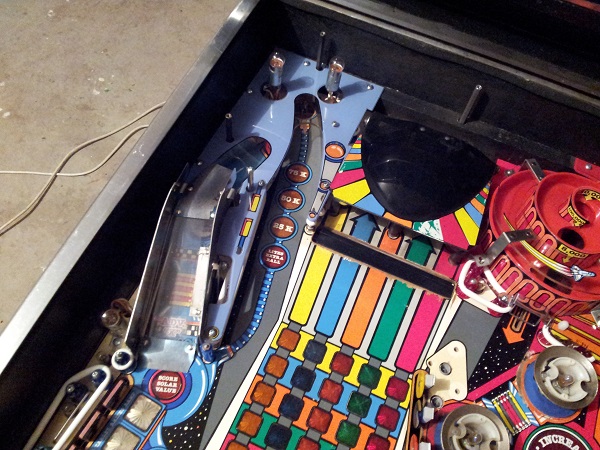
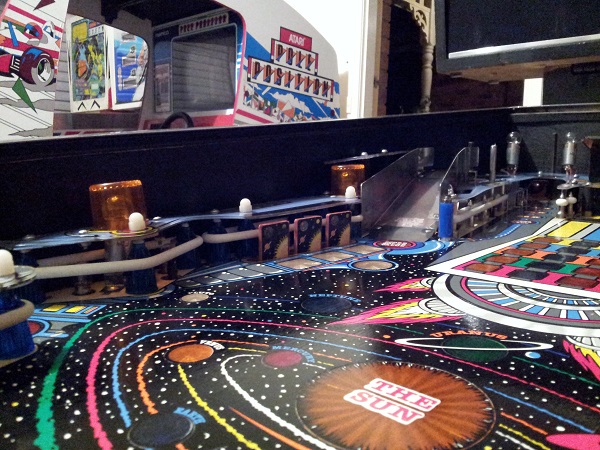
Continuing with my focus on the upper playfield area, it’s now time to look at the multiplier advance ramp on the left. This area has a few things which will need to be cleaned and rebuilt. There is an eject saucer, a single stationary target and an assembly to raise and lower the ramp. There are plenty of metal parts that will need a good polish too and no doubt a solid layer of crap to clean off.
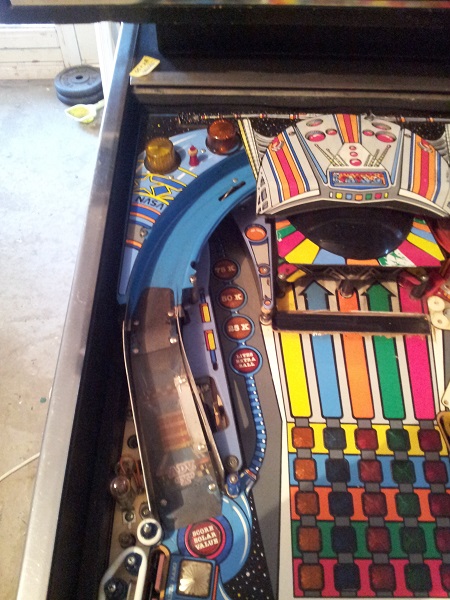
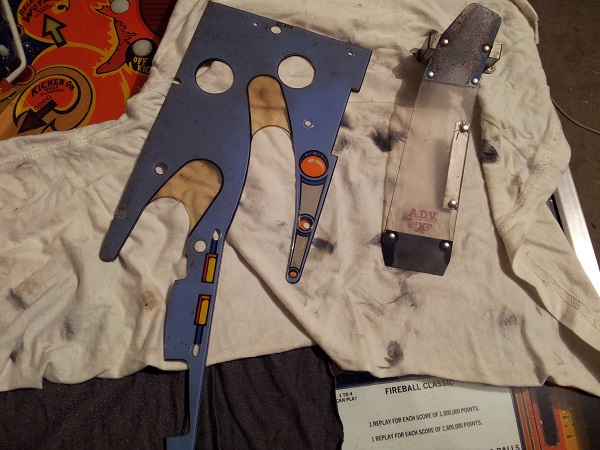
The visor and blue ramp had been removed previously when I looked at the vortex ramp (see a few posts back). As was expected, everything is covered in a layer of dust. But the blue plastic is still good and not broken. The ramp acrylic has some cracks on it. I’m not sure if I’ll replace this or not – maybe later on as I’ll need to get the “ADV X” decal made up and printed. Something interesting here is part way down the blue plastic (close to where the red “Lites Extra Ball” insert is on the playfield) you can see a small slot cut into it which would normally be used to attach the plastic to a post. There is no post here nor is there a hole for one on the playfield. Looking at other machines this hole in the plastic (and missing post) is common – so I’m not sure why they added a hole with no post. Given the length of the plastic, it could benefit from some extra support.
First step was to remove the plastic and some of the posts to see what lurks beneath. A similar story to the right side, lots of dirt and dust has collected on the surface of the playfield. There is no mylar in this section, which had resulted in some minor wear just before the eject saucer.
The ramp was the next part to remove. This revealed some minor playfield wear just before the red target. Again, lack of mylar here and a crap ball have taken their toll. Thankfully it’s not too bad (although irrelevant post playfield swap).
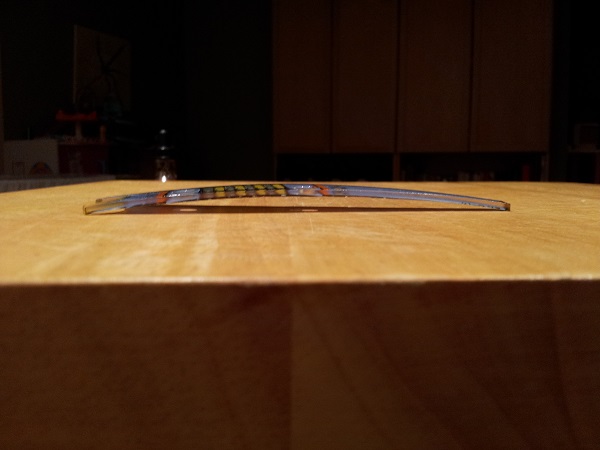
The plastic and ramp will need a good clean. I’m not sure what quality I’ll get the ramp cleaned up to. It has scratches along the surface area from a pitted ball travelling over it for a period of time. The cracks aren’t critical as it still has plenty of strength to support the ball going up and down.
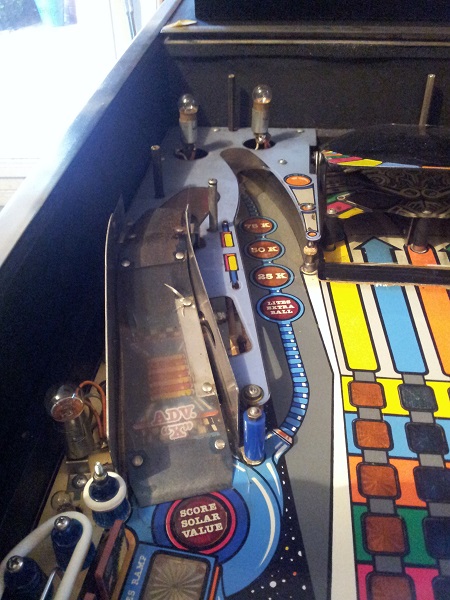
The metal ball guides were removed, leaving a very dirty playfield surface to clean. First though, I’ll get the vacuum cleaner and remove all the loose crap.
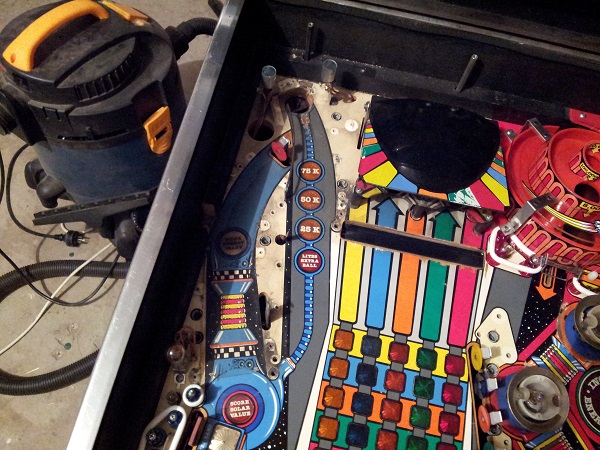
Using a magic eraser and tag teaming with eucalyptus oil and isopropyl alcohol, I worked gently across the surface area. I then finished up with isopropyl alcohol and a soft cloth to wipe away the left over crap. This was then followed up with Novus 2 and finally novus 1. This left the playfield looking much nicer. As with other areas of the playfield, I’m not worried about touching up the paint and sealing since a playfield swap will be done before I’m complete. I do plan to do some extra work on the playfield though once the project is complete.
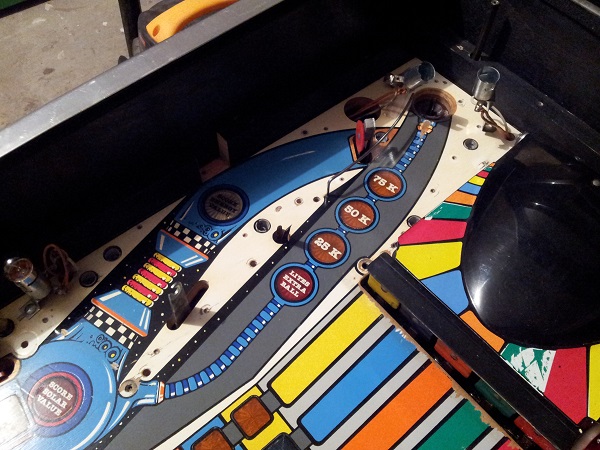
With the playfield cleaned I moved on to cleaning a number of the metal posts. Once cleaned and polished, they were installed back onto the playfield. A new rubber was added here too, along with 2 new star posts. I couldn’t locate a rubber map for pinbot, but I had heard that the rubber map for jackbot was a good fit. The jackbot map said this rubber should be a 3″ ring. I found 3″ was not quite large enough and when left overnight, the rubber had began to split. A 3.5″ rubber ring was a much better fit here.
I find it interesting that there is a blue star post located next to the visor at the top of the playfield. There is no way for a ball to actually get here once the ramps are on – so I’m not sure on what purpose it serves.
The red target was also given a clean with novus 2 and 1 to bring some shine back to it (along with removing the layer of dirt that had been spread to it via a dirty ball). The old foam pad behind the target was also replaced with a new one. New #47’s and #89’s were added too.
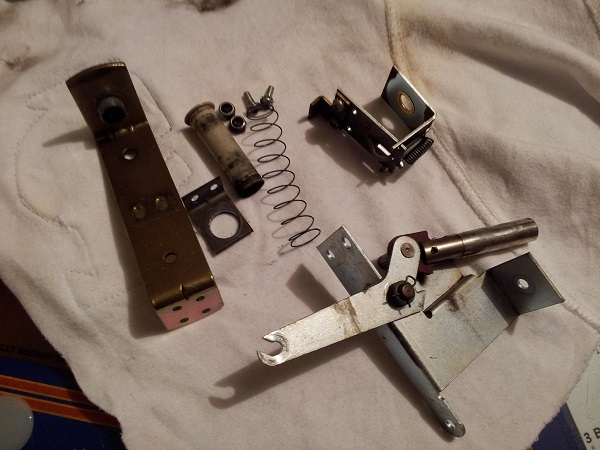
I then turned my attention to below the playfield. First to be looked at is the eject saucer. This is set up very similar to the ball serve assembly at the base of the playfield.
I removed the frame / coil stop first. This then gave me access to the red eject shield and switch. The arm of the microswitch was quite dirty with black dust, so this will need a good wipe down to prevent it being spread.
All parts were removed for cleaning. The current eject shield is broken so will be replaced with a new one.
The arm assembly was then disassembled completely so all parts could be cleaned.
Everything was now ready to be reassembled and put back into the machine. New springs were added, along with a new coil sleeve. The switch was also cleaned.
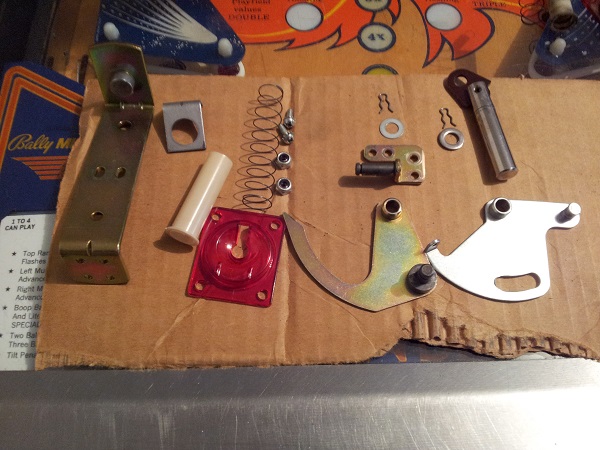
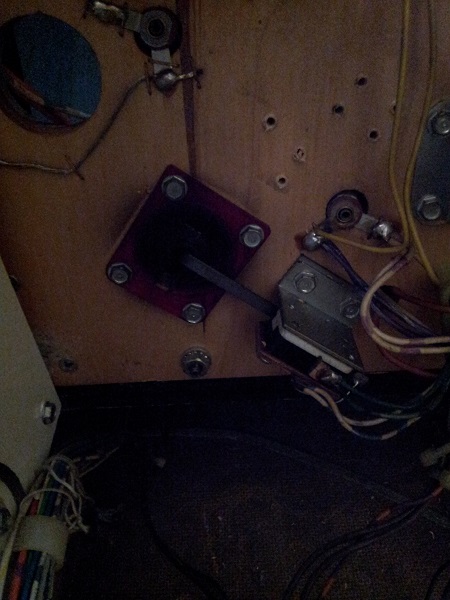
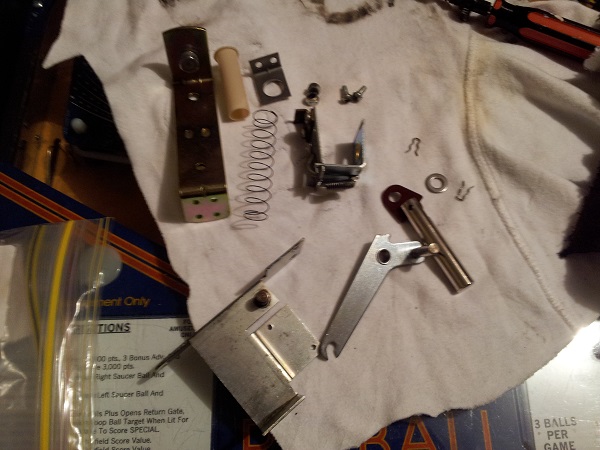
Next assembly to look at is the one that controls the ramp. This is actually made up of two coils. The first coil (the large one) causes the arm to pull forward which raises the ramp on the playfield. This action then locks the arm in place with a small tooth, preventing the arm from returning. The smaller coil fires when the ramp needs to return to its default position (down). The small metal plate pulls into the coil when it activates and this then lets the arm spring back, lowering the ramp. There is a small microswitch located at the top of the large coil which lets the game know what state the ramp is in. I love seeing how all this comes together to work in game.
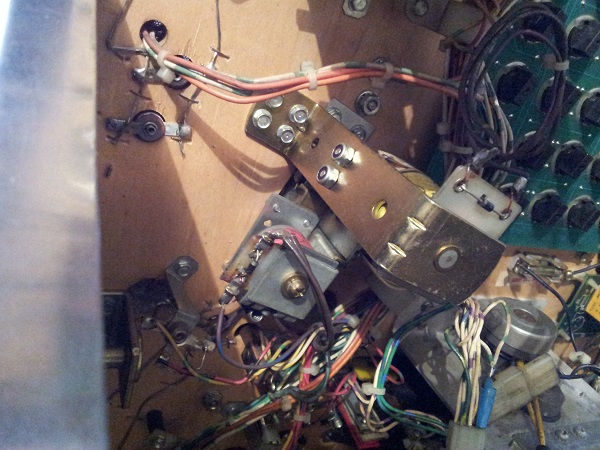
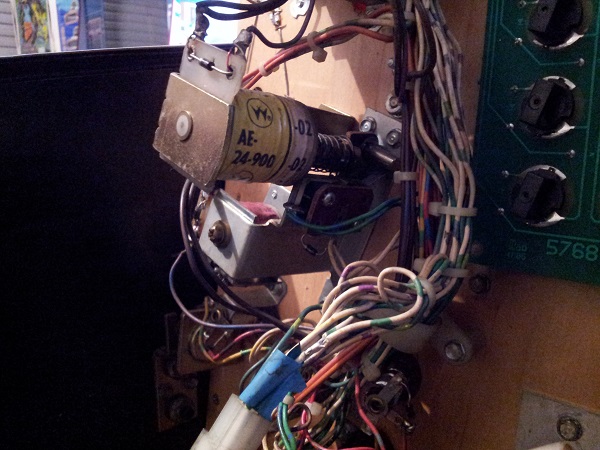
First step here was to remove the large coil assembly as that could then give me access to the second part of the assembly (with the small coil and microswitch).
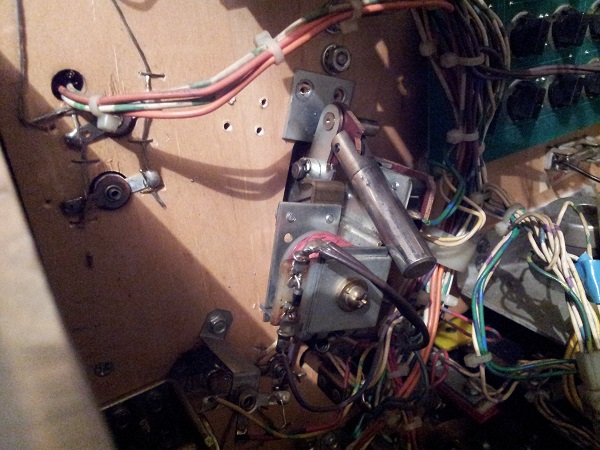
With everything removed, I could now give the parts a good clean.
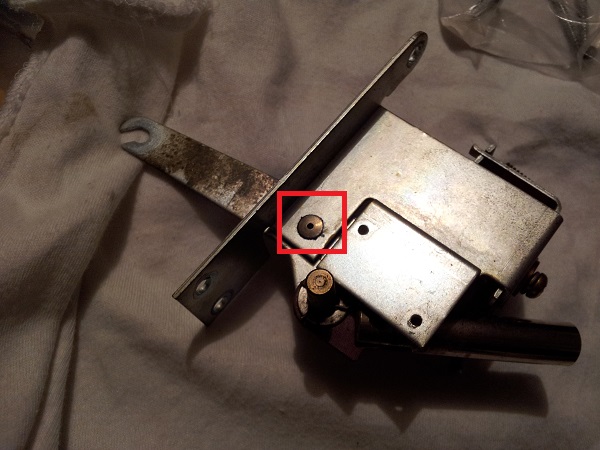
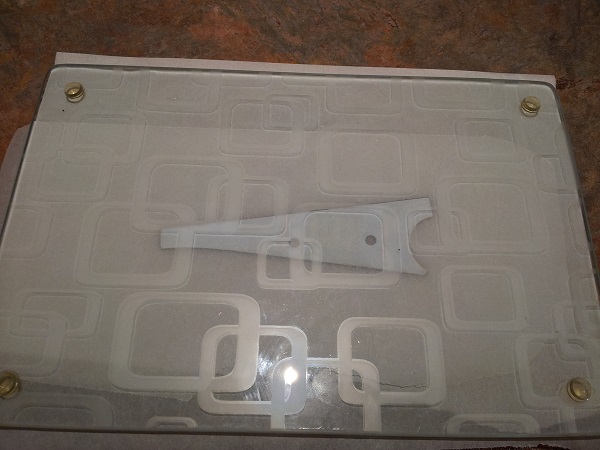
I had a concern with part of the arm assembly. Where the arm connects to the metal bracket, the pin was loose and would spin. This should be firmly attached. I had a spare one thankfully, so will swap them over.
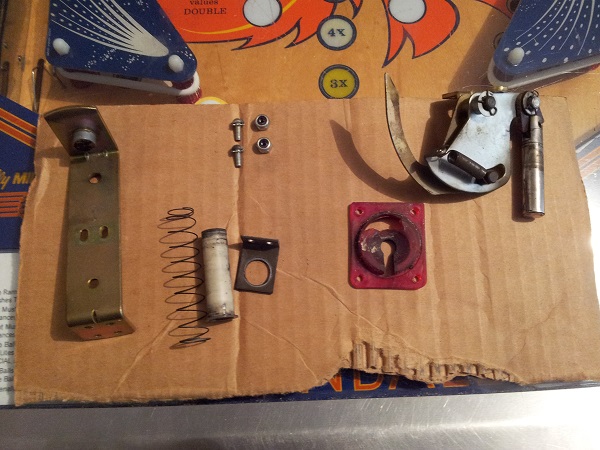
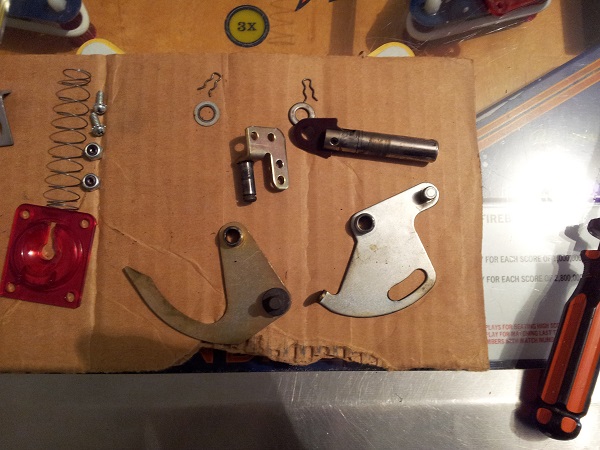
All parts were then given a good clean. A new coil sleeve and spring were added
The plastic was given a solid clean on both sides. Novus does a wonderful job. There is some yellowing of the plastic and it’s not a surprise given the age. The colour of the rag beneath it makes it look worse than it actually is. The ramp cleaned up OK, but I’m still considering replacing it with a new piece of acrylic in the future. The cracks are a bit of a worry and pitted balls have left it with permanent markings.
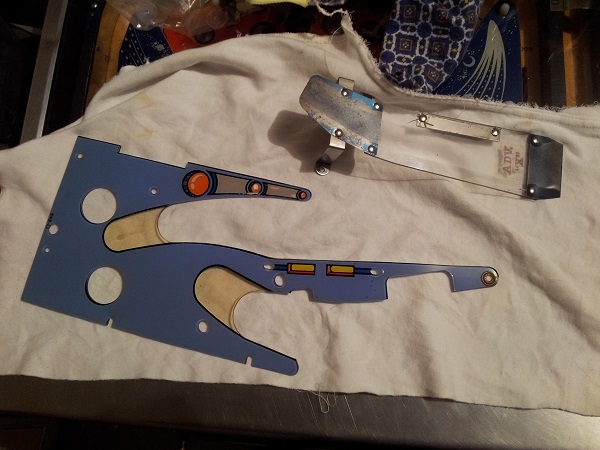
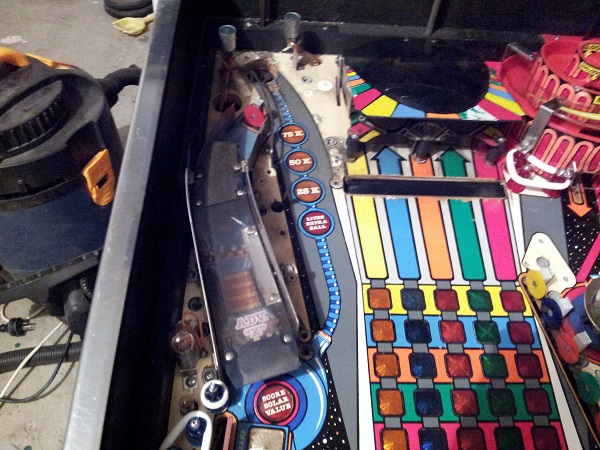
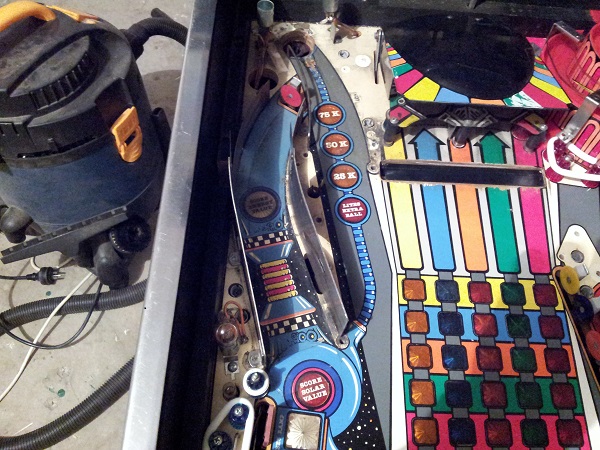
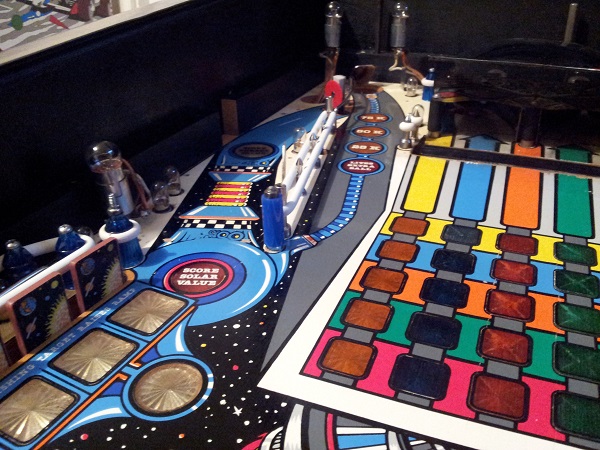
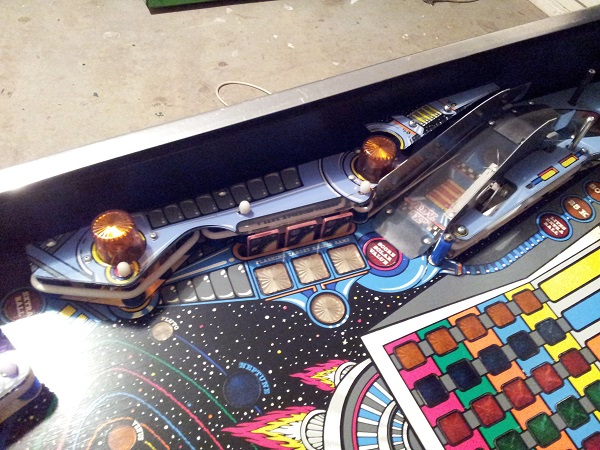
It was time to get the metal rails back onto the playfield, along with the ramp. All rails had been cleaned and polished too, which removed a fair amount of crap. I noticed after taking this photo that the ramp wasn’t sitting properly (too far to the left). I went and adjusted the position of the legs holding the ramp in place to make it more central.

The plastic was then installed back onto the playfield. A few clear lexan washers were added around certain points to help prevent damage to the plastic in the future. All screws were cleaned and polished to improve the presentation also. The area is looking much better now. Amazing the difference an hour or two can make.
This update isn’t done yet though – since the ramp area had been cleaned, I could then put the two bits of plastic from the drop target area back onto the playfield to complete that area. Before I could though, I needed to straighten the smaller piece.
There are a few methods I’ve seen people discuss. Since it’s not so sunny in Melbourne and I don’t own a heat gun, I went with the oven method. I put the piece of plastic (face down) onto an oven tray lined with baking paper. The oven was then preheated to 105 degrees. Once ready, the tray was put into the oven and I blocked out all other distractions as I watched the plastic. After about 3 – 4 minutes I could see the plastic flatten out on the tray, so I removed it from the oven and sandwiched it between two glass place mats. I then put heavy weights on top.
I was then able to attach the small piece to the larger plastic piece that sits over the drop targets. I have replaced the green flasher dome with the correct colour also. Finally, they were installed back onto the playfield, which completed the drop target area and the ramp area.
This leave me with the middle area at the top of the playfield – the visor. The pop bumpers will get some attention soon too along with the flippers.
Hi there, long time reader, first time caller… i am a big fan of yours and your blog helped me with my pinbot restore immensely. I have made a bunch of custom reproduction “ADV X” vinyl decals! Let me know if you still need one.
Awesome mate! Glad the information here was of help. I’ve been following the freeplay ramps thread on Pinside (as I’m keen to get new ramps for my Pinbot) and noticed yesterday that you had created the ADV X decal. Thanks for thinking of me and reaching out to me here. I’ll be PM’ing you on pinside shortly as I’d love to grab one! Thanks!