My next update was going to cover the work I’ve done on the coin door. But something managed to squeeze in just before it. I should have the coin door all ready by Sunday though, so it’s not far off. Meanwhile, the next area on the playfield to receive attention is the upper playfield – or more specifically, the vortex ramp.
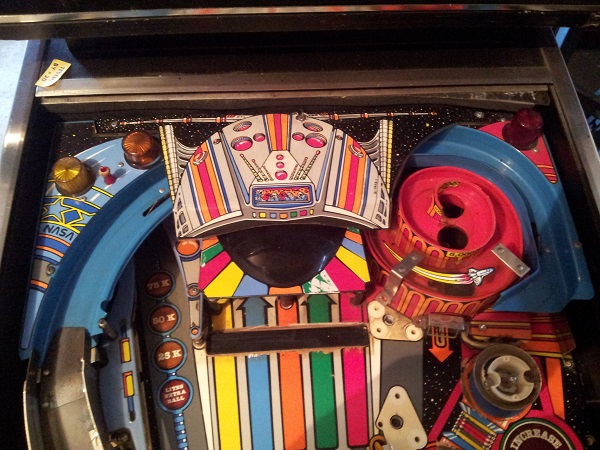
To get access to the vortex ramp though, I need to first remove a few layers of parts. There is a wide thin piece of acrylic that covers the top of the blue ramp which has the head/helmet decal attached. It’s attached by 3 screws along the top. The condition of this decal is OK. It has a small rip at one of the screw holes. I noticed that there was a decal kit sold awhile back which had this in it, but they are no longer available anywhere. I’ve spoken to a friend of mine about possibly reproducing it (along with the NASA decals on the blue ramp) if I decide to replace them.
With the piece removed, I now have access to the blue ramp. Something that grabbed my interest on the ramp was a small white rubber that was screwed into the top of of the ramp. I don’t understand it’s purpose. I had a look through other restore threads and noticed it was present there too, so this isn’t a one off.
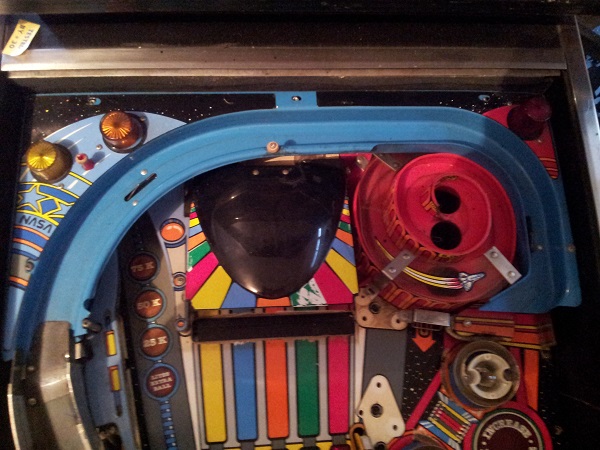
After removing the screws holding the blue ramp in place, I carefully lifted the ramp up. There are two switches attached to the ramp which are connected to the playfield via molex style connectors. These connectors are actually located beneath the playfield, so I had to put the ramp back down and lift the playfield to disconnect them.
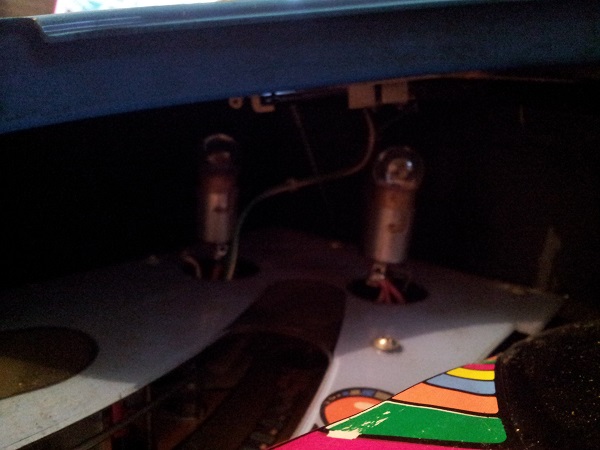
After disconnecting the plugs, I could then remove the ramp. I will put this aside for cleaning and replacing the red and yellow flasher houses with the correct orange ones. Thankfully the ramp is not broken and is in reasonable condition. It should clean up nicely.
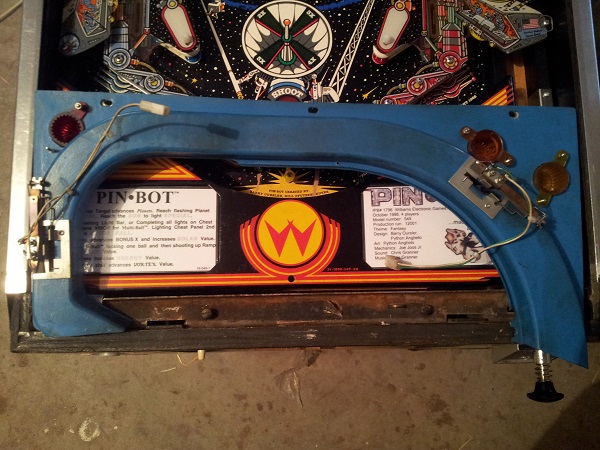
With the ramp removed, I now had access to everything in the upper playfield. I will split this area up into 3 sections. First will be the red vortex ramp, second will be the left side with the ramp and the final section will be the visor and motor controlled targets. (I’ll put up posts in the future for the second and third sections as I get to them).
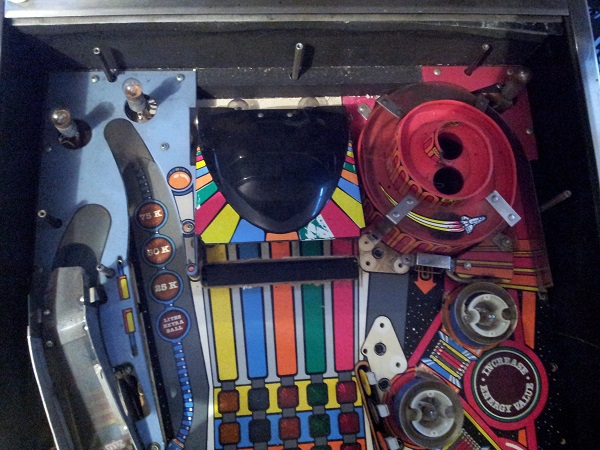
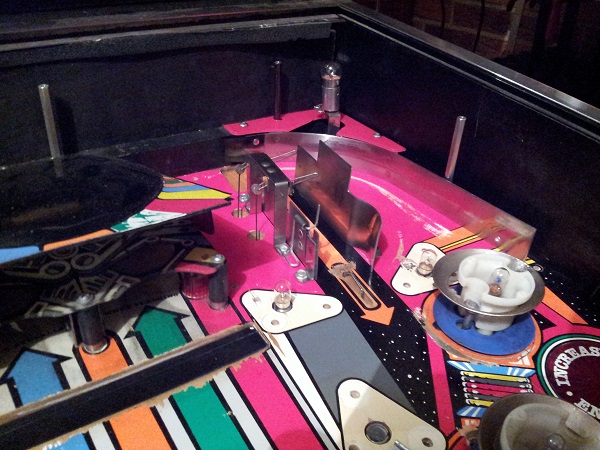
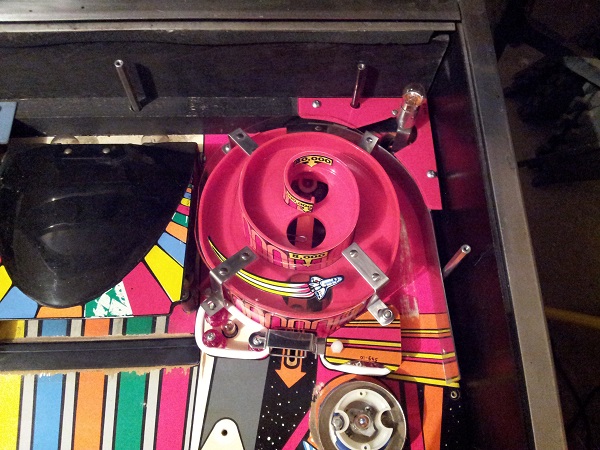
First up though is the vortex ramp. There are two main parts here to remove. First is the clear “cover” that sits over the vortex ramp. The second part is the vortex ramp itself. There were also a few metal ball guides to remove. Once done, the playfield area was ready for cleaning. There was a small bit of mylar that covered the orange arrow leading out of the vortex ramp. As you can see, the lack of mylar in this area has taken its tole on the playfield with some heavy damage on the lead up to the ramp and the exit. I have seen pinbot playfields with a full mylar cover, so was sad to see this one missing and the damage it’s ended up with.
Something interesting here is the small #44/#47 bulb that sits at the top of the playfield. It’s so well hidden by the ramp, plastic and ball guide, I’m not sure it has much effect during play.
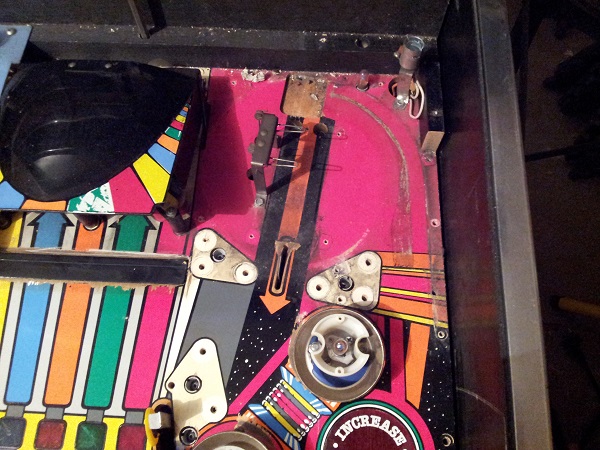
I used the vacuum cleaner to remove the loose crap that had collected in and around the ramp over the years. I then removed the mylar using a hair dryer, followed with eucalyptus oil and magic eraser to remove the left over goo. With that cleaned up, I then gave the area a general clean with isopropyl alcohol and a soft cloth. Lastly, I hit it with novus 2 and then novus 1. The area cleaned up nicely, but will need some playfield touch up. Since I won’t be playing the machine until post playfield swap, I’ll do the touch up post swap also as this area should be covered up with mylar once painted. When I see this sort of thing I’m glad I picked up the new playfield.
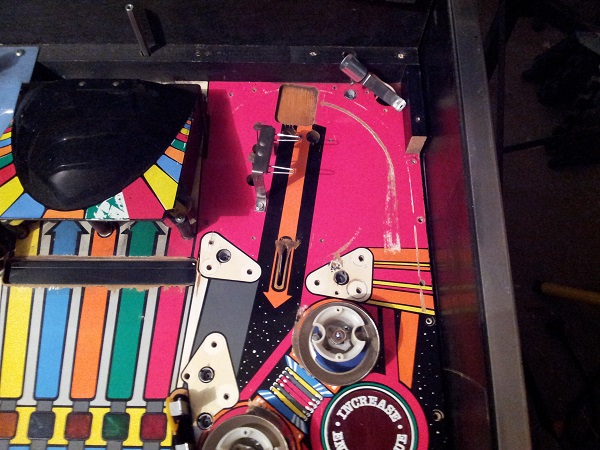
I gave all the metal parts a good clean and polish.
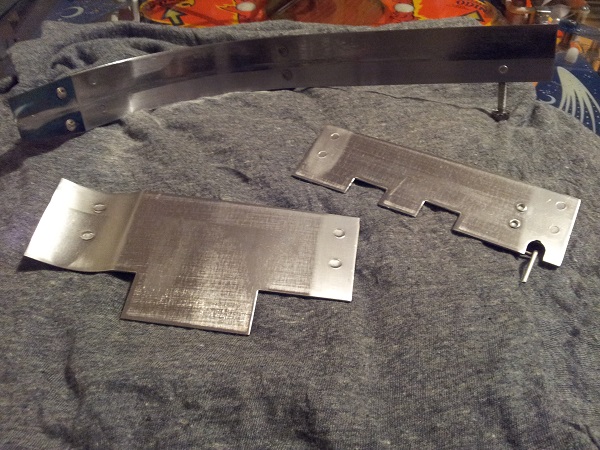
I then began putting the area back together. The red plastic corner at the back was cleaned and installed. The two tall metal stand offs were also cleaned and polished. New bulbs were added and the switch wires were cleaned too.
Next it was time to get the vortex ramp installed. If you remember from an earlier post, I purchased a second hand vortex ramp that was not broken (the one in my machine was broken at the top). This has been cleaned and new decals added and was left sitting on a shelf until I was ready for it. Finally, I can put it into the machine.
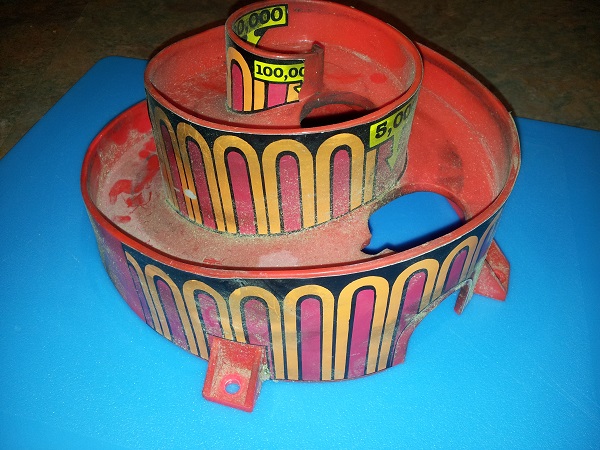
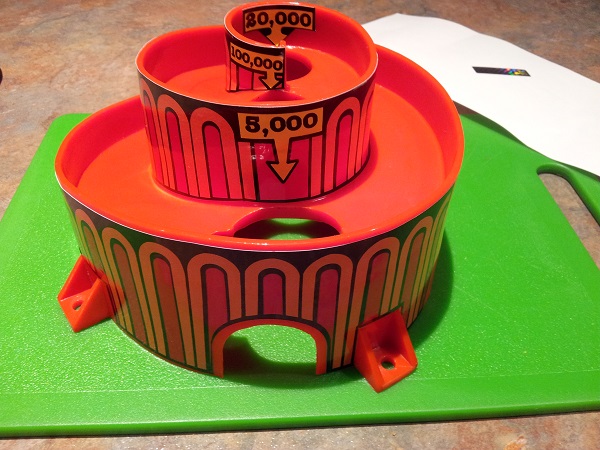
The ramp was installed into the machine along with new star posts and new rubbers. The metal posts and ball gate were also cleaned and polished.
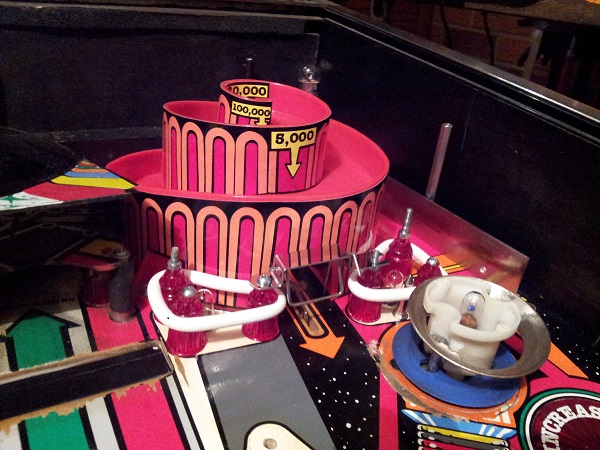
Lastly the clear cover was installed. I had a spare second hand cover and decided it was in better condition than the one that was on my machine (less yellowing of the plastic and fewer markings). The small plastic on the bottom right of the ramp was installed also. There is a long plastic that sits on the left side and extends down to the 5 bank of targets which I won’t install yet.
I’m really happy with how the area looks now. I get excited thinking about the final results post playfield swap as I think the work I’ve done on cleaning and restoring the parts will look even better.
The coin door is just about done and I hope to have that ready on Sunday. The next section from here will be the ramp on the left of the upper playfield, which i hope to look at over the next week or so. After that I have parts coming in so I can rebuild the pop bumpers and finish that area off. Then there is the visor and motor, along with the flipper rebuild. Then I -think- it’s cabinet re stenciling time and new playfield. Lots of exciting things still to come 🙂

Did you find the NASA decal or talk your friend into reproducing it?
No we never got around to it. But you can buy them from Pinball center in Germany though. https://www.pinball.center/de/shop/flipperspezifisch/pin-bot/8952/decal-2-fuer-pin-bot and https://www.pinball.center/de/shop/flipperspezifisch/pin-bot/8953/decal-3-fuer-pin-bot
Keep in mind that items from Pinball Center are sometimes not 100% accurate to the originals in terms of shape and colour. But often it’s better than nothing.