On the home stretch now – the last part of the game under the hood to receive some attention is the saucer kicker. I haven’t really had to worry about this at all since it’s working fine from day one. But like everything else, it can do with a clean and this is a chance to learn some more about it.
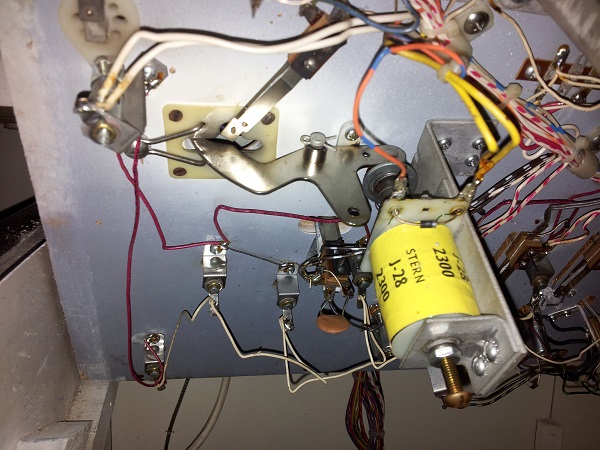
There really isn’t much to this thing. A coil, a coil stop, plunger and metal armature to kick the ball back out and a switch to activate it. First step was to undo the coil from the frame, which allowed me to them remove the whole assembly in one go.
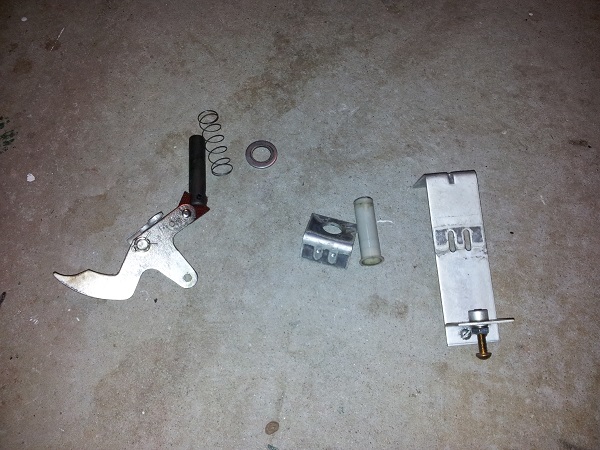
After disassembling the parts I gave them all a good clean and replaced the coil sleeve. The spring was covered in gunk and was a little sticky, so that’s got much more spring in it.
I found the coil stop on this interesting. Just when I thought I had seen everything there was to see in my machine, it gave me something new to look at. This coil stop is different from the others as it has a bolt through it. I’m assuming this is a way to adjust the power at which the kicker acts when kicking the ball back out into play. I hadn’t really considered how (or even if) I could/should change the power at which it comes out at. Right now it throws the ball across to the multiplier drop targets and will drop two at once – which is nice – although maybe a little easy. Nice to know how I can change this now.
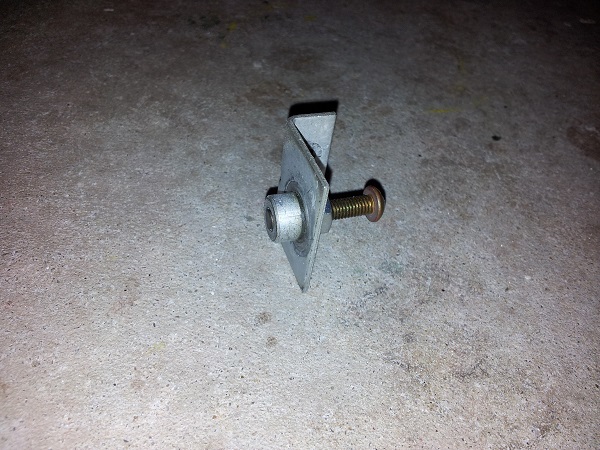
With everything cleaned, it was assembled again and put back into the machine.
Something else I wanted to cover was the sound board and the issues I had with the audio from day one. When I first got the machine the sound was very low. Adjusting the speaker volume fixed that but only for a short time. After about one or two games, the audio started to become inconsistent where sounds would sometimes play and others not. Other times the sounds would not play correctly and sound horrible. There was also a lot of static coming from the speaker. It didn’t seem to be specific to a set of switches or targets. Putting the game into test mode wasn’t much help. The only consistent thing was sound #5 never played in test mode.
I tried some things like reseating the cables on the sound board and main board and even jiggling the cables while activating a switch to see if that had an effect. Nothing was consistent. What did work initially was switching the machine off, setting the dip switch that controls electronic sounds to off, switching the machine on, then off again and toggling the dip switch back to on. I don’t know why that worked – it shouldn’t have – and it made no sense. But at the time I didn’t care – I had sound back.
That lasted for about a week (or slightly more) before it became inconsistent again. Sometimes it would get stuck on a sound and only correct itself when the next sound was played. Other times it would only play sounds occasionally again. I did notice though that often the sound was affected after times I had the playfield up or the backglass off.
Eventually it got to the point where all sound stopped. This lasted for about 3 days before I put everything on hold to investigate it and try to sort it out properly. Thankfully it was only a lack of sound and not game freezing or something more severe.
A mate sent me a link to a VERY useful and interesting article about diagnosing and repairing the SB-100 card which is in my machine (and others). It was written up by Wayne Eggert (and can be found here). First task was to read through this and absorb what I could.
Next step, I removed the SB-100 from the machine to have a closer look at it.
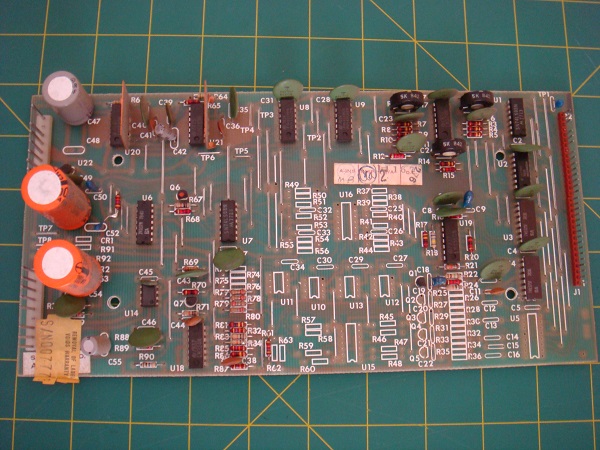
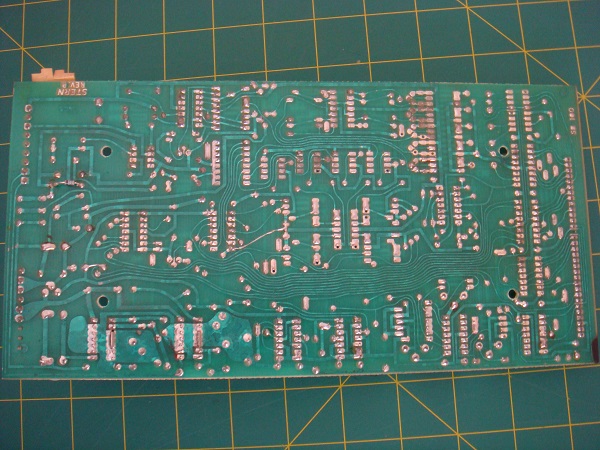
After going over the board (front and back) looking for obvious issues I decided to start small and work my way up. Rather than start replacing parts, I thought I’d get some of the basics sorted first. Because the sound was often affected most after the playfield had been up I wanted to start with the connector pins. In my mind, movement from the cables caused by lifting the playfield or opening the back box could be enough to cause a loose header pin to move, resulting in issues. I reflowed the solder on each of the connector pins and then put the board back into the machine to test it. No change, still no sound.
I pulled the board out again and found a few connections on the back which looked like they could do with some reflowing also. This was done and again the board was put back into the machine to test. No change, still no sound.
On page 4 of the repair guide it details expected voltages across certain test points on the board. I thought this would be the next step. If one or more parts of the board were not getting the correct voltage, that would be a good indication and more isolation of the issue. There were a number of test points, all labeled along the lines of TP1, TP2, TP3 and so on.
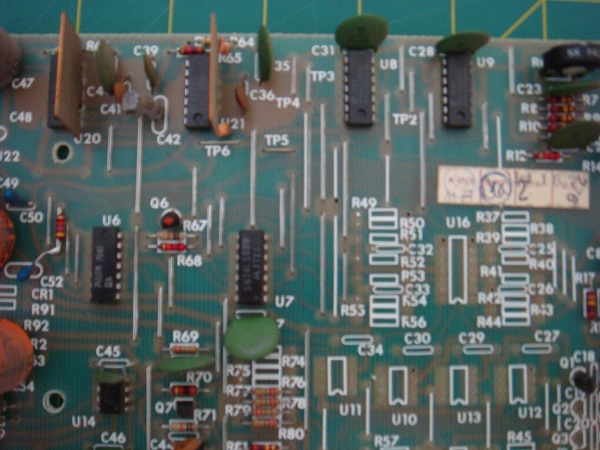
I got my DMM out and tested each of the points covered in the guide. Everything checked out. All voltages were correct across the test points. So what next? I didn’t want to start replacing parts and trying to shot gun it. I put it aside for the night and figured I’d do some more research and reread the guide to see what else I could learn or may have missed.
It then dawned on me one thing I hadn’t checked was the speaker. I did look at it a long time ago when first investigating the sound issue, but only to make sure it was actually soldered on. I went back outside and had a closer look. It looked alright, but decided to desolder it and replace it with a small arcade speaker I had spare that I knew worked. Switched the machine on and SOUND! Glorious SOUND! It had been days – but here it was – playing better and more clearer than ever! So the speaker was at fault! Before I threw it out, I decided to soldier it back on to make sure it was actually the issue. Turned the machine back on again with the original speaker installed and again – SOUND! My head hurt. Was it just luck? Or did resoldering the speaker actually fix the issue!? Was the issue now actually resolved?
That was roughly 5+ weeks ago. The sound had not missed a beat since. I’ve had the playfield up almost every night as I’ve serviced the pop bumpers, slingshots, kickers, drop targets, etc, etc and I’ve also moved the machine around a few times in the garage. It has not had trouble since. So perhaps it was just resoldering the speaker wires. Maybe it was a combination of that and reflowing the connections on the SB-100. I can’t say for sure. But what I can say is the sound now works correctly. The only exception to that is sound #5 in test mode. This still does not play. I’ve hit every target with my finger and each one plays a sound. I have no idea what it’s supposed to sound like or when it’s supposed to play. Given a sound plays at #6, I’m assuming it’s something. But without another Nugent to watch in test mode, I’ll never know.
(now that I’ve posted all that, I expect the sound card to fail in the next 5 minutes :p)
So where to from here? I’d like to replace the glass at some point. The current sheet is scratched like crazy. There are a few bulbs that don’t work properly which I think is an issue with the bulb socket and I’ll look at that soon enough. The playfield could really do with some love – including leveling the inserts. But that’s a huge task and not something I’ll undertake until I have more machines. Right now though I’m on the look out for another pinball machine. It’s true – you can’t stop with one and they do breed. Ideally I’m chasing a project machine from 1979 – 1985. I love the playfields on the machines in this era. I find them much more playable than the newer ones (just my opinion :)). It’s incredibly hard though to find a project cab that isn’t a complete basket case or at a reasonable price (and by reasonable I mean priced fairly factoring in repair costs to get it back into a good state) and not some magical figure slapped on it.
But anyway – working on this machine has been awesome and has sent me in a new direction that I had not expected 😀

I have a Nugent. When I got it all the boards were missing except the soundboard . I now have all the new boards installed and I dont know how to connect the sound board . there are no guides to tell me which cable goes where on the mpu…both connectors have wires in every pin location so it can be a bit confusing without a schematic.
Can you help me figure it out?
Well, I used a Wildfyre schematic and put it all together and No Sound. Reflowed the solder around the pins and That fixed it 🙂 .
How disappointing are these sounds though? I’m trying to figure out a way to reprogram the chip to play different sounds, like those used on Stern Quicksilver.
That would be an interesting project! Although Quicksilver uses the newer SB-300 board (and CPU board) compared with Nugent – so I imagine you would be limited to the capabilities of the SB-100 board. I’m curious about what’s possible though 🙂