Now it’s time to look at the visor. I’ve successfully managed to put this off for awhile, but I’m fast running out of things to do before I get to the restenciling of the cabinet and playfield swap. So I guess now is the time to look at it. At first glance, the only obvious issue is the damage to the colour stripe decal. The motor is operational and will raise or lower the target bank. It seems to get slightly stuck along the way, but does correct itself – so that will be something to look at. There are also two eject holes I will need to rebuild. I’ve decided to split this update into two. The first will focus on the playfield and parts. The second (which I’ll post once complete) will cover the motor and target bank.
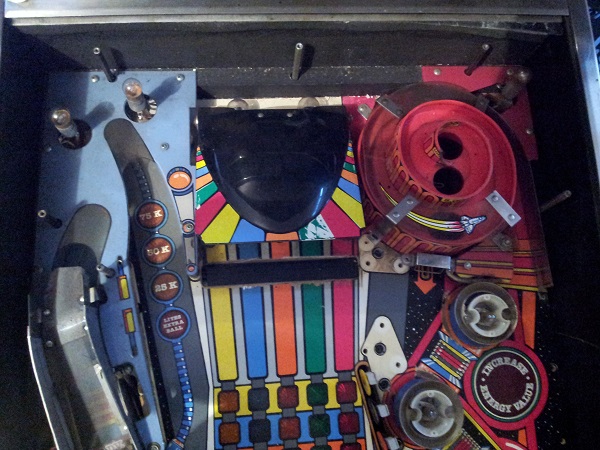
I’ll start topside though. First thing is to remove the visor. There is a small clip on each side to remove and a small metal plate attached to the playfield with 2 screws which then allows the visor to be removed. The face plastic has seen (much) better days. This thing has taken a beating. There are also two over sized globes at the back which look out of place.
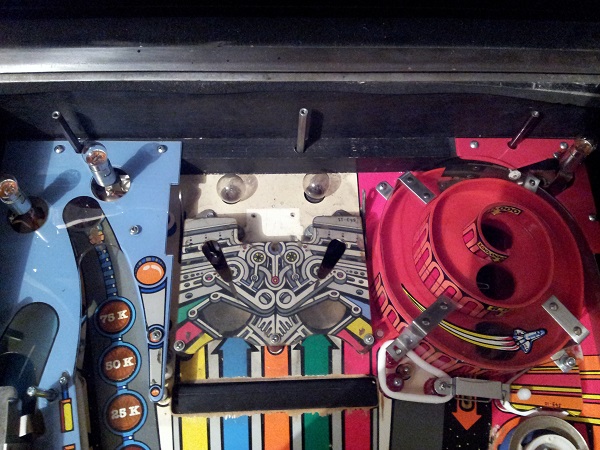
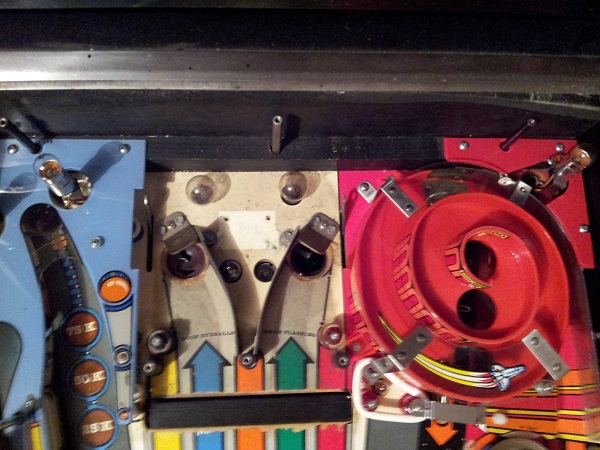
I removed the face plastic so I could get to the playfield and remove the remainder of the parts. A very dirty playfield was exposed and some minor damage due to a crappy ball and no mylar. The eject holes also have some serious wear around the lower edge – more so on the left eject hole.
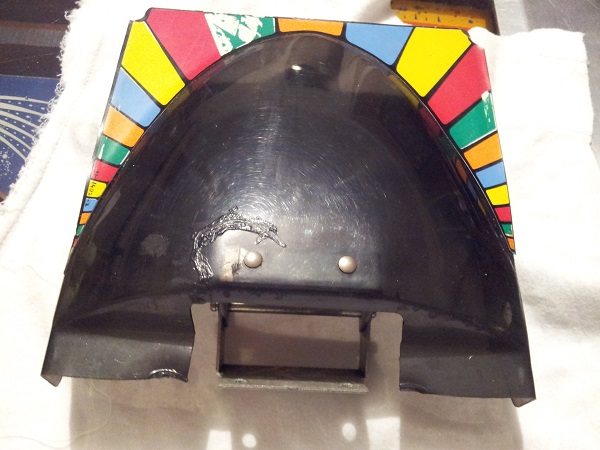
Looking at the visor, there is some damage on the top of it (along with some glue) and also some melted sections acrosss the back (where it was resting on the large globes).
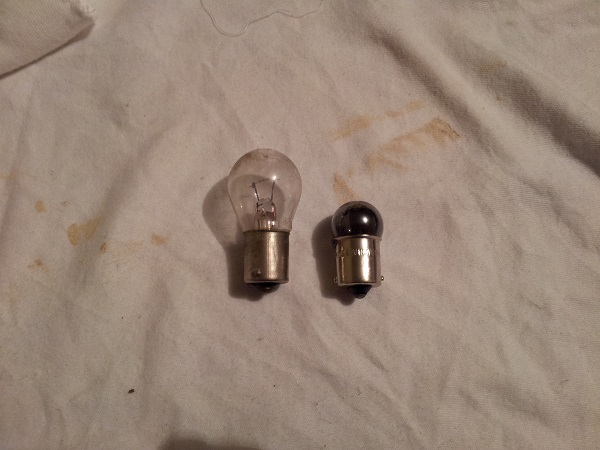
The large globes used at that back shouldn’t be here. You can see the size difference compared with an old #89 (The socket should have #1251’s, but I’ve used an #89 here for comparison which is roughly the same physical size). These will be binned and #1251’s installed. Because they are so large (and get warm), they have melted part of the visor plastic.
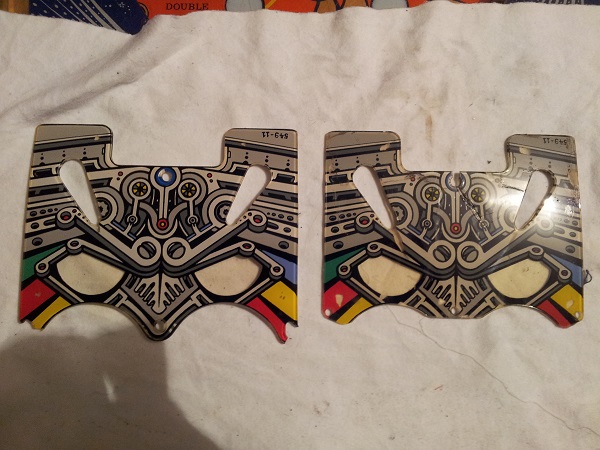
The face plastic certainly has seen better days. Artwork scratched off in various places and some large cracks at the top. The 3 post holes at the front have also broken off and 3 new holes drilled so it could be attached. I guess that at least allowed them to keep it there – still a shame to see so much damage to it.
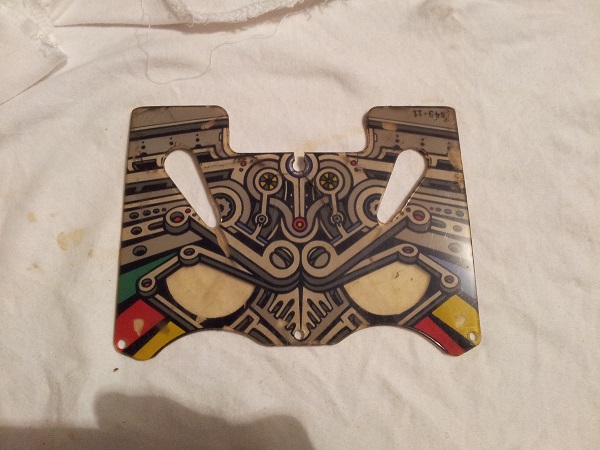
Thankfully, I had a spare. The spare isn’t perfect and has some damage to the left and right post holes. But it’s much better than the current one. It does have a slight bend in the plastic, but this will be flattened out with a quick visit to the oven.
Back to the playfield, all remaining parts were removed so I could clean the playfield up.
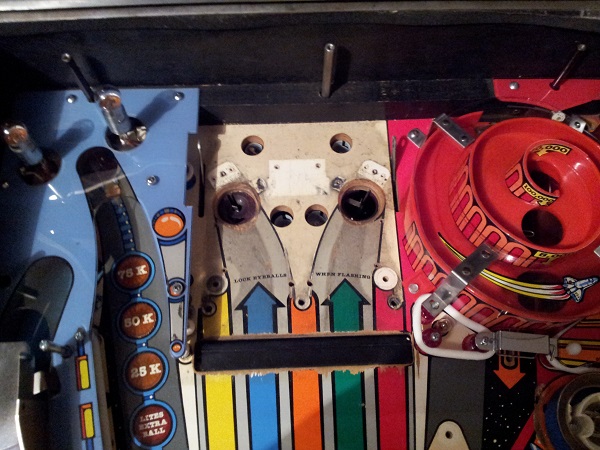
The eject shields will need to be replaced. The one on the right has been completely broken and you can see all the way down in the cabinet. The one of the left is broken too, but not as bad.
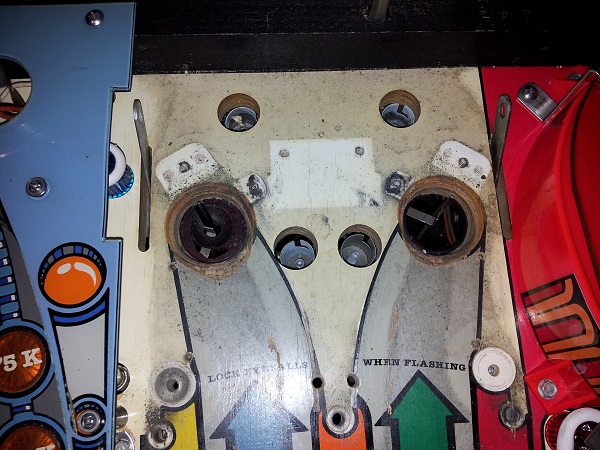
I grabbed my trusty magic eraser along with some isopropyl alcohol and went to town cleaning the playfield in this area. Some minor playfield damage shown and will be touched up post swap. The edges around the holes were lightly sanded, although I may do more to these later on. The playfield isn’t going to see any real playtime so I’m not worried about it now.
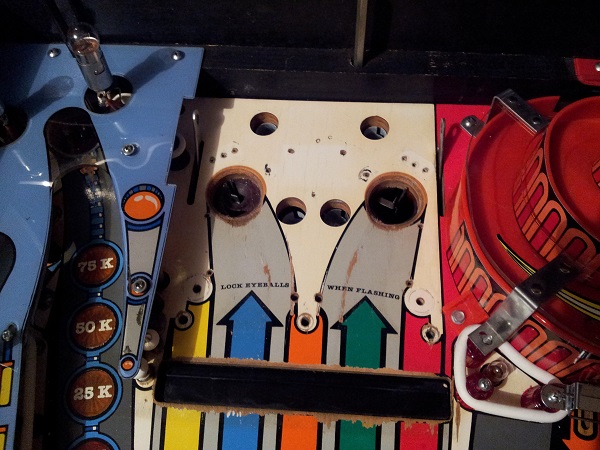
Time to look at the eject holes and rebuild the assemblies that kick the ball out. Below the playfield there is an eject assembly for each hole. Exactly the same as the other eject hole and ball serve assemblies. One slight difference here is an #89 bulb under each.
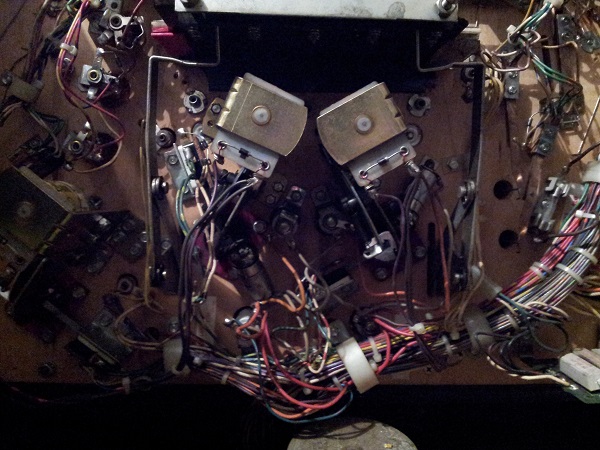
The right eye was the first to be done. All the parts were removed for cleaning. The bulb is completely burnt and the base has been smashed.
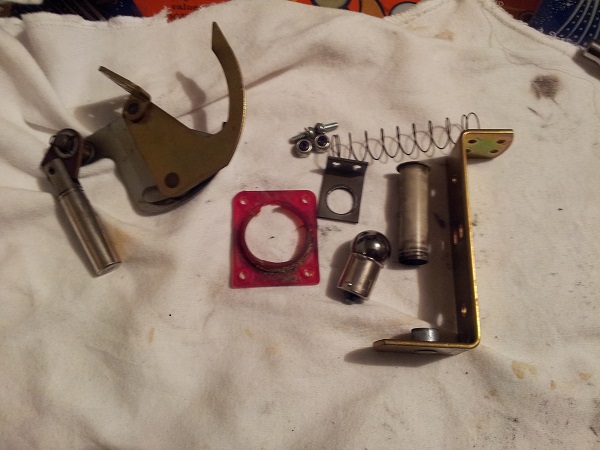
Just like with the other assemblies, the arm was completely dismantled for cleaning.
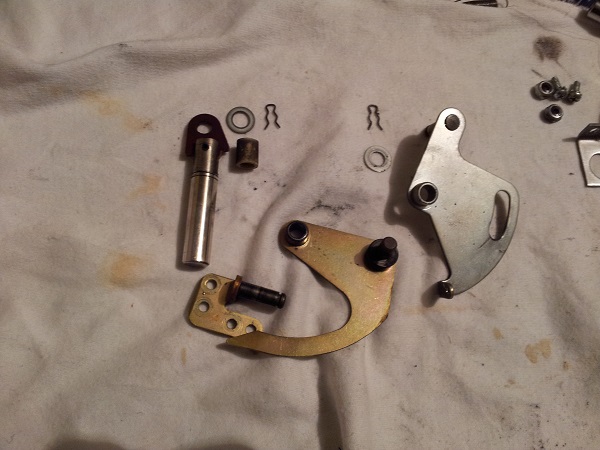
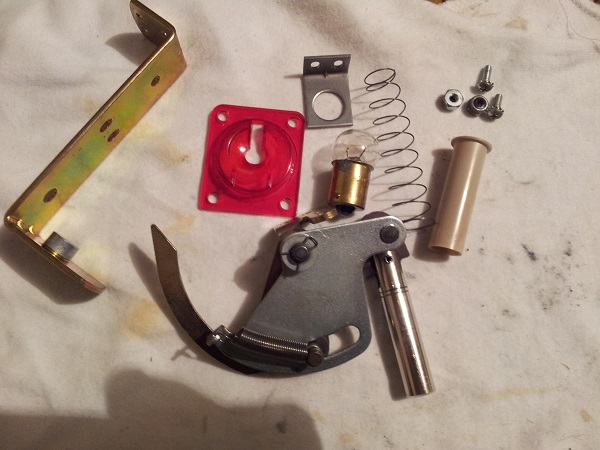
All parts were then cleaned and the arm rebuilt. A new spring, coil sleeve, bulb and shield were added. I could now install everything back into the machine and move onto the left eye.
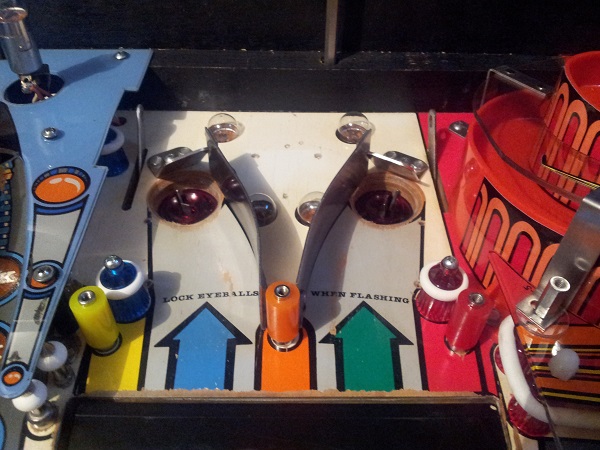
With the two eject assemblies rebuilt, I could then attach the rest of the playfield parts. The metal ball guides were cleaned and polished. New star posts and rubbers added along with colour matched super bands to the posts at the front of the visor.
The visor plastic was then installed. I decided to add lexan washers between the screws and the plastic to assist with holding it in place. Normally I’d place these under the plastic to help prevent damage, but here I need them to hold the plastic down.
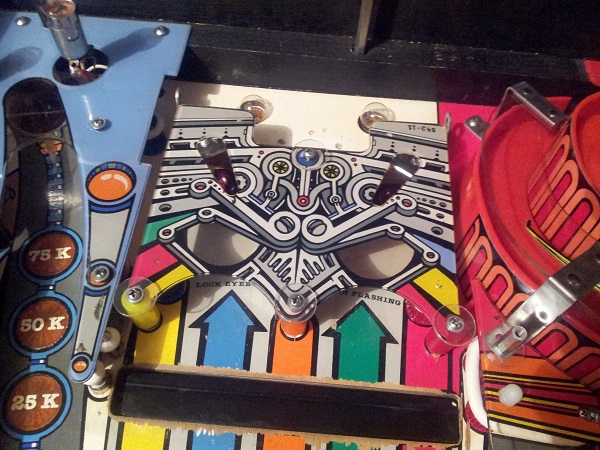
Before I install the plastic and visor again, I want to pull the motor out from below the playfield (along with the arms that attach to the visor) and clean it up. This will be covered in my next update.
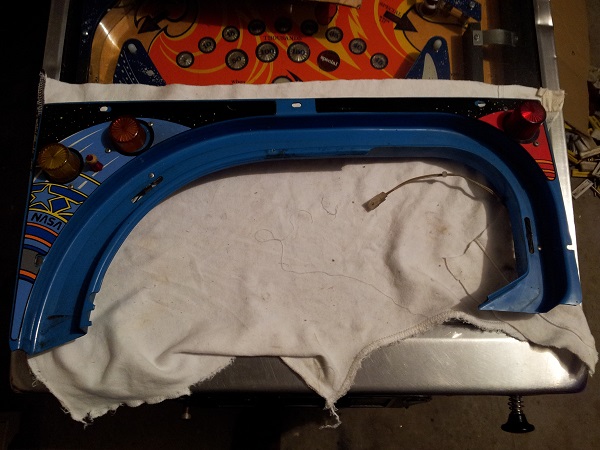
While I’m not yet ready to put the blue ramp back into the machine, I thought I’d give it a clean now and set it aside ready to be installed when the time comes. I have a spare ramp, but this one is in slightly better condition. There is no fade or burn on the blue and no cracks in the plastic. There is a small section broken off one of the post holes, but I think a clean lexan washer here will allow me to attach it firmly. The decals are still in good condition also. Mainly, it’s just dirty.
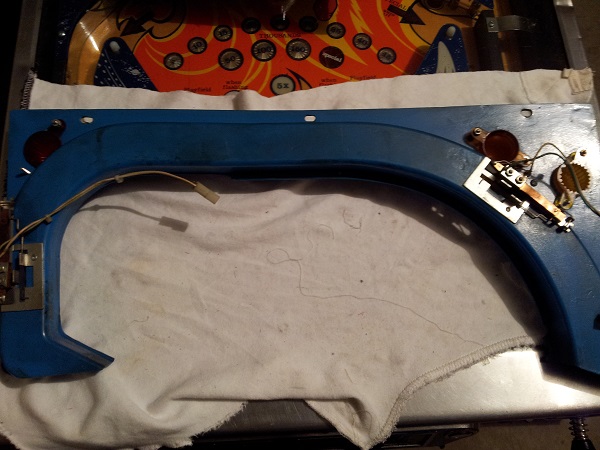
The reverse side is also dirty, but otherwise fine. The wiring needs to be resoldered as all 4 wires are just barely hanging on. I’ll clip these and resolder. There are a few nuts missing from the flasher dome screws which I’ll need to source.
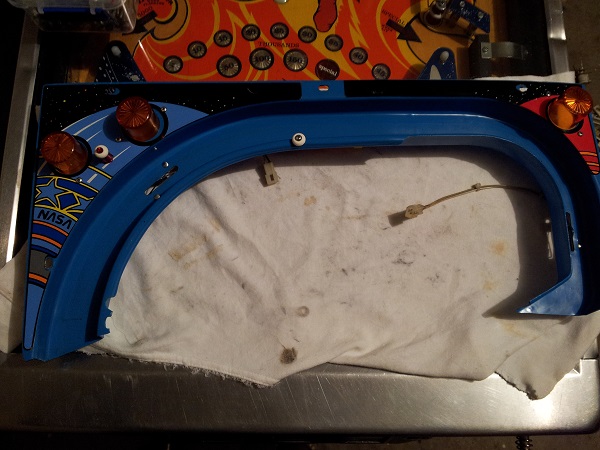
The 3 flasher domes were all removed and cleaned up. The red and yellow domes were replaced with the correct orange domes the machine shipped with. A new red post and rubber was added to the top. Not sure why this is here since the ball can’t actually get up there. There is also a small screw and rubber on the lower edge of the ramp. Again not sure on it’s purpose, but the screw was cleaned up and a new rubber added. Novus 2 worked well here and cleaned up most of the crap that had attached itself to the ramp. Like with the mini playfield though, there is a slight rough area where a bad ball has rubbed across the surface over a period of time.
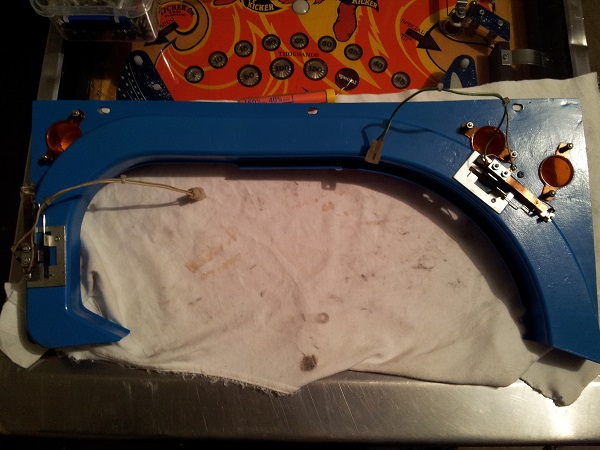
The underside was also cleaned up and the switch wires resoldered. The two metal switches were also polished up before being reinstalled. I’ll now put the blue ramp in a safe place until I’m ready to install it back into the machine.
So that’s it for now. The motor and target bank are currently being looked at and I’ll post up some more progress shortly 🙂
