My second project is now starting to gather some momentum, so I thought it time to post something more than just a few pictures to share my thoughts, plans and progress.
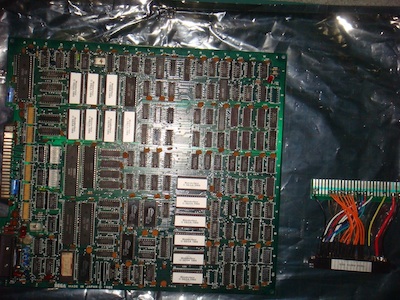
After being very happy with the results on my Galaga cab, it was inevitable I would begin another at some point. Thanks to an Aussie Arcade member it was sooner than expected with his sale (and my purchase) of an original Wonderboy board. This means the cabinet will be fitted with a horizontal screen. Given the number of games I’ve been playing of my 60in1 board on the Galaga cab, I plan to also install one of those 19 in 1 horizontal game boards also. The thought of twin sticks for Robotron is very appealing 🙂
My first thoughts were to research a cab shape I liked. I couldn’t find anything for Wonderboy that impressed me. I actually can’t recall the cab shape I used to play on all those years ago. I love my Galaga cab – I love the Galaxian cab – and I can’t help but love a good PacMan cab. The colour and artwork is top notch – and a hot looking cab means it will be allowed to live in the home :). Given my experience with putting together a cab with that shape, I decided that was the direction to take. There will be some modifications though which will mean it’s not a proper PacMan cab:
– Horizontal screen
– Screen artwork (will be custom pac man themed)
– Control panel (again pac man themed, not authentic)
It’s also an opportunity to do things a little different this time by addressing some of the issues I encountered last time.
After that was decided, I went through my Galaga plans, and mapped out a purchase list along with a plan. Given I’m on limited funds at the moment, the plan will help get the parts purchased in a good order to keep me working on it and not held up.
First purchase was the wonderboy board:

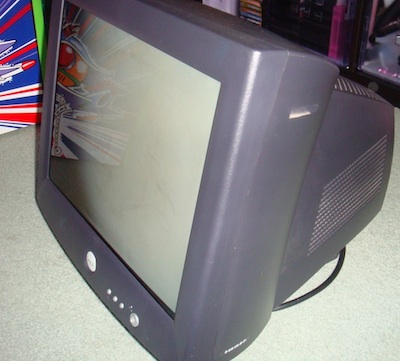
Second on my list was to get a monitor. I used a 21″ in the Galaga cab, and found that a pain to replaced – simply because 21″ monitors are much harder to come by. I decided this time to go with a 19″. Ebay was my source again, and picked this one up for $5. It’s 5 times more than I was expecting to pay, but hey – getting it in black means I don’t have to spray or contact the border.

My purchase list – broken up into batches of around $100 each. There is a little room for movement in some batches, and I expect them to shuffle around a little if some things are not available. But it gives me something to work with and a good reference point. The points bolded in dark green as items I have purchased. Oh and yes, in2amusements was spelt wrong in my document – sorry guys.

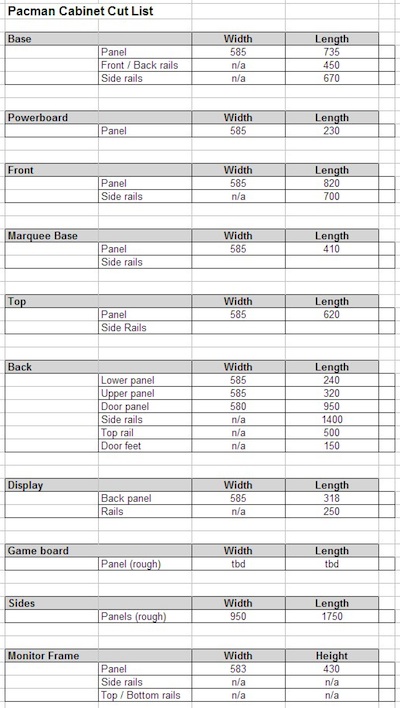
Using my Galaga cab as reference, I next put together an initial cut list to get the cab built. There will be more things needed for some of the internals and control panel mounting. But otherwise, most of its has been covered.

A trip to Bunnings last week secured my wood. I’m again going with 18mm thick MDF. It was great on the last cab, and was easy to get t molding for. Priced at $33 a sheet, I was happy with that. I also had a number of off cuts from the last project left over, which can be see on the right.

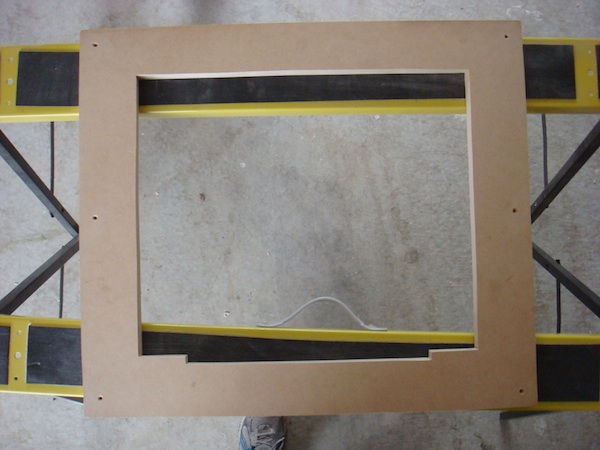
The biggest issue I had with the Galaga cab was the monitor. It was mounted on two beams which ran horizontal inside the cab. Sitting most monitors on their side is a pain due to the odd shape they can have. The approach I took previously came undone when it was found the monitor I was using was defective (this was right at the end with everything complete). Replacing the monitor at that stage was a real pain. To get around that this time, I’ve decided to create a panel for the monitor to sit “in”, which will then be screwed into rails on the side of the cabinet. This will make installing, height adjusting and replacement so much easier. The other option I considered was removing the plastic casing of the monitor all together and finding a way to bolt it on the a frame in the cab. But I’m not comfortable with naked monitors / screens at this point, so happy to play it safe and use another method.
I first found some cardboard I could use as a stencil. Did some measuring of the monitor and cut out a rough shape in the card board. I adjusted the cut a few times until it was positioned where I felt was best behind the monitor.

With that done, I was able to use one of the offcuts from the last project to build this panel. Cutting it to a nice shape and allowing around 70mm clear on all sides, I then tranfered the stencil onto the panel and jigsawed out the hole where the monitor will sit. With a little bit of sanding, it came up great. So this will sit on rails attached to the side of the cab, with the monitor sitting inside the gap. At some point it will be primed and painted black.

Next up I will be cutting the MDF sheets to the cut list I’ve prepared. I’m hoping this will happen before next weekend.
