
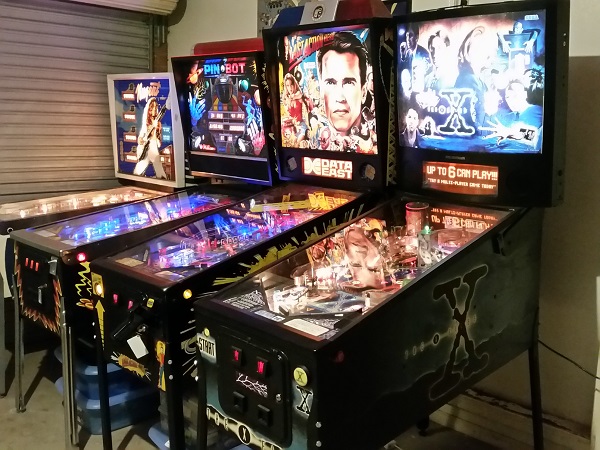
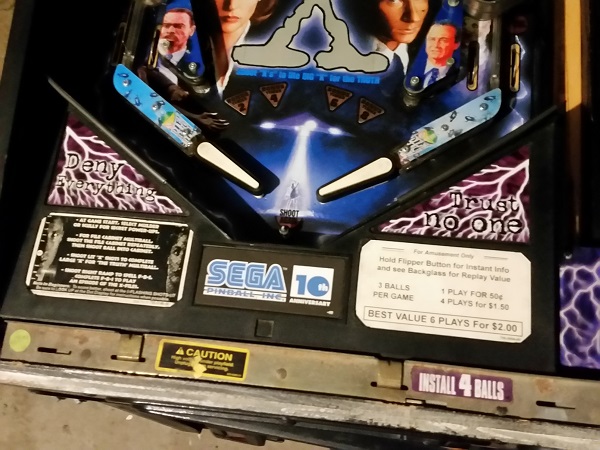
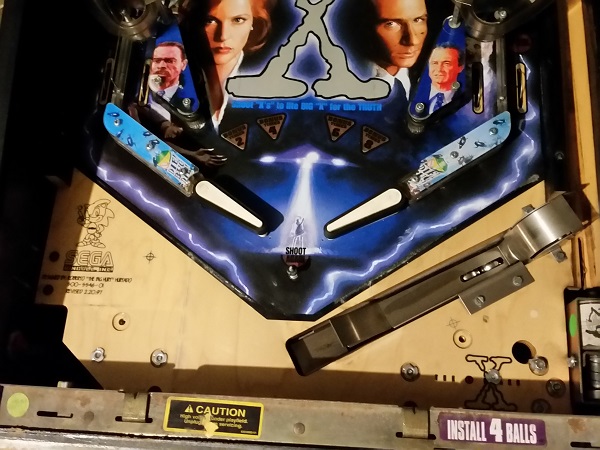
Recently, a new machine entered my line up – X-Files. Release by SEGA in 1997 with 1500 made, it’s the most modern machine to enter my pinball fleet. As you know by now, I’m not one to just get a machine in and play it. There’s always work to be done cleaning, fixing and tuning my machines. This one is no different and I’ll be working my way through the machine in typical fashion for a full service.
On arrival, I found an immediate functional issue with the machine. One of the pop bumpers was broken. The metal ring was sitting against the skirt and not upright like it should be.
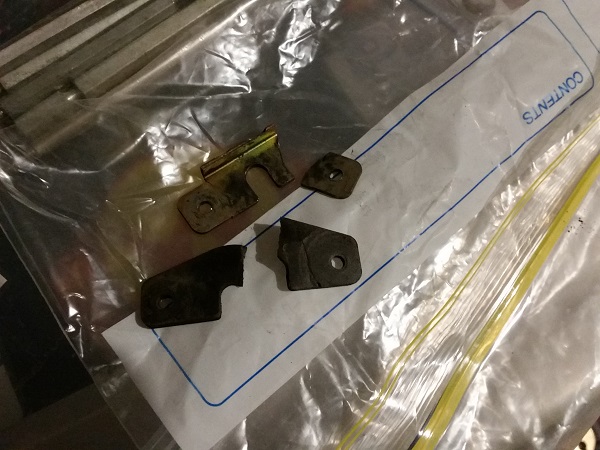
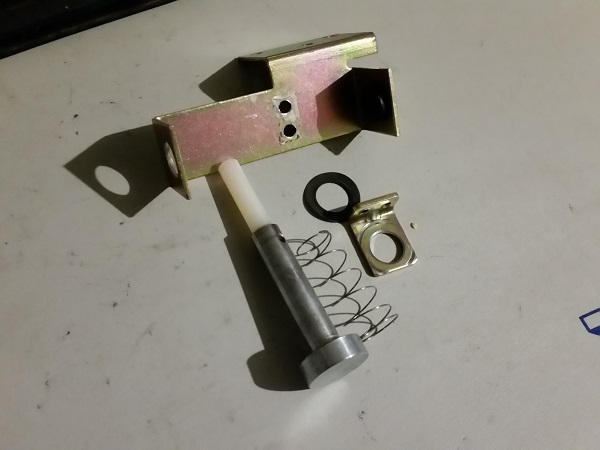
I pulled the glass off and could move the ring up and down freely with my fingers. It would not remain upright. With the playfield lifted up, I could easily see the issue. Both the fiber and metal yokes on the pop bumper assembly were broken in two and the spring had fallen out.
Luckily, I had some spare yokes on hand that could be used. The pop bumper assembly was removed from the playfield and the broken yokes replaced. I grabbed a fresh coil sleeve for it too. I will be returning the pop bumpers at a later date for a proper service, but for now I just want it in a working state. The yokes I installed for now are second hand ones from other machines – and I had kept them for times like this. When I rebuild pop bumpers I replace the yokes with new ones. They get such a solid work out each game, they are worth replacing outright. So i’ll be ordering a few when the time comes.
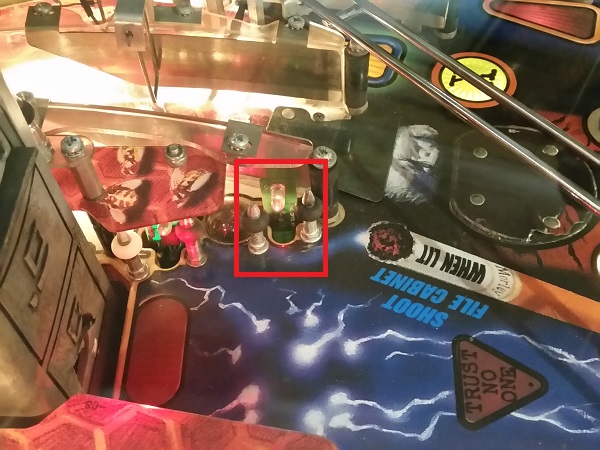
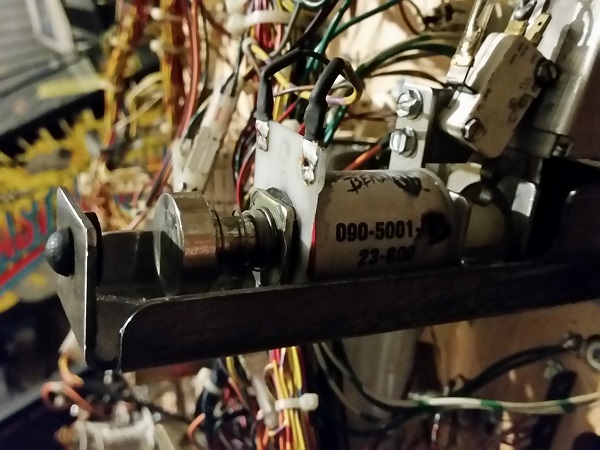
With the pop bumper fixed, I wanted to find out what other functional issues existed. After running the diagnostic mode for coils and switches, some additional problems could be seen. The first of which was the magnet, which did not work. Below the playfield is a single coil driven magnet. This lives just before the filing cabinet. Firing the magnet coil in test mode showed it to not be working as it had no effect on a ball rolling around the area. Under the playfield, I could see the fuse was not in a good way.
The fuse was replaced and the magnet tested again. Still nothing. Off to the manual. Turns out there is a second fuse which lives on the power board in the headbox. A visual inspection of the fuse told me it too was dead. But to be sure, I switched the machine off and removed it for testing. It was confirmed dead and so replaced with a new one. I switched the machine back on again and fired the magnet coil – this time it was successful.
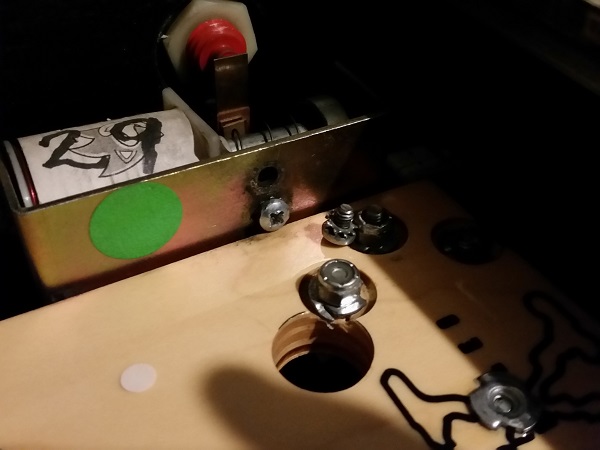
While running the coil tests, 4 of the flasher lamps failed. The first lives under the trap door. Someone had decided to install a #555 bulb instead of the required #906. This was replaced. One of the other #89’s that was failing could easily be reached and was replaced also. In coil test mode again, those two now worked. So I suspect the other 2 failing flashers are just dead #89’s needing to be swapped. They are not easy to get to, so will do them when I perform a proper clean of the playfield.
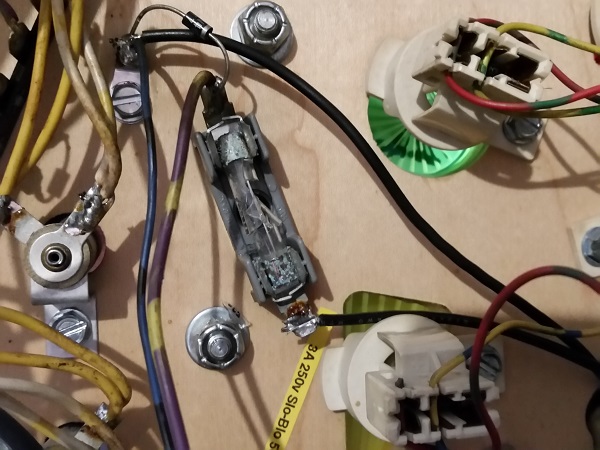
Happy with that I was seeing in the coal test mode, I jumped across to the switch test mode. I ran through the matrix of switches and found they registered correctly except for one – the opto switch that controls the magnet. This switch was constantly flagged as being on. I first attempted to adjust the alignment of the transmitter and receiver, without any success. Even perfectly aligned, the switch was still considered activated. There are two opto switches in this area and a visual comparison showed the faulty one was not as bright as the working one (the photo is deceptive as it looks like the LED is not on at all, while it actually is – it’s just not captured well).
Under the playfield, the receiver board has a LED at the base, which turns on when the switch is activated. This LED remains on at all times, hence what I was seeing in the switch test. You can buy replacement transmitter boards, but it seemed like overkill in this instance. A new LED was purchased and installed instead. Visually the difference was obvious.
Back in switch test mode, the switch was now working correctly, solving another issue.
The switch tests now all passed, along with the coils (minus a few flashers, which I suspect are just bulbs needing to be replaced). With the very obvious issues out of the way and game diagnostics looking OK it was time to actually play the game. This should hopefully show up any game play issues currently lurking there. Indeed, a few issues did show up which I would like to address before cleaning the machine.
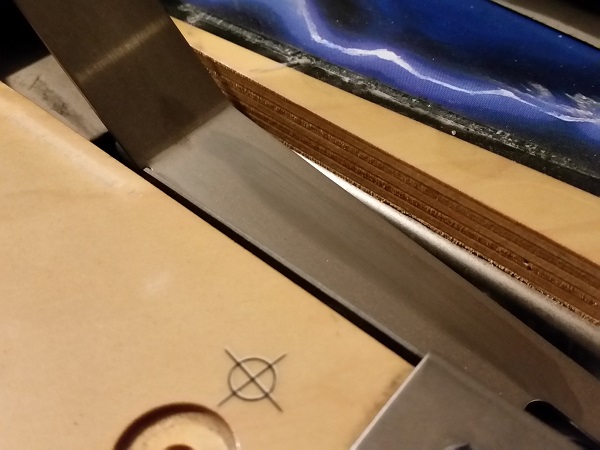
After a few games I noticed that the left orbit switch would get stuck once the ball rolled over it. Eventually, it would come free and return to its normal resting position. But something was preventing it from moving up and down freely. With the playfield up, I could see the switch wire stuck. It was being held there by the edge of the hole in the playfield.
The switch arm looked fine and not bent. The two screws attaching the switch assembly to the playfield were loosened up and the switch shifted down slightly. This now allowed the switch arm to move freely when the ball rolled over it and return to it’s resting position. No more stuck switch when hitting the orbit – it was good to go again.
While looking at this switch, I noticed that one of the wires leading to the microswitch had previously been cut and twisted back together again and the bare wire left exposed.
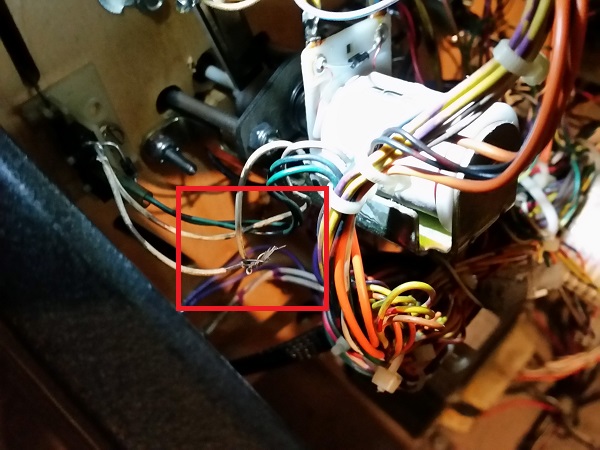
This was fixed up before moving on.
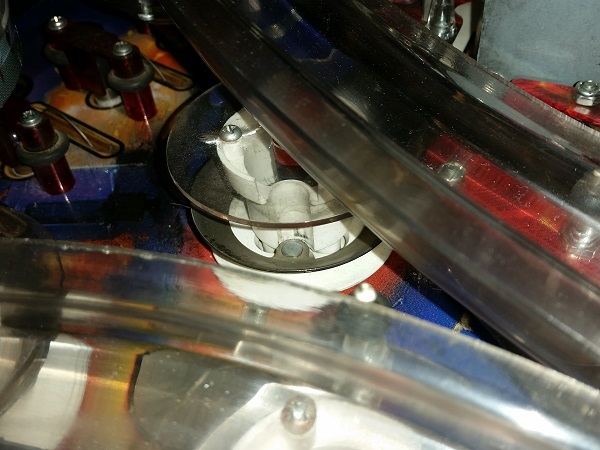
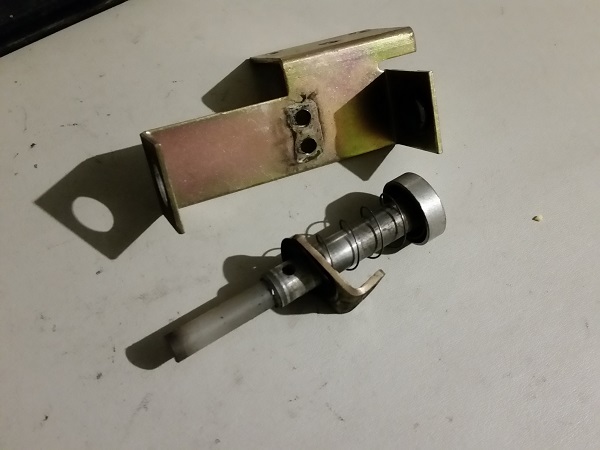
The next thing to look at is the VUK (vertical up kicker). There are a few possible ways for the ball to reach this (Shooter lane, Filing cabinet and Trap door). All three lead here at various points of the game and the ball is then kicked up to return it to play. As you can imagine, this assembly gets a real workout. The are a few issues around this, but I suspect they are all related. Looking under the playfield at the assembly, I manually tried to move the plunger. It was incredibly sticky. As you can see, it can’t always return to it’s normal resting position. The flow on effect from this is weak kicking of the ball and the switch (used by the game to detect there is a ball sitting there) would not actuate.
The whole assembly was removed from the machine, pulled to pieces and cleaned. There was a lot of crap built up around the coil sleeve and plunger. Looks much better now.
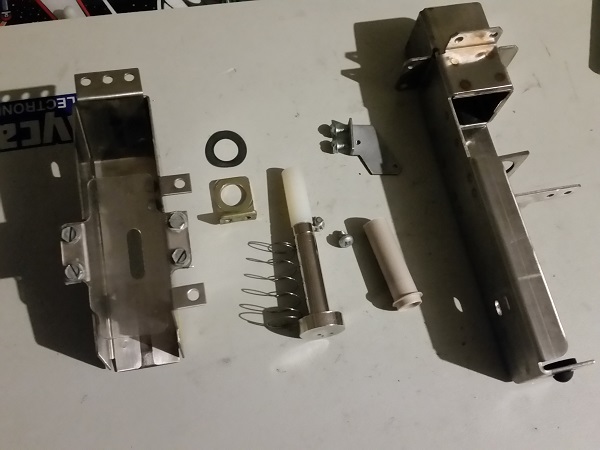
The VUK assembly was installed back into the machine. The plunger now had unrestricted movement and could freely pass through the coil sleeve. This was a big improvement.
One other intermittent issue was the ball launcher. It strikes the ball inconsistently. Since it’s located under the apron, I may as well clean the apron and ball trough at the same time. On the apron, the decals have retained their colour nicely. You can buy reproductions of these, but it’s not required here. Those old crappy apron cards will be replaced with something that looks much better however.
With the apron off, I could see the area below was relatively clean. I like the use of Sonic and X Files logo printed on to the lower section of the playfield. It’s interesting to see SEGA put Sonic on the playfield and also use their Saturn console logo on the flipper bats.
Although the surface looked clean, there was a small layer of dust covering it. Wiping my finger along the top of the ball trough revealed a cleaner surface below. This will be quite easy to clean and well worth doing since I had the apron off.
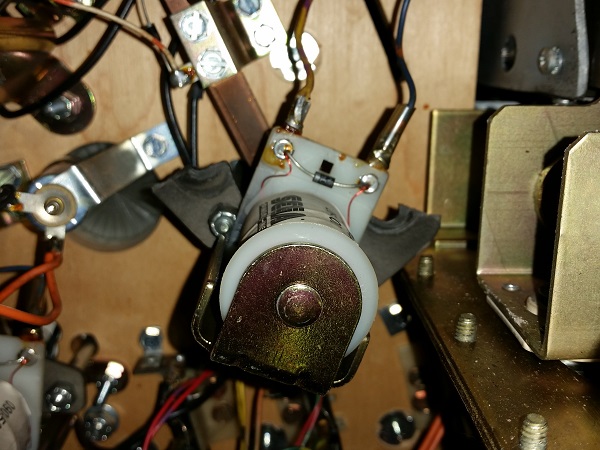
As mentioned, while playing I had noticed something up with the ball launcher. It appeared to be loose and would causes some odd movement / striking of the ball when activated. With the apron off I could now clearly see the shooter assembly and one of the screws that hold the coil retainer in place had come out. The other screw was also loose, although still holding on. The coil sleeve was filthy too.
Before tightening it all up I wanted to clean the assembly, so the launcher was removed.
Each part of the launcher assembly was cleaned and set aside to be put back together again.
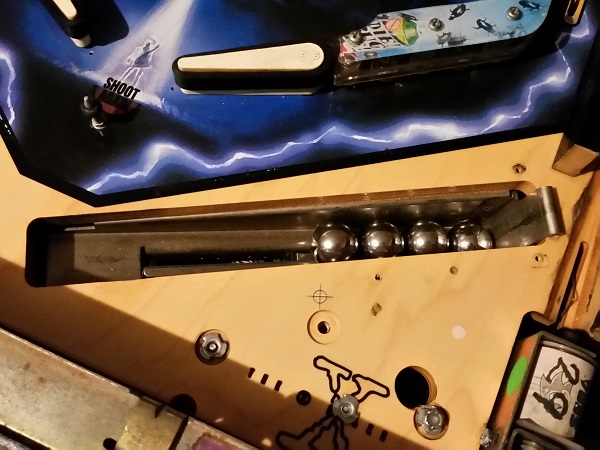
The old coil sleeve was long overdue to be replaced, so a new sleeve was installed back into the coil and the assembly rebuilt. No more wobbly coil and plunger. Much better. Now to look at the ball trough. X-Files has a 4 ball multiball mode and in the trough, are 3 microswitches to detect the presence of the balls. The fourth is an opto switch.
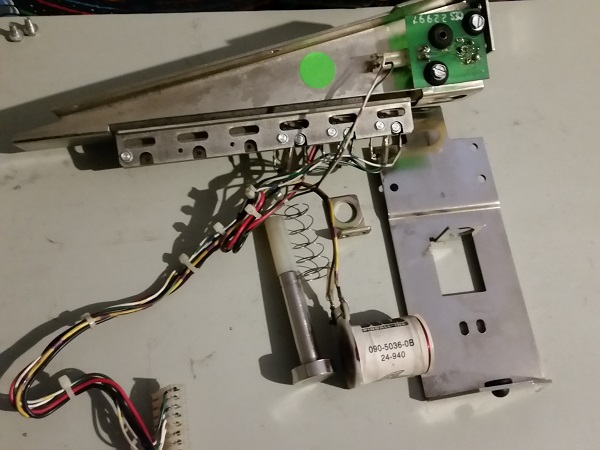
The ball trough cover has been removed, so was cleaned up and set aside ready to go back on.

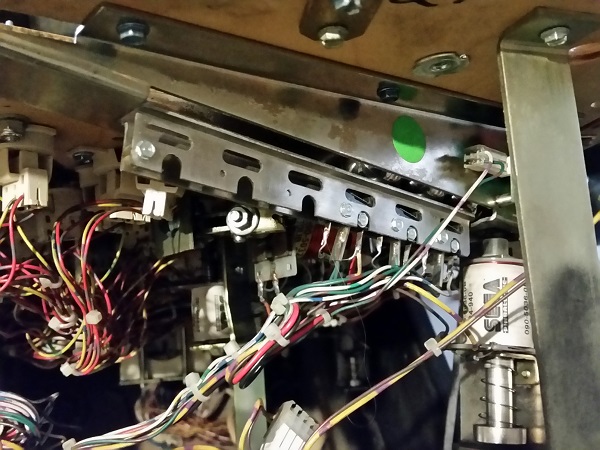
The ball trough was removed from under the playfield for cleaning. The wires run to an IDC plug to allow for easy removal. The coil frame was removed for cleaning too. All components were cleaned up and the assembly was ready to go back onto the machine.
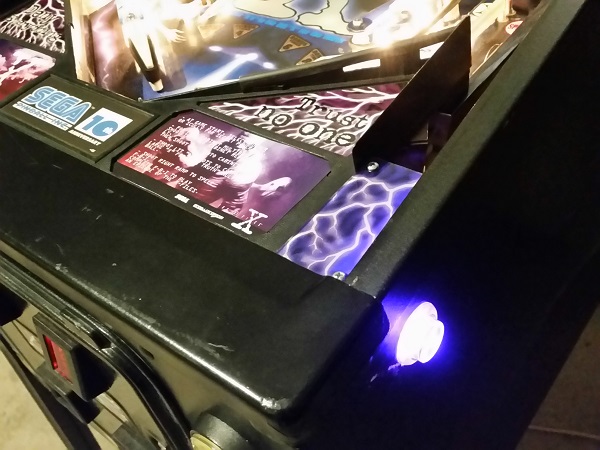
The plastic apron was cleaned up and new apron cards installed. I printed off a custom set from www.pinballcards.com. These nicely compliment the apron and finish it off. I’m not a huge fan of the plastic style aprons Data East and Sega used as I think metal ones look much nicer. But they serve their purpose – and no rust / artwork scratching is a plus. The small plastic over the shooter lane was removed, cleaned and polished. The ball trough was installed back into the machine and the apron over it to complete this area. The erratic ball launcher issue was now resolved and the apron looking much nicer.
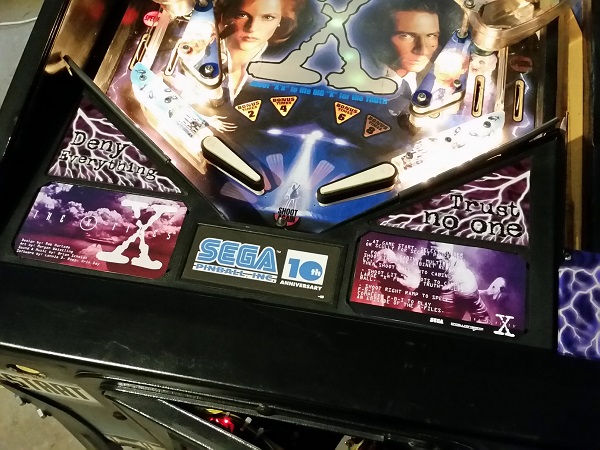
A small mod I’ve done recently on some of my other machines (Pinbot & LAH) is back lit flipper buttons. For those machines I colour matched the LED to a transparent flipper button. Here though I couldn’t find transparent purple buttons, so have had to go with clear buttons. I was tempted to use blue to match the faded side art, but the purple suits the apron decals and cards. I’m going to run with it for awhile – it’s easy (and cheap) enough to change to blue if I decide to change. One cool thing about the purple on the right had side button is the LED is located just below a small purple plastic piece sitting over the shooter lane – the button LED gives off enough glow to subtly light this up. With the button LEDs hooked up to the coin door lights, they flash on and off with the GI at certain points of the game, which has a nice effect too.
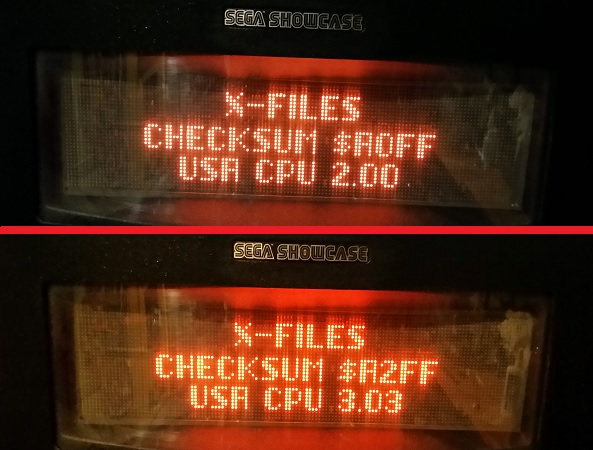
When the game boots up, it shows the current display and CPU ROM versions. The machine is running v3.00 for the display and v2.00 for the CPU. A quick check on IPDB showed the most recent ROM for the CPU was out of date, with the latest at v3.03. I ordered a new CPU ROM and installed to bring the game up to date.
That’s enough for my first update on the machine. A lot of progress has been made already, with very little spent in terms of parts – just time. Some very obvious, feature inhibiting issues were resolved, along with a few small intermittent ones. Some assemblies got a good clean and a bit of presentation work was done on the machine too. I plan to look at the other assemblies for a proper service, along with stripping the playfield for a decent clean. Next up I’ll be looking at the two sling shot assemblies, along with the trap door and orbit diverter assemblies. I will also look to clean up the under ramp playfield (that leads tot he VUK). The right return lane plastic is broken on my machine, but I managed to find a place that sells them new (with a set of the sling shot plastics). These have been ordered and will arrive soon. More to come soon 🙂
This was extremely informative thank you! I recently purchased this machine and I know I will have to learn quite a bit about it.
I too just picked up an X Files and the pictures and info you posted are very helpful… I’ll start the cleanup process soon and will reference your information while doing so. Thanks
Hi guys I’m new to pinball. I picked up my X- files today and found I had a few LED issues. One was the bumper Led that is tightly under the ramp? How do I replace it?
If you’re referring to the LED / Lamp that sits inside one of the 3 pop bumpers, the only way to get access to it is to remove the ramp. The socket sits inside the pop bumper body and can’t be accessed from under the playfield. It’s always worth checking under the playfield first to make sure the lamp wiring is actually connected and hasn’t come loose. That would be a much quicker and simpler fix. Other lamps for the inserts and G.I are easier to replace as you can access them from under the playfield without too much trouble.
Hello…Had my x files machine for about a year with no problems.One day i turned it on and seemed ok….until i hit start.When it came up to choose mulder or scully….it was like it was already in play mode like i was hitting file cabinet.(stuck?)Then would go into multiball mode.It would do this after every ball once it added things up from previous ball.Like something is stuck open or on?
Any leads or what to check for would be great….Thanks
Open the coin door, and press the button to enter the diagnostics menu. Check the state of the switches against the manual switch matrix. Sounds to me like one of the opto switches in front of the filing cabinet is failing. There are two optos that sit in front of the filing cabinet, one is to activate the magnet and the other registers the hit on the filing cabinet. If that opto fails (and is now open all the time), it would act like a ball is constantly hitting the filing cabinet.
The opto might be OK and only need to be realigned (there is a component on each side of the opening – one is the sender and the other is the receiver). These need to be lined up. If they are aligned, you can try cleaning them. If that fails, you will most likely need to replace the LED like I did in the above post.